Latest Comments

Harma Blog Break .
29. April 2024
Isn't the selvedge something to worry about in a later stage? It seems to me a lot more important th...
Beatrix Experiment!
23. April 2024
The video doesn´t work (at least for me). If I click on "activate" or the play-button it just disapp...
Katrin Spinning Speed Ponderings, Part I.
15. April 2024
As far as I know, some fabrics do get washed before they are sold, and some might not be. But I can'...
Kareina Spinning Speed Ponderings, Part I.
15. April 2024
I have seen you say few times that "no textile ever is finished before it's been wet and dried again...
Katrin How on earth did they do it?
27. März 2024
Ah, that's good to know! I might have a look around just out of curiosity. I've since learned that w...
MäRZ
16
2

Weird and awesome textile stuff!

During the past two days,  I stumbled across some very awesome and teeny-tiny stitchery. Check out these websites showing miniature stitchery of landscapes on background skies painted with textile colouring and embroidery for dollhouses in scale 1:12 (scroll down a bit, to "Beispiele"). While personally I'm not really a fan of petit point (contintental tent stitch on the Wikipedia page), because there's more embroidery thread in the back of the work than in the front, and I am much too cheap for that, those examples on the website are incredibly impressive and almost make me want to try it.

Just almost, don't you worry. I'll stick with my nice, large stitches over two threads on 20-threads-per-cm linen for a good while longer.

And finally a really nice video (h/t to Arachne, who facebooked this) with indubitable proof that textile works, creativity and innovation are never very far from each other:

Datenschutzhinweis

Diese Webseite verwendet YouTube Videos. Um hier das Video zu sehen, stimmen Sie bitte zu, dass diese vom YouTube-Server geladen wird. Ggf. werden hierbei auch personenbezogene Daten an YouTube übermittelt. Weitere Informationen finden sie HIER
0
MäRZ
14
0

Inky Goodness!

This was a nice and busy weekend - I finished my test-stitching, both in regard of the stitches and the ground fabrics that needed to be tried out.

And another thing is also done: 


The ink has arrived, and I already bottled it off into nice little flasks that are quite close to some that can be seen on medieval illustrations of scribes.

And the ink... ah, the ink. It's wonderfully black, just the right viscosity to work really well for nice, thin lines on the linen test cloth, and it does what it's supposed to do: Dry up and then stay where it has been put, no bleeding, no creeping, no nothing. So after being annoyed for a bit more than a year by not having proper authentic medieval ink for proper authentic pattern transfers, I finally have ink to do it the medieval way - and ink to sell for all of you who want some, too. Hooray!
0
MäRZ
11
0

Counted Work - Brick Stitch

I've finished one pattern bit in the counted work technique now, using the "versetzter gerader Gobelinstich", as they call it in the book. It's really easy - you go over the linen for four threads, then one to the side and two down. And that's it. Repeat ad nauseam or until you can't see anything anymore because your eyes water... because, as I said before (and I'll say it again): medieval embroidery is tiny. T-i-n-y. Minute. Exiguous. Puny little stitches. Exquisitely small. Very diminutive stitch-wise. Tiny. And very, very small on the stitch part - though they did work really large pieces in these techniques. Those Freaks. I'm sure they all did it just to make me sweat over doing it too.
 
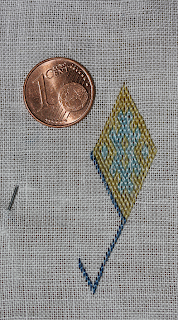
So here's what the test scrap now looks like from the front, medieval brick stitch worked to scale, on the appropriate linen fabric, with the appropriate plant-dyed untwisted silk yarn:


Yes. Did I mention it's tiny? I'm seriously short-sighted, and I work it without my glasses on, which does help a lot.
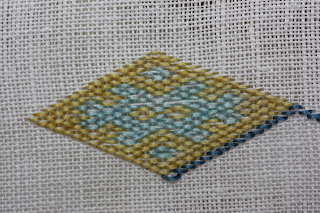
I also made a closer-up of it:


It's not perfect coverage everywhere, but my impression is that the threads will "spread" a bit more after a while in comparison to when they've just been worked, so it might cover completely after a rinse to relax the threads in their new position. However, it does come pretty close to the look of the original already.


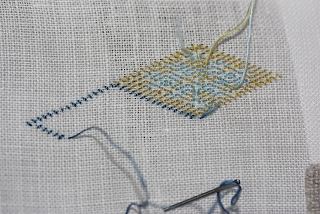
And for those of you who are now feeling that itch in your fingers to flip it over, here's the backside (click the pics in this whole post to make them larger):


And that also is pretty close to how the originals look (sans the unclipped threads that still hang from my work of course). So I'm quite content with this little sampler. One more linen now to test for its suitability as ground fabric for counted work, and then that part of work will be done.
0
MäRZ
09
0

Still testing.

I'm still testing the embroidery stuff on different linen fabrics - I have a few new samples now, and there might be the right one among them.

And I know I've said it before, but boy! is medieval embroidery done-to-scale tiny! It really needs good lighting and good hand-eye-coordination - and probably being short-sighted will help a lot as well...
I hope to be able to show you a photograph of a sample piece one of the next days - at the moment, it's just a very short row of very few stitches in grass-green untwisted silk, and not looking like anything remotely spectacular or embroidery-y yet...
0
MäRZ
04
0

Stiches galore... and all the stuff for the prep work.

I'm still up to my ears in prep work for the embroidery course - I am using this as a wonderful opportunity to tackle all those embroidery-related side projects and side questions that had pestered me for quite a while, but that I never got around to occupy myself with.

And one of those eternal projects was getting the proper ink to do authentic medieval preparatory drawings. There's a nice instruction on how to do it in Cennino Cennini's handbook (the extended version; scroll down to CLXIV to read it), but getting the appropriate ink proved to be a bit harder than I had expected. And now I'm finally in the home straight for the ink project - only a few more days until I have that done and finished. Then I will be one step closer to having all the embroidery preparations covered!

(There's still plenty of steps left until that though, so no danger in my getting out of work to do in that area yet...)
0
MäRZ
03
0

Embroidery!

I'm currently spending snatches of time here and there to sit down with some embroidery, all in preparation for the workshop in April. At the moment, I'm mostly trying to figure out whether there was a typical approach to work sequence and turning corners in the counted embroidery that I have in my books. And that means... stitching and comparing.

There are a few things I have already learned (or learned even better) about medieval embroidery. One of the first things, and one of the biggest problems, is the size of that stuff (pun intended). Medieval embroidery... it's tiny. Teeny-tiny. If you buy modern ground fabric for counted work, you'll often get about 12 to 13 threads per cm as "fine quality". Medieval fabrics? 19 or 20 threads per cm. That's about a third smaller, and fabric in that fineness and even weave is not easily available nowadays. (I'm working on it, by the way.)

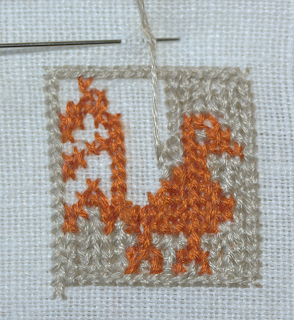
Apart from those little problems, I'm vastly enjoying myself trying out different ways to make transitions from one row to the next, with differring success. I have not settled on one "best" technique yet, and I'm not sure there will be one for me... but my sample-and-try-out-things fat chicken currently looks like this:


It is worked in "Zopfstich", a stitch giving sort of a braided appearance (Zopf = braid), and it's fun and easy to work. I did not get it totally like the original which is partly due to my being bad at counting and partly due to the different thread counts (I have to work over different counts of threads in different directions). As you can see, it's not perfect - but it does serve its purpose as a trying out slightly different techniques.

And plump chickens? I like them.
0

Kontakt