")
")


Search the Blog
Latest Comments
Warp Weighted Loom Thoughts.
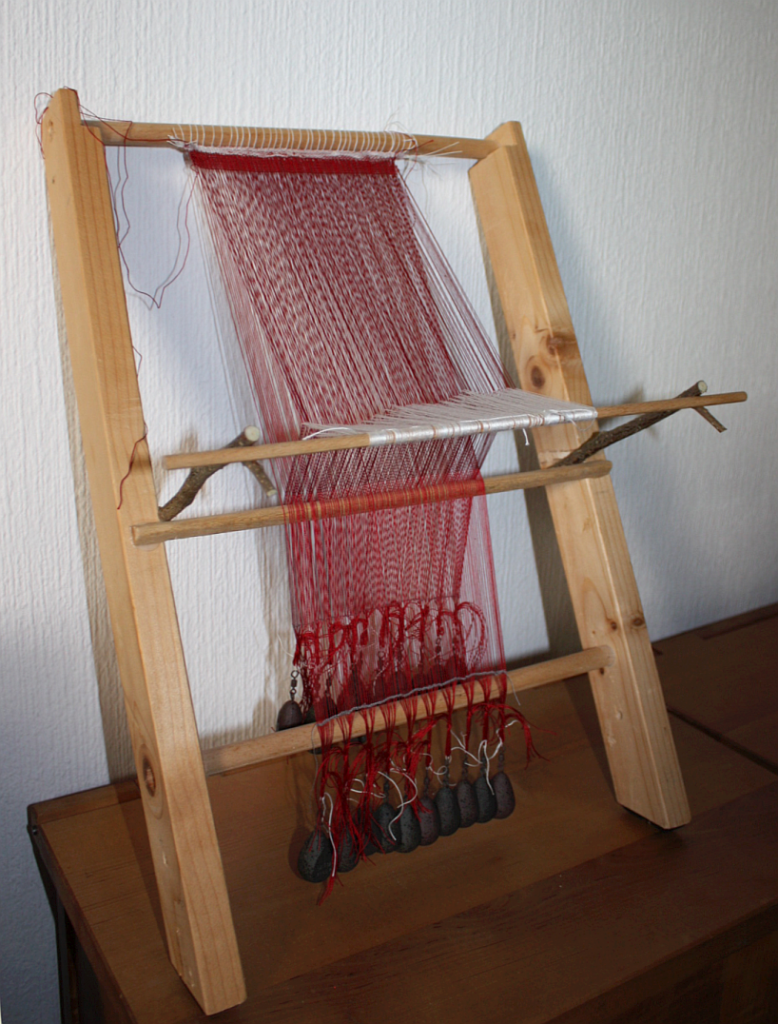
The model has come in handy for a lot of occasions now - it's the perfect way to very quickly explain how a warp-weighted loom works, and much easier to transport than a full-size one. For weaving purposes, though... it is obviously not the most suitable thing.
For actual weaving on a warp-weighted loom, you need a full sized version. And due to some people putting a flea into my ear, I've been pondering the question of how to organise a loom-weaving workshop, in logistical terms. Because you'd obviously need a loom for every weaver...
Now, in my personal opinion, the weaving itself is not the crux in learning how to work with a warp-weighted loom. Yes, you can of course muck up things wielding the shuttle and beater - but according to my experience, the stage where the main decision happens on whether you will end up with thread salad or a proper fabric is the setting up of the loom. Which also happens to have a lot more steps, and a lot more varied tasks, than the actual weaving itself (which is, basically, change shed, beat, insert weft, repeat). So to learn the how-to, I would actually aim to teach setting up... followed by a bit of weaving.
Whether the one or the other, though, you still need a loom for every weaver. Preferably one that is a good, efficient tool which would be suitable for production weaving. Also relatively cheap and easy to make (even without a woodworking workshop and lots of tools), suitable for normal-sized women (a plus would be easy adaptability for body size), and with the option of making it free-standing (in case the workshop area does not have enough wall space). It should be possible to take it completely apart for storage or transport, preferably with no single piece longer than 2.2 m.
The most important measurement for me, at the moment, is a suitable and sensible depth of the natural and artificial shed. How deep does the shed have to be, in order to weave comfortably? At one point, it will be too shallow to pass the shuttle (or weft ball, or whatever) through. (Obviously, the wider the fabric, the more fiddly this might get.) Making the shed deeper than necessary, though, means that you have to pull your heddle stick out further than necessary each time, and that is not very efficient.
Mathematics say that the depth of shed and height of loom will dictate the angle of the loom, and thus how far its bottom will stick out from the wall, and thus how far forward you will have to lean to pull the heddle stick, and how long the rests will have to be for the artificial shed - so, basically, everything.
Which means that construction-wise, deciding on a smart depth of shed is the most important thing... which also means that if any weavers with experience on a warp-weighted loom are among you, please let me know about your thoughts - and your experiences with shed depths!
Comments 7
One of the remarks I've often read about shed size is: Ït's a shed, not a barn!"
Micki's shed is about 2 cm deep and it works well. One can always widen the shed with a weaving sword.
Another thing about vertical looms became quite apparent during last Forum: the top beam should be reachable whilst standing on the floor! The way the first centimetres were woven in Lorsch wasn't comfy nor smart.
While I'm a firm fan of Little Micki, the shed size of a miniature horizontal loom will not work as a comparison size for a full-size warp weighted loom... after all, you don't have to stick your arm half-way through to pass the weft to the other side!
Because of its impact on a number of other measurements, yes, the shed should be on the smaller side (and definitely not a barn, I really like that remark!). But having to insert a weaving sword to open the shed would mean that you have to do several additional moves for every single pass of the weft, since the weaving sword/beater will most probably not be longer than the fabric is wide, which makes this operation not a very efficient thing. Also, either the beater would have to be VERY wide to open up the shed by inserting it and then turning it sideways, or it would be necessary to pull the beater towards the weaver to open up the shed more, or it will not widen the space. That, again, does not sound very efficient to me.
Compared to this, standing on a stool for the first bit of the weaving, as was done in Lorsch, did not feel like a big deal to me, actually. Having the top beam in easy-to-reach height means the overall length that you can weave before rolling up the fabric will be smaller. Probably that's partly a matter of personal preference, though, whether one prefers to adjust the weights more often or to stand on a stool for part of the weaving.
My approach to teaching weaving on the wwloom has always centered on what I shall call (for lack of a better word) "seeding." I'm not teaching them to be better weavers; I'm teaching them to use a tool unlike any other tool they've worked with before. My goal is to sow the seeds of knowledge and send the students back home to perform their own experiments. I counted up a couple years ago, and just over 100 people have taken my classes in the 20 or so years I've been doing this. Several of them have built (or had built for them) their own looms afterwards and gone on to teach other people, and the craft advances at several levels simultaneously.
This approach has worked well for me in the US, where most of our history and museum weaving demonstrations focus on the Colonial (or later) treadle loom. In Europe, thanks to the many fine regional museums focusing on older history, you have more base level awareness of wwloom weaving, which gives you a more educated introductory student than what we usually have here. Attending a workshop and having my own loom to play with there is an unimaginable luxury! (Although one day I hope to get to Vesterheim to do that.)
I have taught wwloom weaving in short form and in long form. Short form is setting up the loom and teaching tabby. But I have more experience teaching the long form version. That's typically been a series of two two-hour classes on successive mornings at Pennsic, the big SCA event in western Pennsylvania.
Under a large canvas sunshade outdoors, we first assemble my Icelandic style loom. Then we work cooperatively (with frequent task switching) to weave the header band, lash it to the beam, and weight the two sheds of the warp. That's the first session.
In the second session, we pick out the four twill sheds and knit the heddles, then readjust the weighting. (I teach the method outlined by Hoffmann, i.e., "now the middle heddle is wrong." That requires that you set the weights in three rows.) Then I weave a few repeats of twill to show them how it's done, and each person steps up to weave a repeat. Getting that far usually takes the whole two hours.
Anyone who wants to stay afterwards and continue to play more on the loom is always encouraged to do so. I leave the loom set up in the sunshade for the rest of the event, which is usually another whole week. I weave a little more on it now and then, and when we are in camp it is available for any visitor to play with it who wants to. It's kind of like an attractive nuisance. :-)
The short form class can just manage to be taught in two hours if the loom is already assembled. In those cases, I usually give a short orientation to the loom parts and how they work at the beginning. But always my goal is to get as many hands as possible on every stage of the process, so each person can come away with at least the seeds of knowledge for how to do all the tasks required.
I hope this is helpful.
That is definitely very helpful! And I'm beyond amazed that you manage to set up a complete loom in only two or four hours to be ready for weaving. With twill setup, too - may I ask how wide your pieces are for this (how many threads, approximately)?
I would have estimated that doing a complete loom setup in form of a workshop, to start weaving a plainweave fabric would take up most of a weekend. When we were setting up the loom at Lorsch, it was quite a bit of work for two people, and not done in under four hours...
Again, this is an issue where the overt goals of my workshops may differ from yours.
My workshops are very much introductory, a get-em-on-the-field kind of expectation. And when I teach the twill method, I'm specifically aiming at teaching it on my repro Icelandic/Greenland loom, which is the one for which we have the richest oral tradition of how the wwloom was used historically. My thinking was that the Icelandic loom is the one that produced the most yards of wwloom cloth in the Middle Ages, and they must have had a very highly developed method in place. Hoffmann's and Guðjonsson's work gave me a place to stand and try to relearn that method.
The year my husband built the loom (in the field, using period hand tools and methods), I had big expectations. To my great surprise, I had been able to secure a 2# cone of fine singles wool. My goal was to lead a group to create a roughly period width and thread count textile with the loom. I aimed at something around two feet in width, maybe a little wider. But I found out the hard way that the warp I'd chosen was both underspun and too hairy. We succeeded in getting about an inch woven, but most of it was me doing the work while my bemused attendees sat on benches and listened to me cuss.
The next year I tried using a fine 2-ply commercial Shetland for the warp. That worked well at about 25 epi, a good "medium" Viking Age sett, but again the warp was so wide we spent most of our efforts in setup and barely got through one repeat apiece of weaving.
Then I changed to a third, more workable technique that has survived into all my subsequent classes. I reluctantly decided that teaching for authentic sett and size can wait until after people understand the skills. Instead, I decided to make a narrow sample (I call it a "teaching") warp and use large yarn. The goal was to give people the manual and visual training to help them learn to use the loom. Proficiency at period textiles could come after the basic skills were firm.
For years I used the same two cones of rug wool for warp and weft, one light purple and one dark purple. (Every year I'd switch them off, just to keep myself entertained.) After I ran out of those, I used two large skeins of worsted weight knitting wool that was tightly plied and not stretchy. They came in black and white, which celebrated the structure even more than the two-tone purple yarns.
Having the yarn two different colors gives people an additional hook on which to hang the concepts of warp and weft. Even experienced treadle weavers can get confused when confronted with their first warped wwloom!
I found that my loomweights (based on Jorvík ones, and they weigh within a few grams of the mode of the weights from there) worked really well with 12 strands apiece of this rug yarn. Accordingly, I make a warp that is based on groups of 12. That way it divides up well for both the initial two-shed weighting and the subsequent three-course weighting. I've done teaching warps on this principle that have been as small as 48 ends (which works out somewhere around 10-15cm in width depending on the header band) and as large as 72 ends (I forget how wide that one was).
With respect to technique, I make sure we had as many hands working at once as possible. When weaving the header band, I sit one weaver in a chair by the Oseberg tablet loom. Another person is charged with holding the two balls of warp and presenting the correct one to the weaver for each weft. A third person conveys the loop of warp down to a third post (often another Oseberg loom, of which we had several in that camp). A fourth drops the loop over the post and keeps them in order. That fourth person is rewarded for the boring stationary job by getting to be the one who pops the warp loops off the post, establishes the initial tabby shed, and ties the slip not in each hank of warp. This division of labor makes the weaving of the header band a party, especially when we play musical posts by having people swap off tasks. Even with the fun and chaos, this assembly line approach makes the weaving of the header band very fast compared to every other method I've tried.
There are very few parts of the workshop that only I do: lashing the band to a stick which is in turn lashed to the beam is the only one that comes to mind right now. (Oh, and putting together the loom.)
In most other cases, I show people how to, say, chain a warp and attach a weight to it, or pick out the first twill shed, or knit the first rod's worth of heddles, or do the first weaving. But mostly I am crowdsourcing the labor for my pedagogical purpose.
So, like I say, my teaching goals may differ significantly from yours. But they reflect the hard choices I had to make given my student pool. You will get to make choices based on your student pool, not mine.
Hi Kareina, I can see this. :-)
In all my studies I've only seen maybe two or three tablet woven header bands from extant textiles that had patterning in them. (I believe they were all from the pagan Saxon period in England, but I'd have to do a lot of digging to be sure.) At any rate, I have focused on making plain alternately threaded bands turned continuously forward. I do usually include a reversal of twining during the weaving, just so people understand that it is possible to do.