")
")


Search the Blog
Latest Comments
Katrin
Experiment!
14. Mai 2024
Thank you for letting me know - I finally managed to fix it. Now there's lots of empty space above t...
Harma
Blog Break .
29. April 2024
Isn't the selvedge something to worry about in a later stage? It seems to me a lot more important th...
Beatrix
Experiment!
23. April 2024
The video doesn´t work (at least for me). If I click on "activate" or the play-button it just disapp...
Katrin
Spinning Speed Ponderings, Part I.
15. April 2024
As far as I know, some fabrics do get washed before they are sold, and some might not be. But I can'...
Kareina
Spinning Speed Ponderings, Part I.
15. April 2024
I have seen you say few times that "no textile ever is finished before it's been wet and dried again...
MäRZ
02
0
FEB.
27
The stitch used for the bird motifs is called linen stitch, because it emulates the binding most commonly found in linen cloth: tabby. It is simple darning, first filling in threads in one direction. Then, in a 90° angle to that, you weave the thread in with your needle, alternately going over and under the threads already in (including the threads of the meshwork).
In case you have never tried darning in this way before, you can have a look at Thérèse de Dillmont's instructions, straight out of her wonderful book "Encyclopedia of Needlework". And if you don't know her book yet, consider getting a copy - either an old one, or one of the reprints. Or go for the online version at encyclopediaofneedlework.com. In any case, don't miss out on this book: If I could choose only a single book for textile crafts to keep, it would be this one.
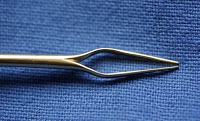
Bonus pic: The netting needle tip, without thread on.
FEB.
26
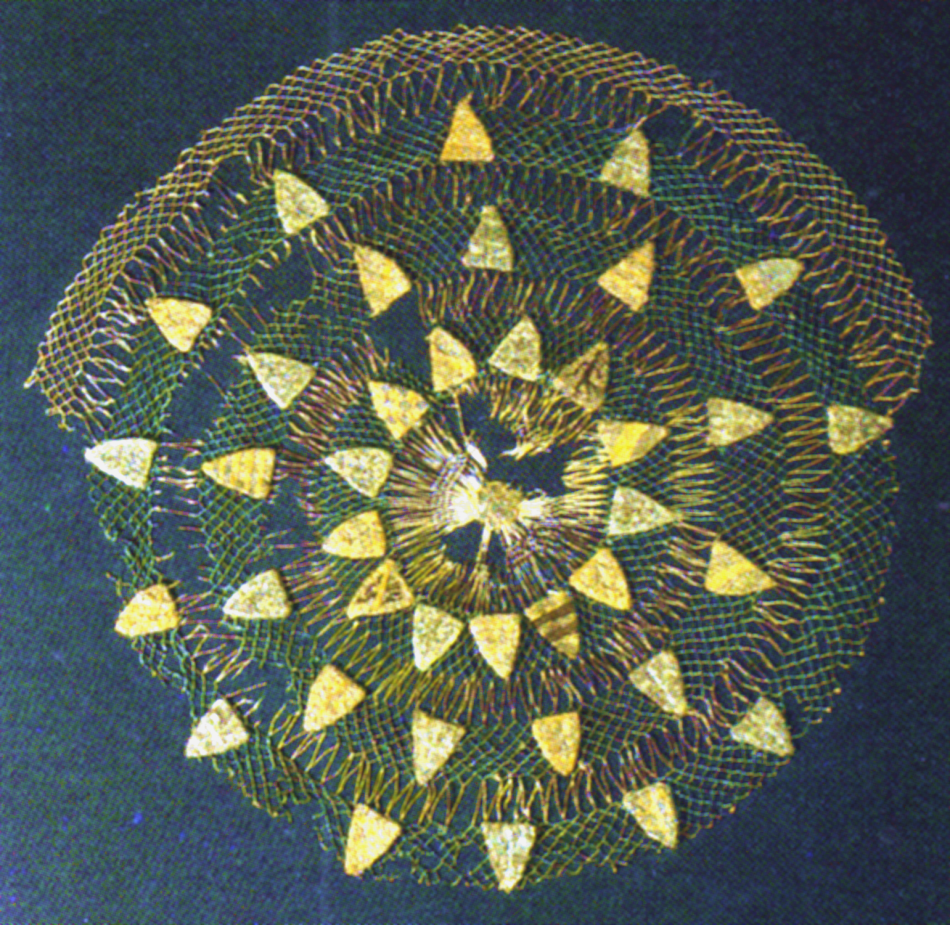
Should you feel that the actual netting of rather large mesh is just not enough, even when combined with a bit of embroidery on cloth to sew on later - you can always do some embroidery straight on the mesh. Lacis, or filet lace, or however you want to call it, has a rather long history. The even ground made by the meshes of the net is a good groundwork for embroidery and allows for a nice contrast between open mesh and filled-in mesh.
A nice example for this is this fragmented net from the 13th or 14th century, with origin in West-Europe. There are two larger fragments and some smaller fragments preserved, with the largest piece measuring 13.5 by 43.5 cm. It is made from red silk for the knotted ground and embroidered with yellow and white silk.

On the bottom right side the large fragment has larger loops of thread, measuring 1.1 cm. The regular mesh size is 4 mm. If I read correctly, the red silk is dyed with madder, yellow was done with weld (Reseda luteola). The embroidered motif consists of alternating white birds and flower motifs, maybe fleurs-de-lis. Embroidery was done in rows, and three rows are still preserved. The flowers are embroidered by stitches around the mesh threads, while the bird motifs fill in the open mesh squares, using linen stitch.

With rather sparse embroidery, on a mesh that is a whopping 4 mm size, this would be a nice starter for your medieval hairnet collection, don't you think?
By the way, medieval silk nets really have small mesh sizes in comparison to later ones. A pattern book for lacis by Therèse de Dillmont is available on the net (German version of "Filet Guipure": Part 1 and Part 2), and she offers thread weight advice for mesh sizes between 7 and 11 mm.
Source for text and pictures:
DECONINCK, E., GEORGE, PH., DE JONGHE, D., Y., VAN STRYDONCK M. J., WOUTERS, J., VYNCKIER, J. und DE BOECK, J.: Stof uit de Kist: De Middeleeuwse Textielschat uit de Abdij van Sint-Truiden. Leuven 1991. Catalog Nr. 107, page 354.
FEB.
25
If you are at all interested in medieval cooking, go check it out (but have something to snack on ready). There's even a forum, so you can connect to other cooking enthusiasts, should you be one. (Yes, kuechenmeyster. I know where you will spend the next hours. Like they said over at phd comics, in the now defunct blog: "We're not working, so why should you?")
FEB.
23
I'm sorry that I can only give you a picture with the needle wound with thread, and thus you won't be able (yet) to see the wonderful finish of the passage from shank to tips - but this is my "no brains needed" craft, and I could not keep from winding it again the evening before taking the photos, when it had run empty.

It is made from brass, after one of the London finds given in "Textiles and Clothing", and it works like a breeze for my normal mesh size of about 4 mm. I'd like to try my hand at smaller mesh sizes one day, but first I will enjoy this utterly wonderful netting needle with the fast-to-work larger meshes, currently on a net that was inspired by the twocoloured one I blogged about here.

Here you can see the mesh size. I tried a new version of casting on, but I had a few problems with it, so there are some irregularities in the net especially in the first few rows. After the long cast-on loops, there are five rows of normal-sized mesh, then one row for doubling the number of meshes. After that I am now continuing with red thread (madder) for a while - I still have to get a feeling for how much thread on the needle will last for how many rounds.
In the picture below, you can also see my normal gauge, which is a shashlik stick shortened and smoothed with fine sandpaper, resulting in the 4mm mesh size.

I have a free day tomorrow (hooray), so the next blog post will be on Wednesday - have a good time until then!
FEB.
20
While getting pins and needles made from copper alloy is very easy today, compared to the situation only a few years ago, there are more problems waiting for the unsuspecting dabbler in textile arts who ventures into lesser known territories. Like netting. It can be incredibly hard to get a proper netting needle nowadays.
When I first started learning how to net, I searched and searched for a netting needle. The results? Zero, nil, zip. But I wanted to net!
So first of all, I tried with a needle. You can use very little thread with a normal sewing needle, plus the chance of pricking yourself is very high. Not good at all. Even nastier, because a pricked finger will heal: There was a good chance of hitting a thread with the tip of the needle (I was really stupid and used a sharp sewing needle), thus sewing into the net and not knotting.
The next step was trying to make a simple makeshift netting needle by winding two pieces of wire together, forming the ends into netting needle shaped ends. This was better, but not much: The thread kept inserting itself between the two wires, and the makeshift thing had a tendency to bend, twist, and fall apart. I needed a proper netting needle.
So I whined and begged until I got a netting needle made from a hobby metalworker, made of thick copper wire. I had to twitch it a little, and it would only serve for rather large mesh sizes, but I had a netting needle that was actually useable. Hooray! It was much too short for significant lengths of thread, though, and rather hard to wind on and off. But at least it worked. Some time later, I tried to make one myself, which was also of the rather-crude-but-working sort.

Imagine my happiness when I found out that a proper modern company still manufactures netting needles, sells them via normal sewing shops (though they had to order it) and cheap, too! And with three gauges thrown into the packet! I ordered one at once.
Believe me: it is a good thing this was so cheap. You do not want to buy this. It is so crudely made that I laugh about myself every time I see it. I actually did try the "needles" once. Here is pictorial evidence for you:
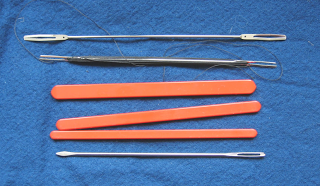
Frankly, they are a bad joke if you are going for medieval-style netting. The material is very cheap and you can see that they are also cheaply made - no wonder, since they have a retail price of about 7 Euros. The shanks at the ends bend easily, they are much, much too thick and will catch the threads of the net much better than sliding through the mesh. If bent together too much, winding and unwinding is hard and abrasive on the thread; if there is a gap between them wide enough for easy winding, the tip is even wider and bulkier. Well, maybe they work if used with the "gauges" that accompany them (plastic sticks), which will result in mesh sizes of approximately 8 to 15 millimetres. Which is rather... huge. I would not recommend buying them, unless you have no other choice whatsoever (read: unless there is nobody at all in your acquaintance that you could beg until he makes you a crude-but-workable netting needle).
... to be continued
FEB.
19
Should you try to follow these instructions and keep getting utterly lost, you can tell me in the comment section, and I will try to provide some crude illustration.
The updo I used as the kruseler foundation is commonly called a "log roll", or at least I only know it under this name.
To make a log roll, you do the following:
- Grow hair. You will probably need mid-back hair or bottom-length hair at least. Fine hairs can usually do it with hair on the shorter end, thick-haired ladies (or guys, of course) need more length.
- Gather hair together in a low ponytail, and hold the ponytail with one hand.
- With the free hand, grasp the hanging end of the tail and wrap it upwards and towards your head over the hand holding the tail. Your first hand should now have hair looped around it.
- Open the hand in the loop slightly, keeping the base of the loop together with the other hand. Now you twist the hand in the loop - this will form a sort of twine underneath the loop. While twisting, pull the hand gently and slowly away from your head, to elongate the twist below the loop.
- Stop pulling and twisting when the twisted section is as long as the back of your head or only slightly longer. You should now have the twisted section, coming from the base of your starting ponytail, and a free-hanging tail of hair coming out of the twist.
- With one hand, hold the twisted section up by the loop so there is some space between the twist and your head. With the free hand, wrap the tail of hair still free around the twist, covering it gradually from bottom to top. That is why you need the length.
- Tuck ends underneath to hide them. Settle finished log roll on your head, going straight up the middle, and secure with your method of choice. Until the roll is firmly secured on your head, always keep hold of the loop, or the roll will uncoil, and you have to start over.
This is one of my staple updos, since it is fast and well-balanced and does not look bad. But for modern living, I do it only as a single bun worn on the back of the head, not with parted hair and put up on the temples. It is also possible to logroll a braid, something I also do pretty often, but this will not give the sleek look of the "hair horns" that can be seen on the Arnolfini wedding picture, and that was my model for this try.
My main problem is getting the two humps symmetrical and then fixing them securely. They must be firm enough not only to support themselves, but also the (admittedly light) veil, which I pin to the lumps.
I know I'm not the only person wearing or trying to wear a kruseler - so what are your experiences? Have you had problems with the symmetrical arrangement? How do you fix your fabric to the head? How long does it keep in shape?
And most importantly: If you had one single question to ask a medieval kruseler-wearing lady, what would you ask her?
FEB.
18
 s.
s.In case you do not know it yet, Carnivalesque is a blog carnival (something like a showcase for interesting blog posts), alternating between early modern (from 1500 to 1800) and ancient & medieval (until 1500).
The next Carnivalesque is due for February, 21, and it is hosted by Notorious Ph.D. Now I'm off to look for my favourite medieval-themed post to nominate, before it is too late.
FEB.
17
A lot of people know the nets found in London - with mesh sizes between 3 and 9 mm, depending on the net. But they are really simple.
Now take this one, as one of the not-too-elaborate nets. We don't know where it comes from, unfortunately, since it was bought via art trade, but it has been dated to the last quarter of the 13th century. Nowadays, it is in the Art Museum in Düsseldorf.
Diameter is 33 cm, and it has been worked in green and white silk. I had to tune up the colours on the scan, and now it should be easy to see where the green and where the white silk was used. I would have expected the small, embroidered shields-with-arms on a white background. Shame on my modern mind - green it is. The arms are embroidered in spun silk and gilded silver wrapped around a textile core. The ground for embroidering was coarsely woven linen. Some of the arms have been identified: there's six times Sayn and eight times Geldern, pointing to the Middle or Lower Rhine region. The net might have served for a wedding or proposal ceremony. In addition to the 38 arms, there's a little six-petaled rosette in the middle of the net.
The netting should not be too hard to do, using two different-size gauges for the long white and the small green meshes. My rough estimate is 3-4 mm for the small green mesh and about 1.5 cm length for the long white mesh - which is "not very small" for green and "exceptionally large" for white. It would be very interesting to see it close up, and in good detail, to see whether it was worked in spirals or in rounds, and whether the colour thread not in use was cut off or just led down for the next colour change. Any odd joints caused by this could be covered up easily with the embroidery bits sewn on later.
Source for the net picture and information: FANSA, MAMOUN (Hrsg.): der sassen speyghel. Sachsenspiegel - Recht - Alltag. Beiträge und Katalog zur Ausstellung "Aus dem Leben gegriffen - Ein Rechtsbuch spiegelt seine Zeit". Bd. Beiheft 10, Band 2, Archäologische Mitteilungen aus Nordwestdeutschland. Oldenburg 1995.
FEB.
16
Still, now I am behind schedule - so no long, elaborate blog post for today!