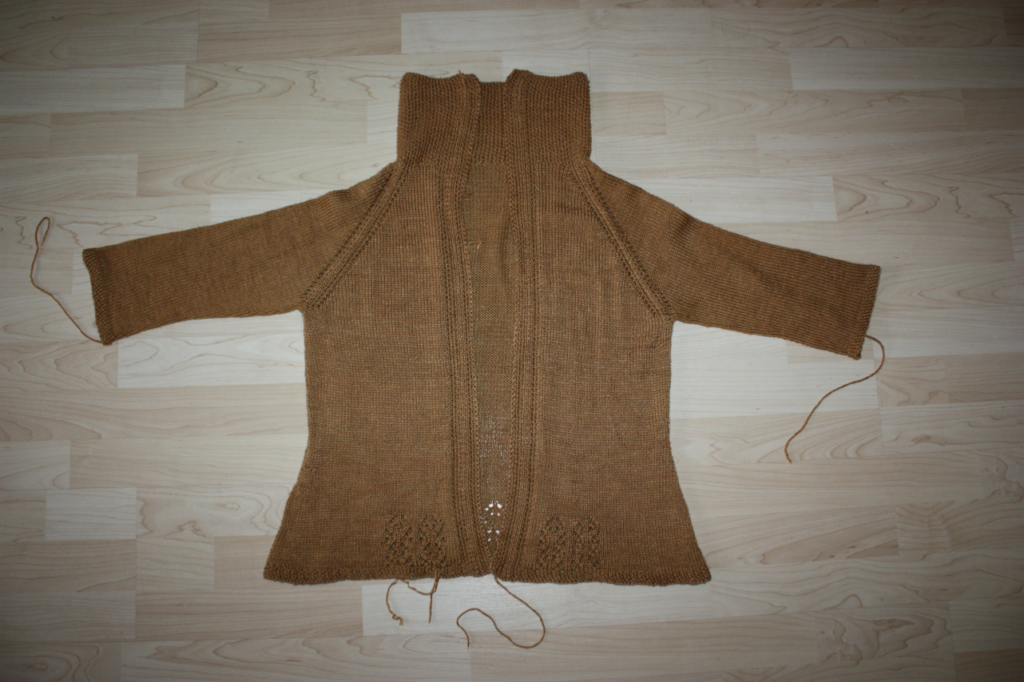
I have finally finished and blocked my Vodka Lemonade - now it's only the last few ends that have to be woven in, and it will be ready to wear!
All blocked!
I have not yet decided whether I will stick with the "worn-open" version that it's intended to be by the designer, or whether I would like to have a closing option - and if the latter, what it will be. Some small and unobtrusive press studs? A slim, hidden zipper? Some kind of brooch, or a hook-and-eye closure? I tend towards the zipper, though - provided I can find one that is a good length (or can be cut to a good length) and that is a fitting colour. Ah, decisions, decisions...
I'm off to the Nadelwelt - in case you are going there, you can find me and Margit at booth F2.3, just like in the last years.
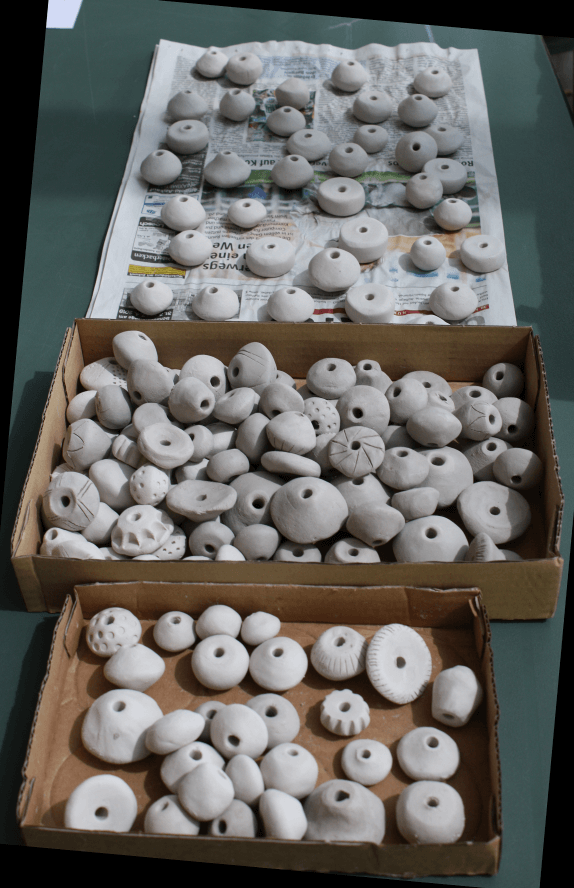
I haven't managed to fire the next batch of spindle whorls before the fair, so they will have another few days to hang out. Possibly that is a good thing, too, because then they will definitely be completely dried out, and that results in less losses due to cracking.
Here they are, all hanging out on the table:
It's a clay that fires up to a light grey colour. Actually it's two clays that fire up to a light colour, as I have used up the last of my previous batch. Some of the whorls are already made from the new clay, which is looking a little bit lighter in the unfired-but-dry stage, so I'm very curious to see how it will look when fired. The bits that are not in a reducing atmosphere, that is...
This time around, I have also played a little with some decorations on some of the whorls. Most of the decorated ones are closely modelled after extant finds from prehistoric times, and a few are modeled after finds from the Celtic era. I did try to match both the form and the size as closely as possible, and found once more that there are forms I find very easy and natural to do, and others that I have not figured out the perfect method yet. So there's more to learn... which will have to wait for the next batch, though.
For now, I'm looking forward to the firing, it's always a fun thing to do, and it's always exciting to see how they all turn out!
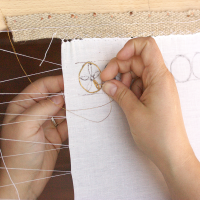
Here are a few images from the workspace, so to say - I've been outfitting part of the new embroidery frames with bands to attach the fabric.
The way these frames work is rather simple: You baste or herring-bone-stitch your embroidery ground fabric to the bands at top and bottom of the frame. Then you tension the fabric between the frame bars with help of the wooden pegs; if your fabric is a long strip, you can roll it around one of the frame bars to store the excess. (The bars are fairly rounded to avoid sharp crimps in the fabric or, as you progress, in the embroidered fabric.)
Once your vertical tension is thus established, you get a nice horizontal tension by stitching the left and right edges to the vertical slates. Using a needle, you pierce the fabric, then wind your tensioning thread around the slate, then go through the fabric again.
This setup of the fabric is, obviously, more time-consuming than just plopping a modern round embroidery frame onto a piece of fabric, but it will give you a higher, more controlled tension that will not slack off quickly or easily.
To make all this possible, though, you need the bands on top and bottom of the frame - and fitting these is a story of its own.
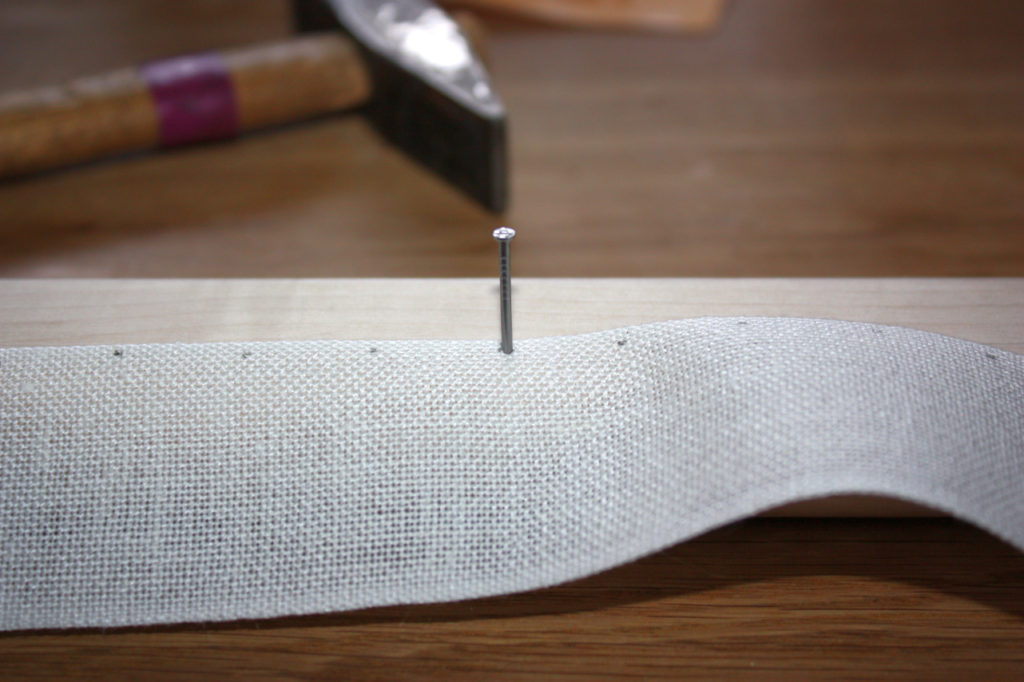
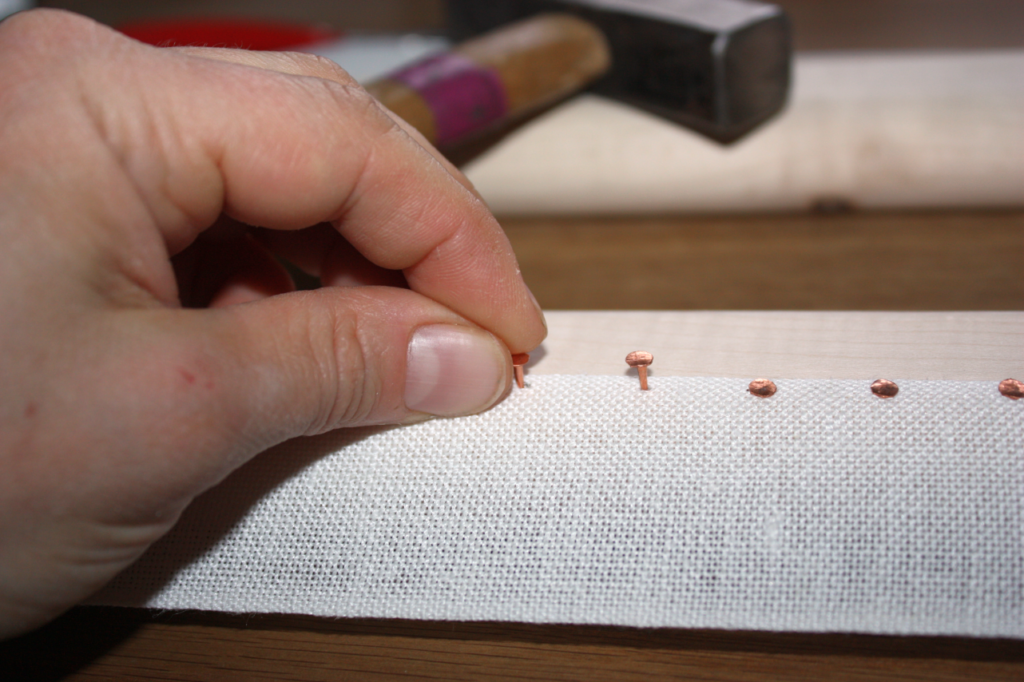
First of all, the bands are cut and their edges are hemmed. Then the real thing is up - the attachment. I use small copper tacks to attach the linen bands to the frame; they have to be placed close enough to each other so the band doesn't get a lot of opportunity to sag between attachment points.
They are tiny, and soft, and they look really nice. As they are tiny, it's rather fiddly to handle them, though. And because the wood of the frames - birch, beech, or maple - is rather hard, it's also very easy to just deform the tacks instead of hammering them in - which is why every one needs some pre-holing. I do that with help of a slim steel nail.
Once every attachment spot has its hole prepared through the band and into the wood, the tiny tacks are inserted into the holes, two or three at a time. Theoretically, I could insert all of them at once, but experience has shown that this does not save time, as the vibrations from hammering in their mates makes those further down the row jump out of their prepared holes again... which is not very helpful.
So there's bit by bit fitting and hammering, until all of the holes are filled. And then the process is repeated for the second of the bars for each frame.
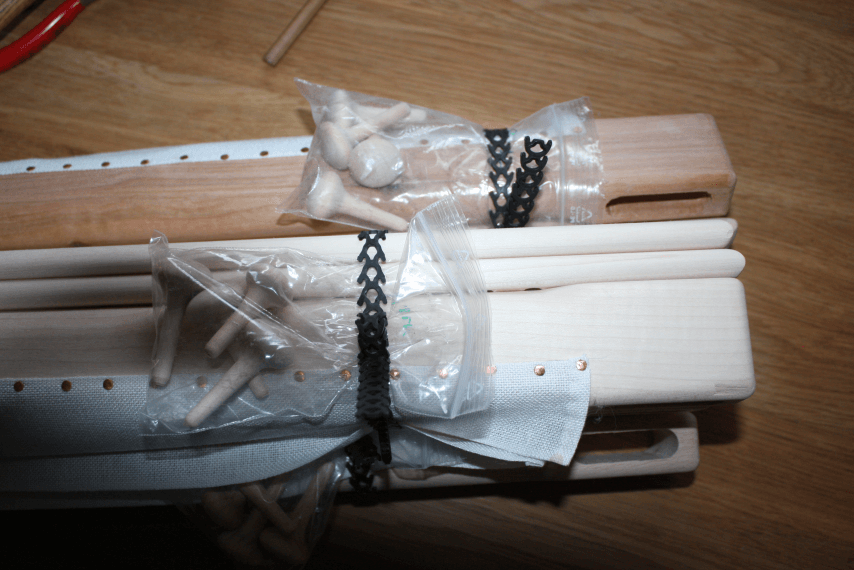
Once that is done, the two fitted bars get bundled with their side slates and four pegs, turned out of the same wood - and they are ready to be used for some lovely embroidery!
There's something new in the shop - I have finally found someone to make some more copies of the weaving knife found in Dublin, DW80. It was found near Christchurch Cathedral, in unknown context, but is probably Early Medieval/Viking age.
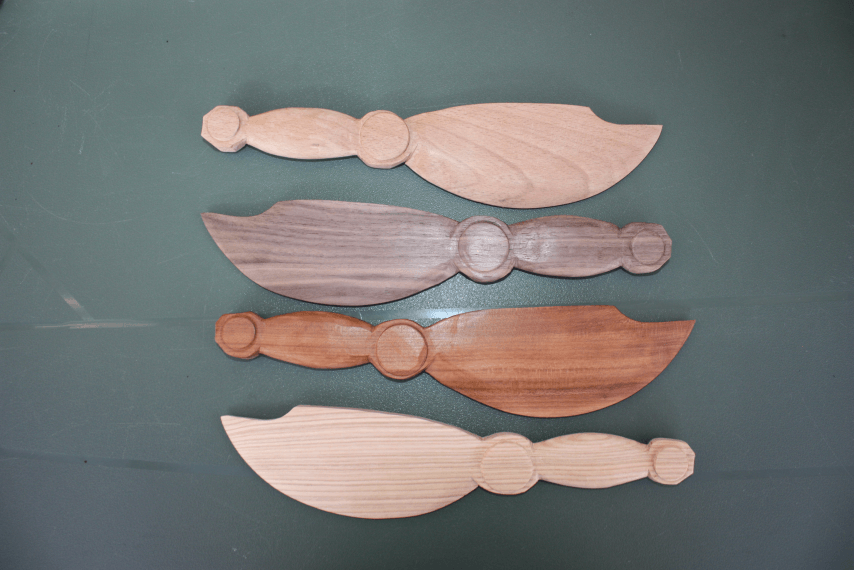
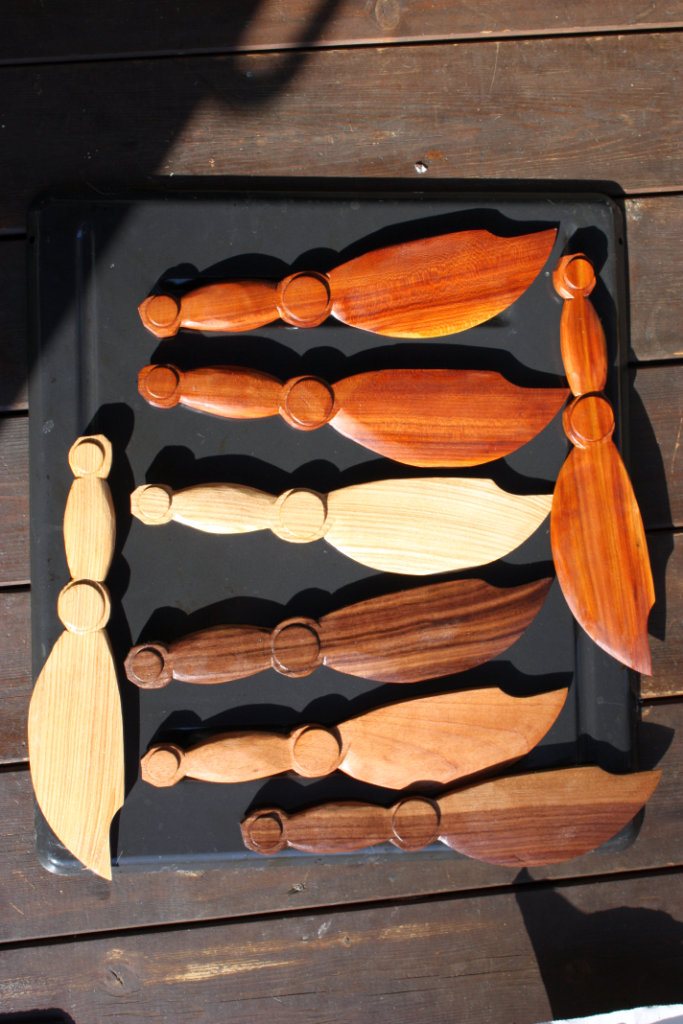
They arrived looking like this:
It's beech, walnut, Zwetschge (a kind of plum) and ash wood; and of course I promptly went ahead and applied some linseed oil and sat the blades in the sun so the oil could soak in nicely.
The wood looks even more gorgeous with the added depths of colour and the shine it has. Linseed oil will harden by an oxidation process, protecting the wood.
These versions have the form of DW80 without the embellishments, by the way - but the functionality is the same as in the original. I've used (and had other people try) this form, and it is wonderful. The pointy tip can be used to pick out individual threads, or to single out a troublesome tablet, or to clear the shed. The main thing, though, is the form of the blade: its curve allows the weaver to gently yet firmly press the previous shed into place.
Yes, it's usually called "beating in the weft", and that is what a lot of people do when tablet-weaving. When you have a full-size standard horizontal loom, the motion to settle the weft is indeed beating. The type of loom makes this a sensible and efficient way of doing the task at hand.
Of course you can use a similar sharp beating motion to settle your weft on a band, but there are distinct disadvantages to this. One of them: You will need a lot of space between your tablets or your heddle to build up speed for your beating implement before it hits the fell. At least I do - otherwise, my beating is not hard enough to really get the previous weft packed in tightly. You also need to hit with the beating implement exactly parallel to the fell, or you will end up with uneven weaving. The main reason against real beating in my opinion, though, is that you will put a lot of strain on your tensioning spots and/or knots. With both tablet and rigid heddle weaving, I find that finding the correct tension is one of the key points that will make your weaving go from "okay" to "smooth going with excellent results". Tension has an influence on the width of the band, the elongation of the motifs, and the ease of changing sheds. Fiddling with tension, to arrive at that point sometimes means working with very, very delicate adjustments, held by knots that will sit tight where they are... unless there are sudden, strong changes in the tension on these knots. Which is exactly what happens when you beat in the weft.
So I much prefer to press in the weft; I can even hold the band with one hand to build up counter-pressure if I want to press very strongly, using the weaving blade with the other hand. The curved shape allows me to use a kind of rocking or rolling motion across the fell, exerting pressure in a small spot at a time, so I can make sure that the fell is completely straight. No sharp, short motions, but a nice, quiet, gentle flowing move that fits in very well with my general style of movement when weaving.
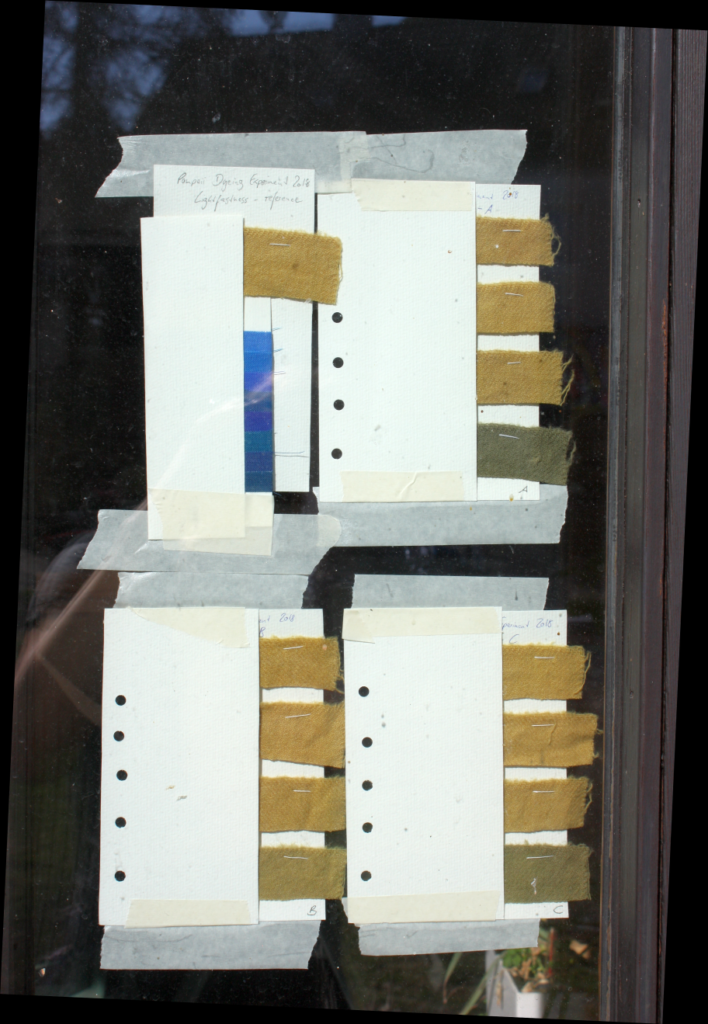
For those of you interested in the lightfastness tests, here are pictures!
This was how the setup looked at the start...
I covered the parts to be protected with cardboard and stuck the whole shebang into the window of our wintergarden, facing south. After 7 days, I took it all down and checked the fading.
On the blue wool scale, each reference strip takes about two to three times longer to begin fading as the next lower strip in the scale. As the Material Technologies Limited website states:
Under normal solar testing conditions, reference 1, the least permanent, will begin to fade in 3 hours to 3 days, depending on geographic location, season, cloud cover and humidity; reference 3 will fade in 5 days to 2 weeks; reference 6 in 6 to 16 weeks; and reference 8, the most permanent, in 6 to 15 months.) These scales are used for paint lightfastness testing under international standard ISO 105-B, and are also used by gallery curators to measure the accumulated amount of light received by museum displays of paintings, textiles or photographic prints.
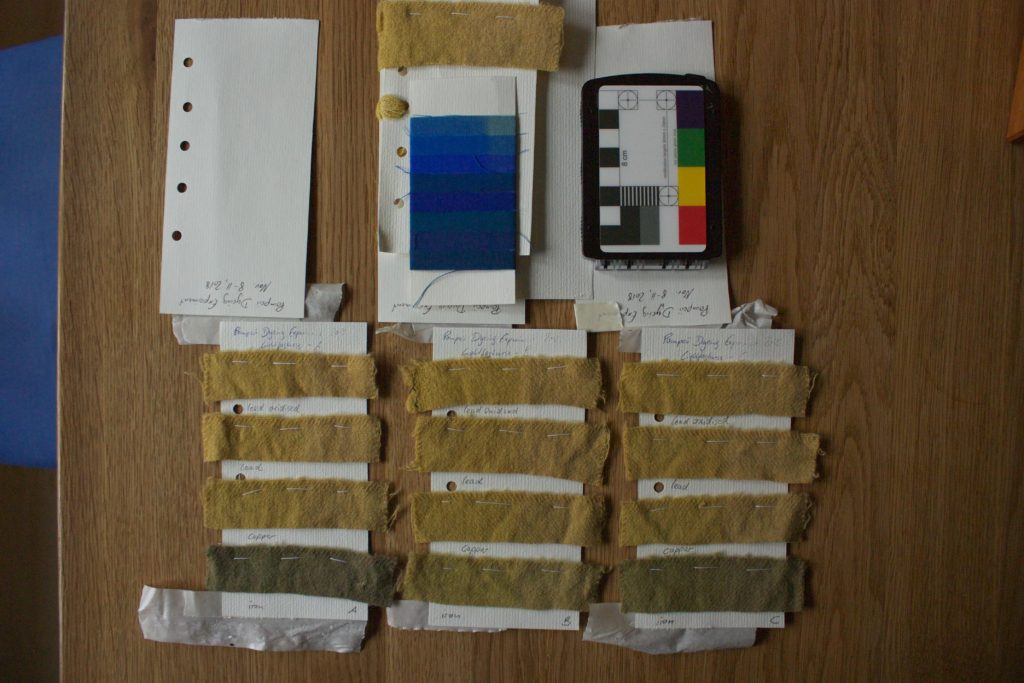
This fits in fairly well with the speed of fading that I had, with reference strip 3 already noticeably faded after the 7 days that I took it down for the check. And this is how the birch looked:
As you can hopefully see, there's distinct fading on the first blue strip, and there also is fading on the second and third one. It is not so easy to see on the photograph, but in actual natural daylight, there also is a little fading visible on the birch-dyed cloths. That would place the colour fastness regarding light of these strips somewhere between strip 3 or 4 - not too bad, seeing that modern recommendation for clothing dyes is to have 4 or better.
This, by the way, is another example of it being rather difficult to document nicely and clearly - not everything is easy, or even possible, to show on a photo.
After taking these pictures, the strips were covered again and went back into the window. I'll take them down once more soon, and see how things look then.
There's a "rare sheep breed wool challenge" going on in the US, started by The Livestock Conservancy. It runs under the delightful name of "Shave 'Em to Save 'Em", and you can read more about it here and here.
Speaking of publications, here is an article about the completely fucked-up system that is academic publishing, where you pay to get access to publications on research... which had been paid for by the state (usually), and where the authors and peer reviewers do not see a penny for their work. Yes, really. It's a complete gnah situation.
If you are a knitter, you will know that there is more or less maths involved in knitting. While it's quite possible to avoid maths-ing to a large degree, not doing so can make things much, much easier - like adjusting a pattern to your gauge instead of endlessly fiddling around with different needles, and maybe trying a different yarn, to "get gauge" exactly as stated in the pattern. Or figuring out how much yarn you'll need from knitting a sample swatch and weighing plus measuring it. Or other things like that.
I was reminded of all that maths stuff when looking for an article about early compound knitting on JSTOR and found instead this one here:
Belcastro, Sarah marie, and Carolyn Yackel. “About Knitting...” Math Horizons, vol. 14, no. 2, 2006, pp. 24–39. JSTOR, www.jstor.org/stable/25678655. (JSTOR is a paywall thing, but they offer a free registration that allows you to read up to six articles per month for free. So if you are interested in that article, or in other stuff, you can sign up there and get some sciencey goodness.)
I found it amusing - and if you are tickled by the combination maths and knitting, Sarah Marie Belcastro also has a webpage about these things, with plenty of links to keep you amused and/or occupied. And a photo tutorial for a knitting increase that looks like a reverse ssk or k2tog!