
Latest Comments

Guest - Aislinn Dyestuff Citizen Science.
09. Oktober 2026
This is a great project. I look forward to the results. Thanks for letting us know.
Guest - Aislinn Time for...
09. Oktober 2026
Looks delicious!
Guest - Katrin Sprang Discussion
18. September 2026
Hi Rachel, I have looked for more photos of you, but that was not very successful. I found a link on...
Guest - Beatrix Sprang Discussion
15. September 2026
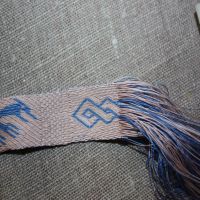
That lozenge pattern element is not a photograph, but a scan. So it should be to scale. But I pinned...
Guest - Katrin Sprang Discussion
15. September 2026
I was not referring to Rachel's reconstruction (is the reconstruction you refer to the one photograp...
JUNI
28
2

Lace Chapes - Or: How To Tiny Metal.

I've been asked about proper, nice, authentic lace chapes again and again over the past years... so this has been on my list for ages now.

Lace chapes, for those of you not into medieval dress accessories, are like the plastic endcaps on shoelaces - they protect the lace from unraveling, and they make threading the lace through holes or eyelets much easier. Especially in the later Middle Ages, the style of dress for both women and men uses lots of laces to get things nice and tight-fitting on the body... and for all those laces, chapes are really handy.

The tiny problem is, though: The chapes you can usually buy today are way too large, and they are often cast, while the originals were made from sheet metal with use of a hammer and much smaller. How much smaller? Well. The modern ones I could find quickly when pretending to shop for some have a top diameter of about 5 mm. The medieval originals that I have nice documentation for have a top diameter of between 2 and 3 mm. That is... much smaller.

Most modern laces with chapes are also held together with a few stitches, while those original chapes that survived with lace in them are usually riveted to lock in the lace.

So recently, I have gotten some material to give this a try... then I played around some more. Then I bought some additional tools. Then I made some more tools. Fiddled around some more. Researched what was inside those chapes.

I'm getting there now. I can tell you, though: These things are tiny. TINY. And it's incredibly fiddly to set those infinitesitiny rivets without bashing the chape itself to pieces...


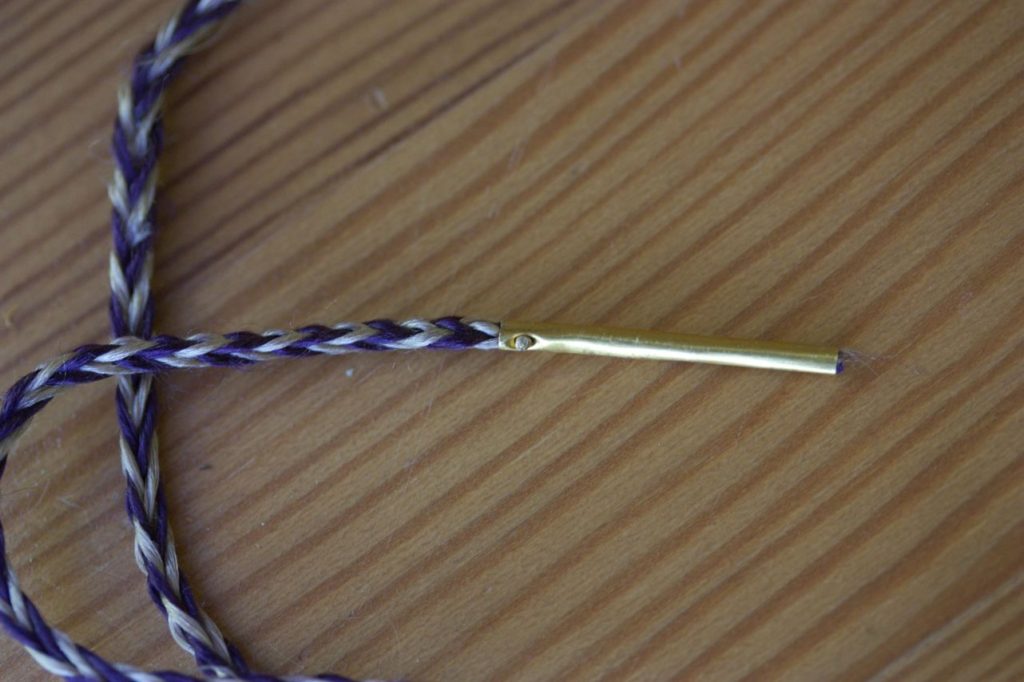
...but I'm getting there. This is one of the latest prototypes I've made, with 2 mm diameter at the top. And just so you get an idea of the size, here's a bigger one (with a good 3 mm diameter top) in my fingers:


I had originally planned to make these chapes and sell them, together with rivets, for customers to assemble with their band of choice. It looks to me, though, as if the originals were hammered close around the lace, then riveted for extra security. Even if you put this aside and assume it will be possible to stick enough of the lace into the closed chape, successfully setting a first rivet took me several tries, complete with totally bashed chapes. So I'll have to offer the chapes mounted on laces, all set and finished, to save everybody's nerves.

Which means I had to take a closer look at the laces involved...
0
NOV.
19
0

Arnolfini Dress

I think anybody who is more than slightly interested in late medieval dresses will know the Arnolfini dress - this voluminous green monster of a gown, fur-lined, worn with a headdress and looking, well, stunning.

The BBC series "A Stitch in Time" has also taken a closer look at this dress, re-creating it to see how it looks and moves:


The show does a nice exploration of different historical and modern techniques - including modern fabric production and dyeing with woad and weld.
0
SEP.
27
0

It's the ass of the dog...

... that's appearing on this band.


Some more things have fallen into place, and I've invented some more mnemonic rhymes that are more or less silly, but all very helpful for me.

Now there's only (hah!) the torso and front paws and head to weave, and I will have a doggy on my band. Making the hind paws was exciting, especially the first one, and I was very proud to have gotten the distance to the second leg large enough. Which, on retrospective, would have been very hard not to - due to the structural rules when weaving. Anyways, it was a lot of fun up until now, and a very exhilarating feeling of "oh my goodness this all works as it's supposed to!" which is a nice change from "oh my goodness I've gotten totally muddled and this may look pink but it's all in the wrong direction and I'm out of the rhythm so I need to fudge this and hope it won't be too obvious".

So... half a dog done, half to go. Though I should probably also take care of some other things...
0
DEZ.
11
0

Compromises, or: Faking it (as you do).

As I've mentioned a while before, there's no such thing as the perfect textile replica. Well, theoretically, there might be - but really getting it all perfect, down to the fibre and thread and exact measurements? That would mean a truly insane amount of test runs and effort and time and material and money.

So whenever there's a reconstruction, there is usually also some compromising being done. Part of that can be due to time restrictions, or budget restrictions, or technical issues. One of the typical compromises are the changes made to a fabric because of the available looms. There's a difference between how different types of loom work (obviously), but I've recently been told by a weaver that from her own experience and that of others, even small differences between looms will result in different fabrics, as they may or may not work with a certain amount of tension, or may be more or less harsh on the threads.

One of the main issues, though, is the fact that when you weave on a horizontal loom, you have no starting border. (It can, technically, be done. It just makes little sense if you do the normal way of setup on that loom. I've met one lady once who does use a starting border on the horizontal loom, but she's the exception to the rule.) Starting borders are, however, a pretty common feature if you use the warp-weighted loom, as they make total sense when setting up your warp here.

For those of you who are confused now - a starting border is a woven band forming the top (starting) edge of your warp. Think of it as a band with a gigantonormous fringe at one side - that fringe is the warp of your main fabric. The starting border secures your warp threads and spaces them out evenly, two invaluable things when you are setting up the loom.

So if you want to replicate a fabric made on the warp-weighted loom that includes a starting border, there's two possibilities. Obviously, you can find a very competent and willing weaver with a warp-weighted loom and get the fabric done as it originally was, with the starting border and all. Alternatively, have the weaver make a starting border and weave it on a horizontal loom. However, finding weavers willing to do just that is not the easiest of tasks - and you might, again, run into budget and time restrictions.

The other possibility? Get the fabric woven on a horizontal loom, without a starting border, then fake one afterwards. This is, admittedly, only the second best solution, as the faking it will be blatantly obvious to every weaving geek looking closely - but then, it will probably only be blatantly obvious to those. There's a difference between a faked and a real starting border, and it is due to technical reasons.

If you make a real starting border, you weave a band. As the weft for the band, you pull loops of yarn through each shed - this will form your main warp. You have your yarn ball or cone on one side of the band and the warping aid (such as posts) to the other side. So the sequence is: Change shed, pull loop through and around your warping aid, change shed, pull next loop through.

This means there are two threads running through each shed, both of them turning into warp threads.

Next post: How you fake a starting border, and the difference this makes.
0
OKT.
17
0

So many colours.

There are so, so many open questions left around the man found in the Bernuthsfeld bog. Who was he? What was his job, if he had one? He definitely wasn't rich, but how poor was he?

There's also plenty of questions regarding his tunic... one of them being the colour question, as usual when some bog-brown textile is found. There was a dye analysis done, but the results were rather sketchy, with only quercetin found as a definitive dyestuff ingredient.

Well, we have a tunic that is put together from a lot of different pieces of fabric, most if not all of them already in their second, maybe even third or fourth use. Chances are very, very high that there were not only all kinds of fabrics, but also all kinds of colours... which we don't have definitive proof of.

Quercetin is, however, found in many different plants - among them woad (isatis tinctoria) and birch leaf. So for the reconstruction, we decided to leave some of the fabrics undyed (especially those with interesting natural wool colours), and to use birch and indigo (the latter rather sparingly) on others.

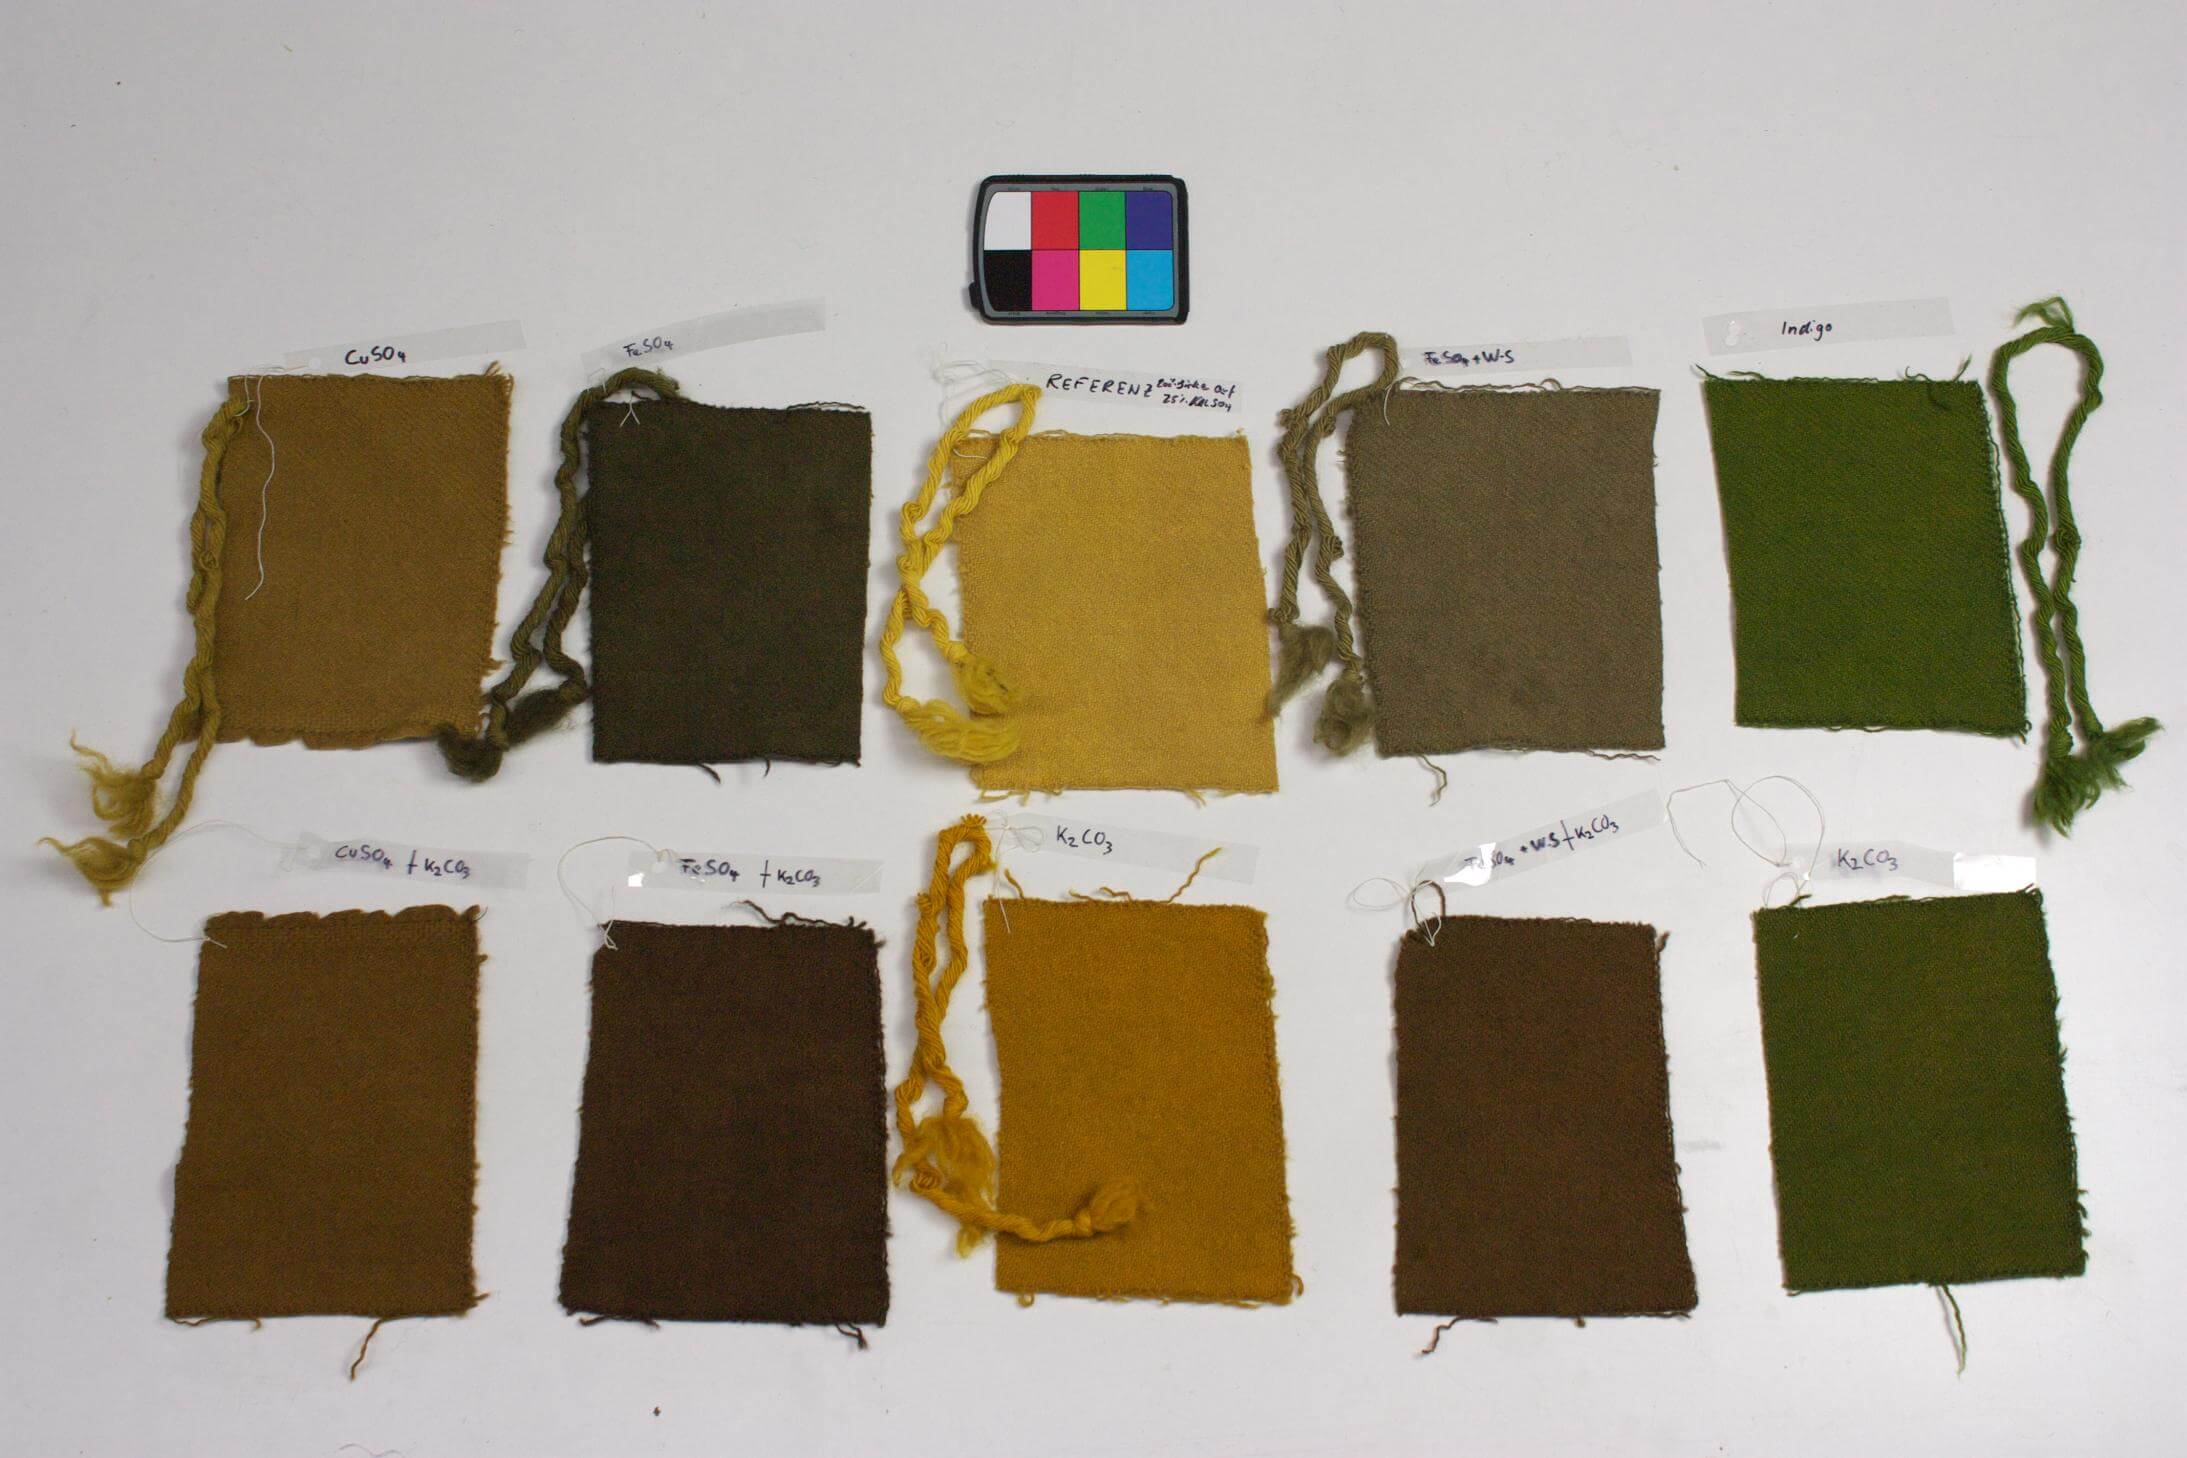
The nice thing about natural dyes is that you can get so many different hues from one plant that it won't be boring at all. So we were, after a lot of discussion and brainstorming and thinking, going for two different hues of blue, one double-dye of green (birch yellow with blue), and several different colours made with birch. For that, we did a nice little test run with pieces of fabric, all mordanted with 25% alum, then dyed in 200% dried birch leaf, then nuanced with iron, copper, iron plus cream of tartar, and potash. One of the yellow bits was dipped into an indigo vat, and then all of the candidates (except the yellow bit that went into the potash right away) were rinsed, split and half of them thrown into the potash brine over night.

The results were rather spectacular:

birch_colours

As usual, it's very hard to give a good impression of the colours on a photograph - natural dyes look very different in reality than on a picture, and they can even change hue depending on the light angle, let alone depending on light colour and quality. So you'll have to believe me that the green achieved by iron sulfate nuancing looks really green (until you hold it next to the indigo-on-yellow green, when it looks like someone dropped it into a mud puddle), that there's beautiful soft browns to be gotten with copper and that nuancing the yellow with potash gets you an orangey colour that is utterly, utterly beautiful.

Also as usual, the actual dye run yielded slightly different results to the test run - but we were both quite happy with the outcome, and the tunic reconstruction will look colourful enough to give an impression of the many colours in medieval times, yet will only have used two dyestuffs that we have hints for in the analysis.

Also also? Dyeing is fun.
0
OKT.
10
3

I'm off doing things... exciting things!

You might remember that a while ago, I posted about having a project for a reproduction of the tunic worn by the man from Bernuthsfeld.

Well, it's time to get the project into the next stage - which means I'm getting to see the original, and will be starting work on the actual tunic-making together with my colleague. So I'll be off doing exciting things to cloth for the next few days, and thus be taking a break from blogging - I will be back on October 16.

Meanwhile, I will leave you here with a picture of the fabrics that were woven for the tunic and a small mantle-like cloth:

[caption id="attachment_3429" align="alignnone" width="1632"]Fabrics woven for the Bernuthsfeld-Project - lots and lots of different ones, many of them just small patches... Fabrics woven for the Bernuthsfeld-Project - lots and lots of different ones, many of them just small patches...


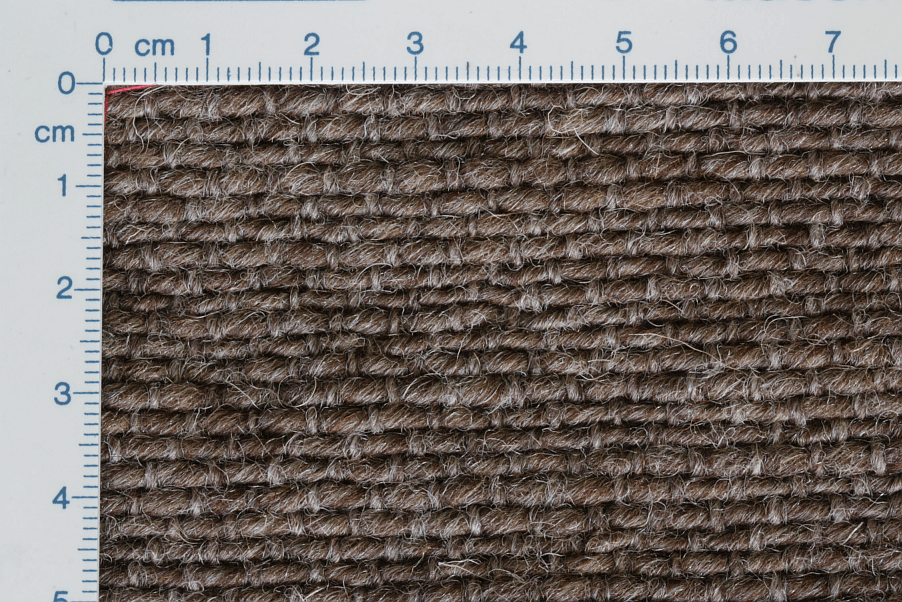
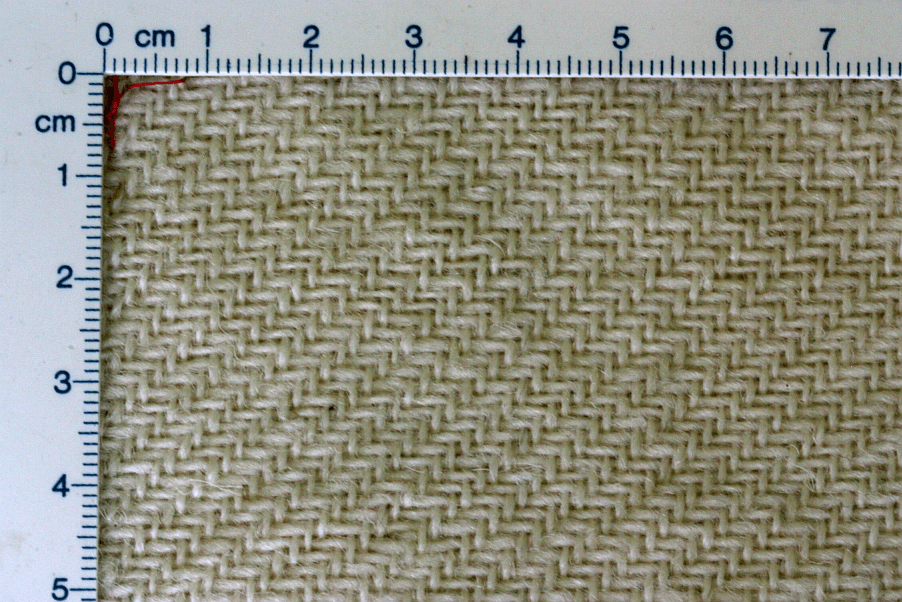
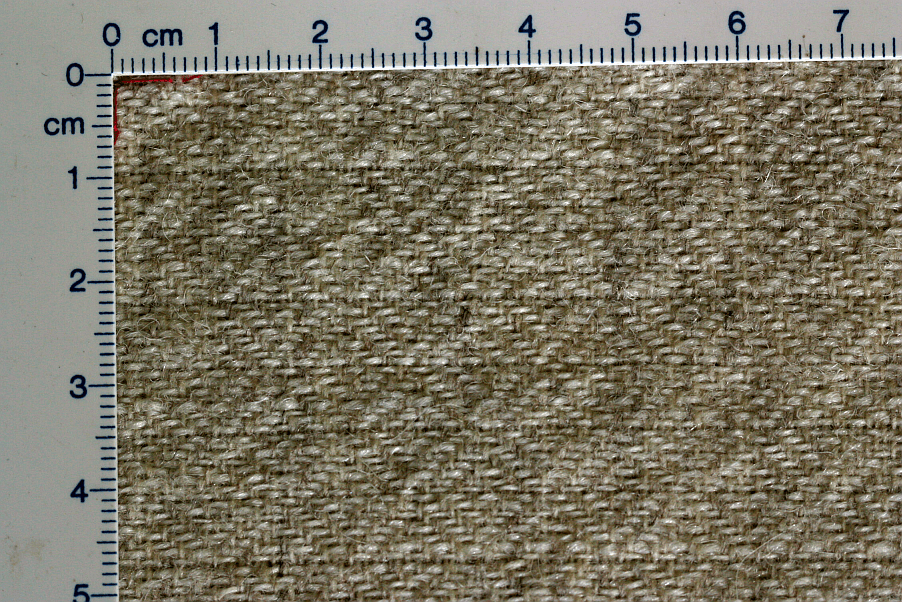
And just because I have them, here are a few more pictures of some bits, close-up:

bernie_b
bernie_a bernie_c bernie_d bernie_f
It's going to be so much fun to dye a selection of the fabrics, then cut everything up, roughen them a bit to simulate use-wear, and stitch them together into the tunic!
0
AUG.
02
0

Fabrics. Multiple.

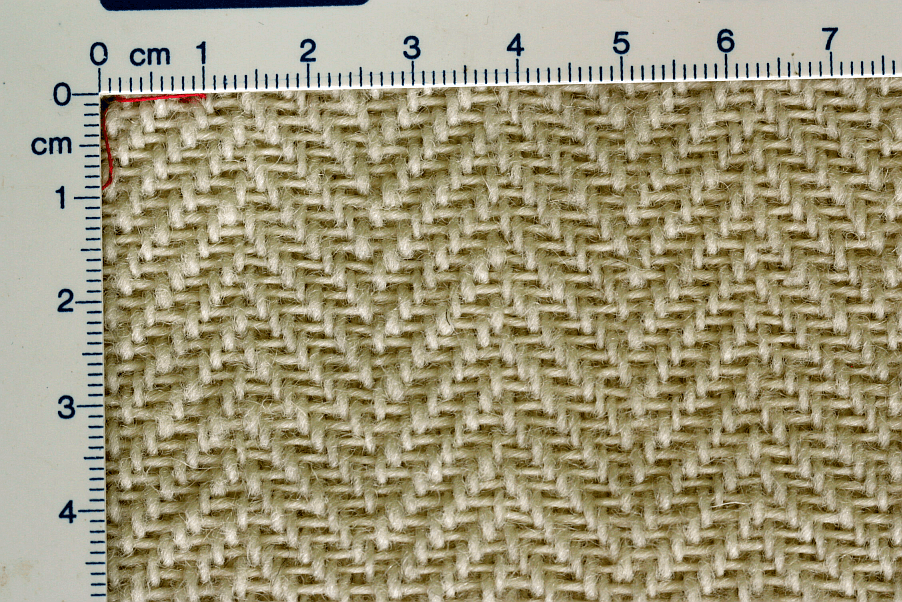
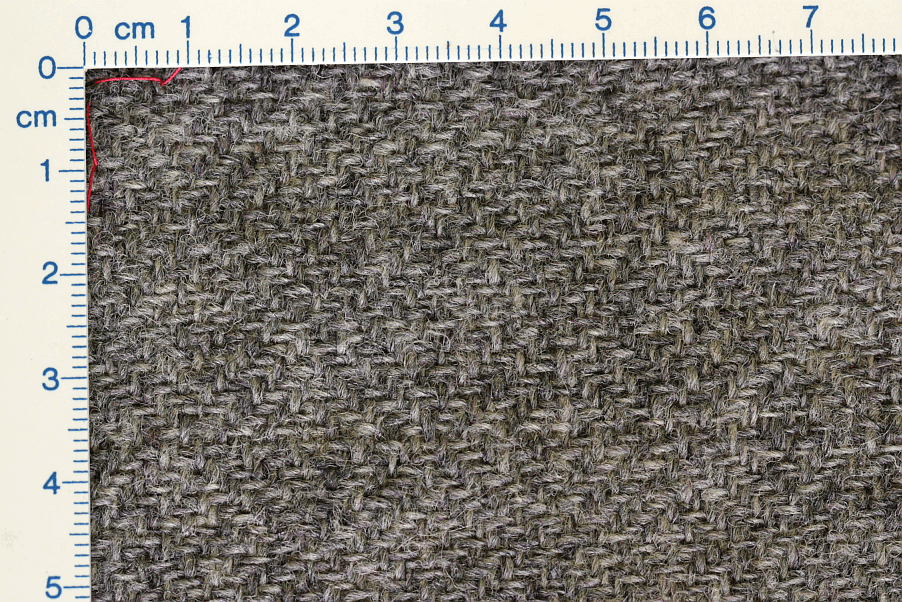
There's some more progress on the Bernuthsfeld project, though it is all but spectacular - pre-wash documentation of the fabrics, and subsequently washing, drying, and documenting them again. That documentation would mostly not be strictly necessary, but I couldn't resist the temptation to gather some additional data. Like how much shrinkage we are getting with the fabrics, and if there are clearly observable changes in how the yarns look before and after washing.

So what I did was take closeups of an  area marked with a bit of red polyester sewing thread - you can see that in the upper left corner of my measurement frame. And these are just a few of the many, many fabrics:

bernie_f bernie_d bernie_c bernie_a bernie_b
All of these will eventually be cut up and pieced together to form the Bernuthsfeld tunic reconstruction... before that, though, they will get washed and dried and have another photo op. And I'm really, really curious to see how it will come out!
0

By accepting you will be accessing a service provided by a third-party external to https://www.pallia.net/

Kontakt