")
")


Search the Blog
Latest Comments
Beatrix
Experiment!
23. April 2024
The video doesn´t work (at least for me). If I click on "activate" or the play-button it just disapp...
Katrin
Spinning Speed Ponderings, Part I.
15. April 2024
As far as I know, some fabrics do get washed before they are sold, and some might not be. But I can'...
Kareina
Spinning Speed Ponderings, Part I.
15. April 2024
I have seen you say few times that "no textile ever is finished before it's been wet and dried again...
Katrin
How on earth did they do it?
27. März 2024
Ah, that's good to know! I might have a look around just out of curiosity.
I've since learned that w...
Heather Athebyne
How on earth did they do it?
25. März 2024
...though not entirely easy. I've been able to get my hands on a few strands over the years for Geor...
Mask Making Adventures (part II)
So, as promised, more about my mask-making adventures!
In case the following things tempt you to try something similar yourself, this is probably a good time to warn you that I quite enjoy fiddly sewing once in a while. You might, too - then go ahead and do things. If you like your sewing nice, easy, and un-fiddly... try this at home at your own risk.
While we do own a (very simple, pedal-driven) sewing machine, we made our masks by hand-stitching. I just like that better, and I'm not very good with a sewing machine, and also I wanted to use medieval-type stitching to be able to join in Karina Grömer's #historicalmaskchallenge on Instagram.
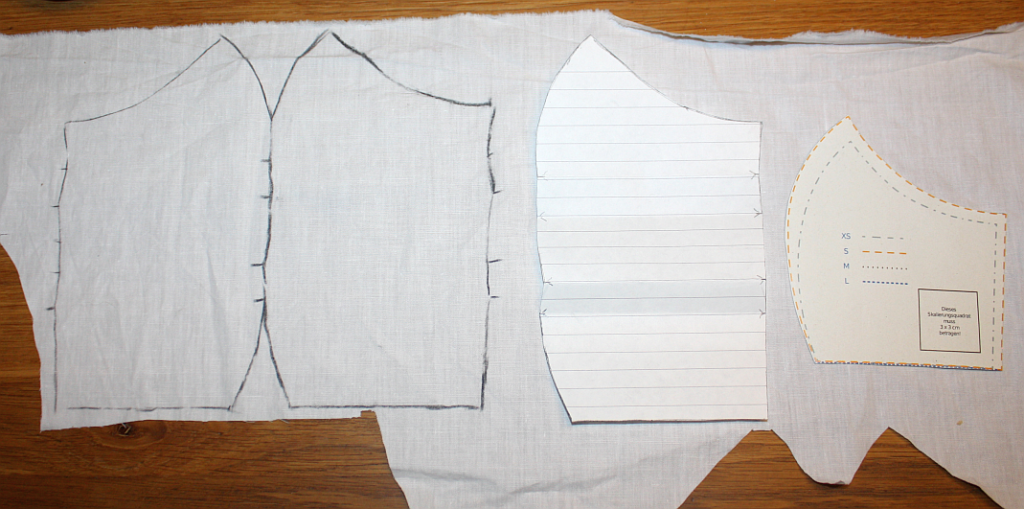
So. Mask-making, second try: This time I did test the breathability of my fabric combination first. I then adapted the pattern by making two folds, each about 2 cm deep, into a sheet of paper and transferring the shaped pattern outline to the folded-up paper. Un-fold, and there you have the adapted pattern. I made sure the folds do not overlap to avoid having a gazillion layers of cloth on the side of the mask.
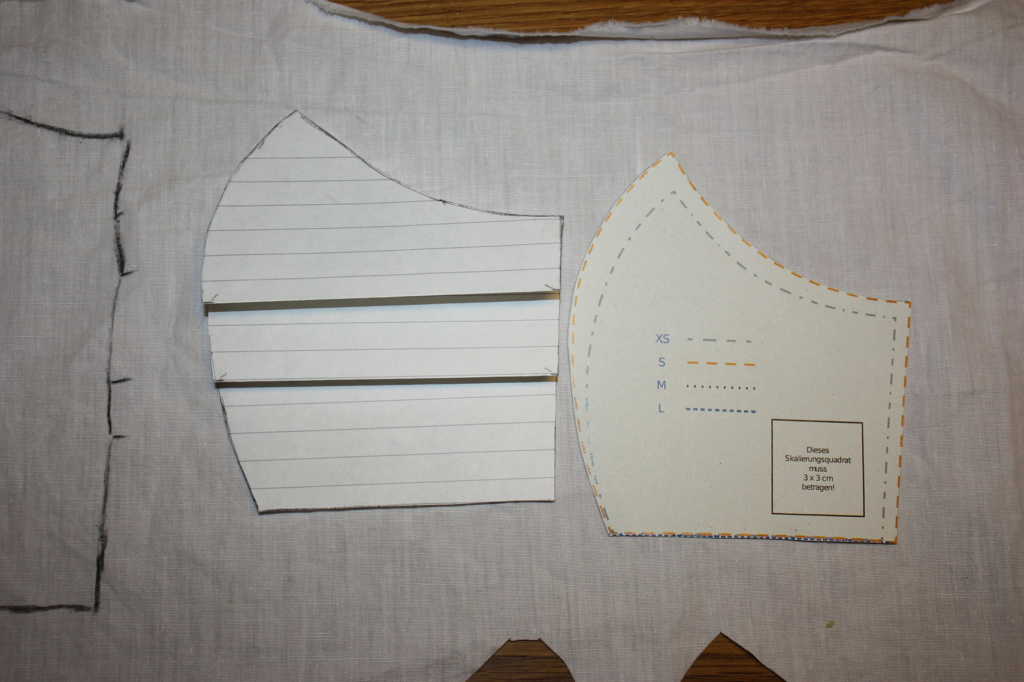
Next step was transferring this to the lining cloth. I did this by drawing around the paper pattern with charcoal (my preferred means of drawing on cloth), then flipping the paper over and drawing the second half right next to the first. The wiggly bits in the middle don't fit together, but hey, it's just guidelines anyways, right?
(Yes, there is very little seam allowance at one spot. I know how I sew, and what stitch I will use for that section, though, so I also know that I can get away with that.)
I then placed the cut-out lining on the fabric for the outside of the mask and cut that out accordingly. Consequently, there's only one piece of fabric with the mask lines drawn on it; if you want or need the lines on both, you'll have to trace around the paper pattern instead.
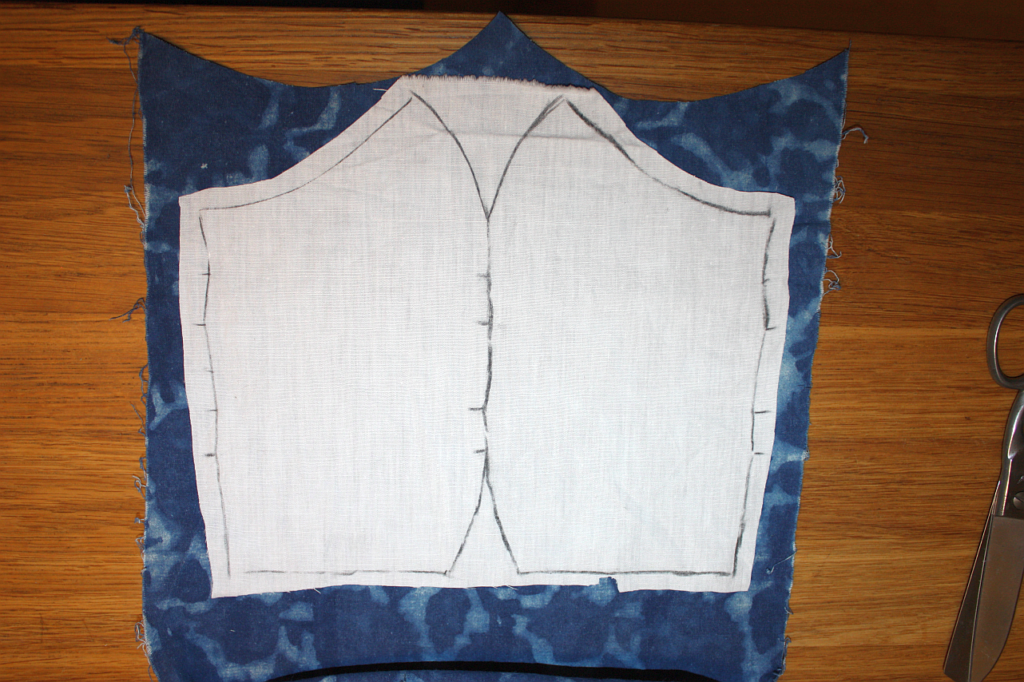
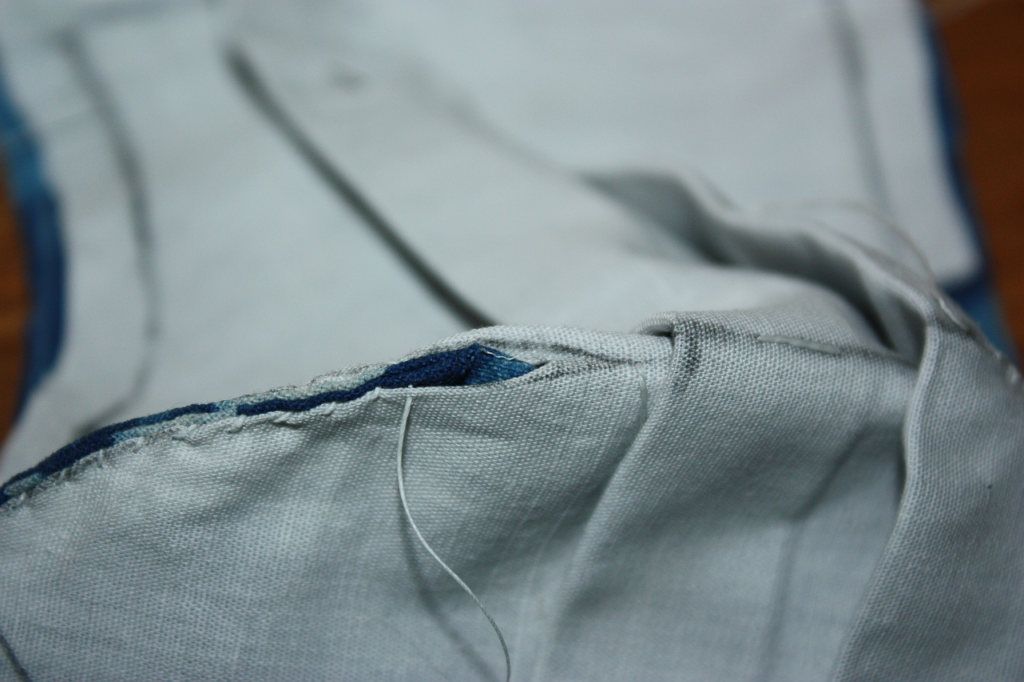
Next up was basting the two parts together to make the following things a little easier. I basted three lines, one each close to the outer edges (but far enough in so that I can fold the seam allowances to the inside) and one down the midline.
[caption id="attachment_5238" align="alignnone" width="908"]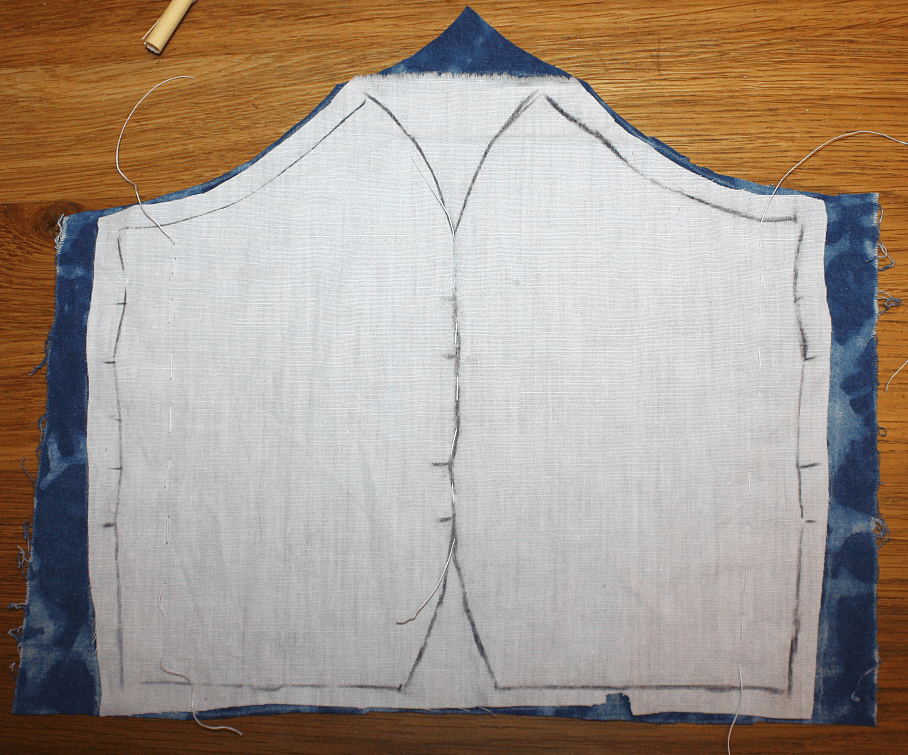 You can barely see the basting, but you can see the ends of the basting threads hanging out of the fabric on the top and at the bottom of the sides.
Once that was done, the next step was ironing in the folds. I did this after sewing on my first mask in this style, but realised it would be much easier to do it on a flat piece afterwards. There's two lines to iron in for each fold; moistening the fabric a little did help in making the creases nice and sharp, and the basting helps to keep the layers from moving against each other.
[caption id="attachment_5237" align="alignnone" width="493"] Ironing in the second crease of the first fold (and you can see the basting stitches better here)
[caption id="attachment_5236" align="alignnone" width="499"]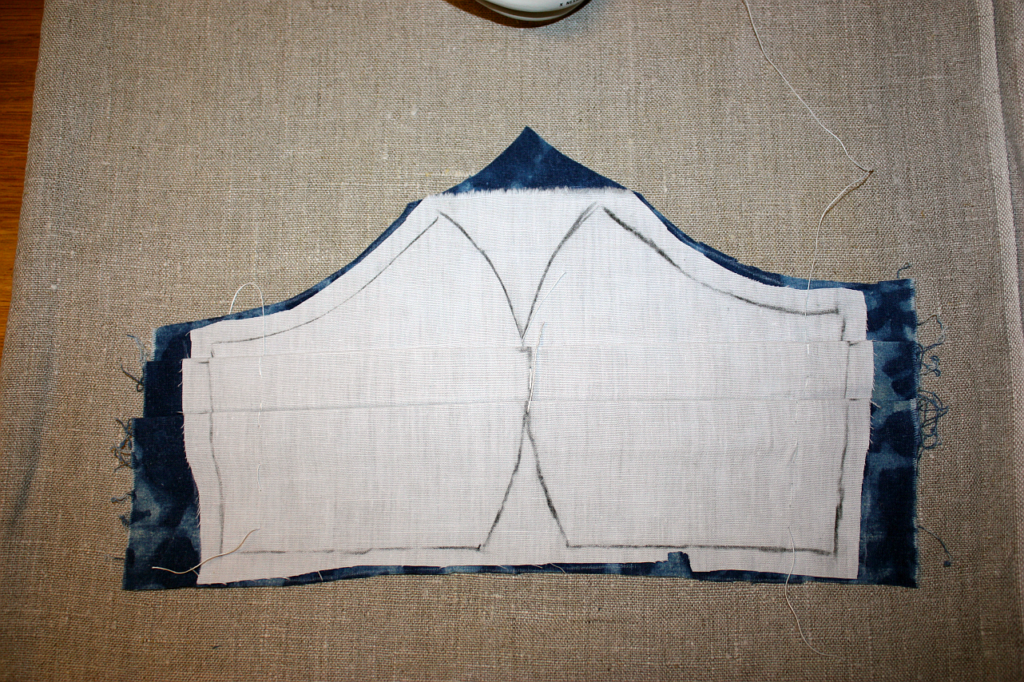 ...and all folds are folded and ironed here.
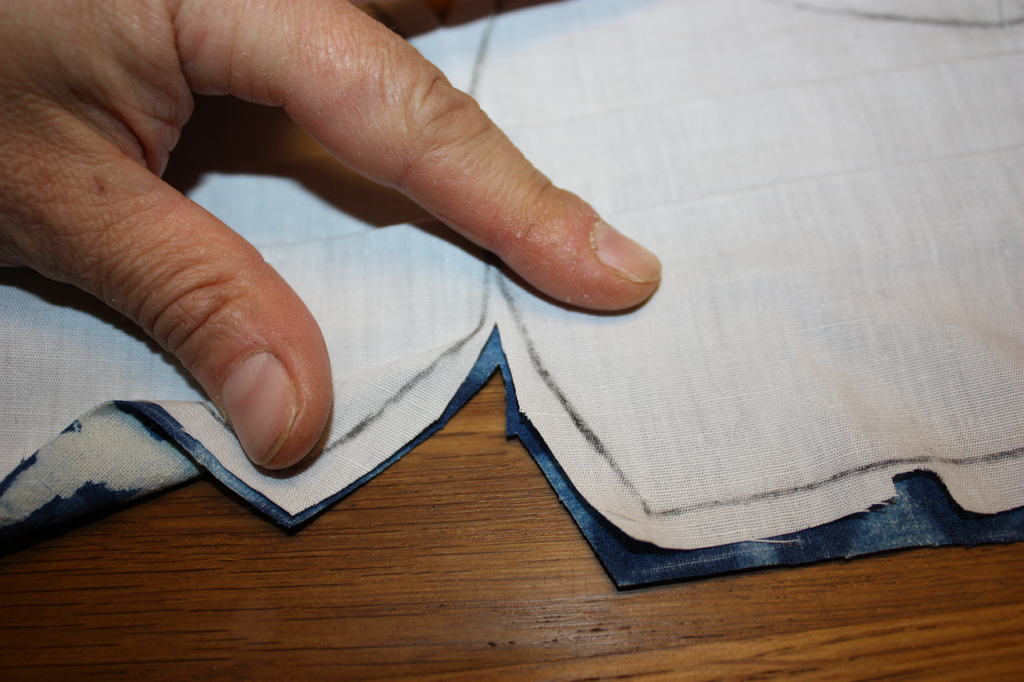
Next step: sewing the shaping bits in the nose and chin section. This is where it gets fiddly, and also where I get to use a stitch snatched from the 11th century linen shirt found in Viborg Søndersø. I cut the triangular bits, leaving a bit of a seam allowance, and lengthening the cut a bit more on the lining fabric than on the outer fabric:
Then the seam allowances are folded in, and the edges get whipstitch-varianted together. You go over the first of the four parts with the needle and through the other three, then repeat this from the other side.
[caption id="attachment_5232" align="alignnone" width="515"]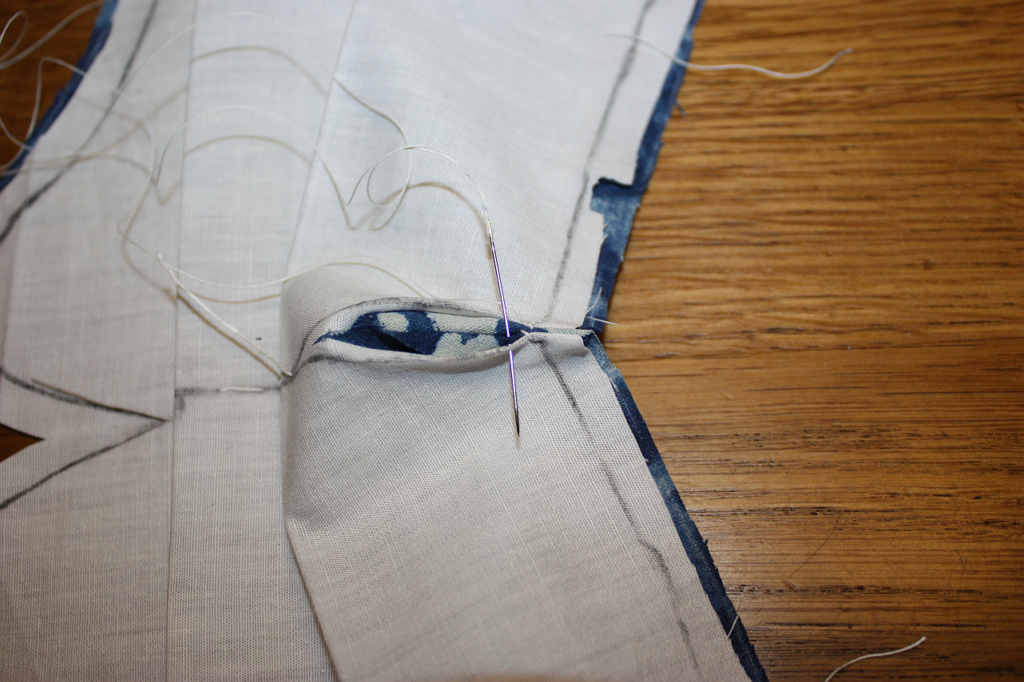 I actually went over the first two layers in this stitch and through the second two. Oops.
The result of this technique is a very neat seam that can be pressed completely flat and does not feel bulky. It's also very pleasant to work, in my opinion, so I'm very fond of this kind of seam.
The nose part gets stitched up just like the chin part. It gets fiddlier the closer you get to the end of the cut - which is why I make one cut a little longer. Once I run out of cut in the outer fabric (having the inside towards me as I work), I stitch only through the inner fabric.
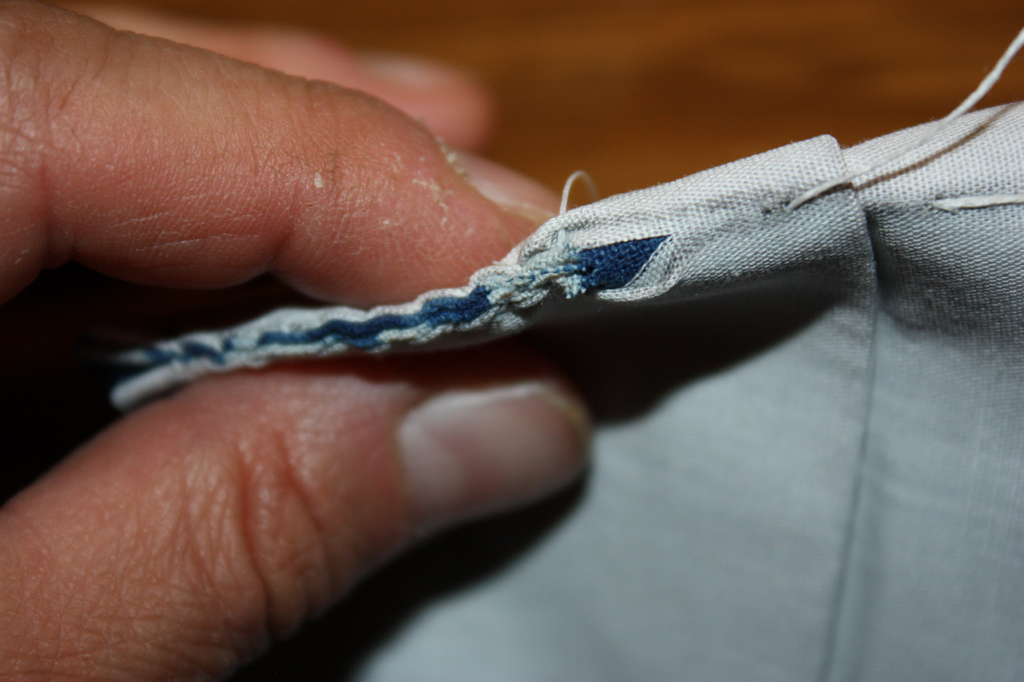
This closes up the last bit of the gap, and makes for a neat finish.
Now the mask has an actual shape - but there's a few more steps to go...

...which will follow tomorrow.
In case the following things tempt you to try something similar yourself, this is probably a good time to warn you that I quite enjoy fiddly sewing once in a while. You might, too - then go ahead and do things. If you like your sewing nice, easy, and un-fiddly... try this at home at your own risk.
While we do own a (very simple, pedal-driven) sewing machine, we made our masks by hand-stitching. I just like that better, and I'm not very good with a sewing machine, and also I wanted to use medieval-type stitching to be able to join in Karina Grömer's #historicalmaskchallenge on Instagram.
So. Mask-making, second try: This time I did test the breathability of my fabric combination first. I then adapted the pattern by making two folds, each about 2 cm deep, into a sheet of paper and transferring the shaped pattern outline to the folded-up paper. Un-fold, and there you have the adapted pattern. I made sure the folds do not overlap to avoid having a gazillion layers of cloth on the side of the mask.
Next step was transferring this to the lining cloth. I did this by drawing around the paper pattern with charcoal (my preferred means of drawing on cloth), then flipping the paper over and drawing the second half right next to the first. The wiggly bits in the middle don't fit together, but hey, it's just guidelines anyways, right?
(Yes, there is very little seam allowance at one spot. I know how I sew, and what stitch I will use for that section, though, so I also know that I can get away with that.)
I then placed the cut-out lining on the fabric for the outside of the mask and cut that out accordingly. Consequently, there's only one piece of fabric with the mask lines drawn on it; if you want or need the lines on both, you'll have to trace around the paper pattern instead.
Next up was basting the two parts together to make the following things a little easier. I basted three lines, one each close to the outer edges (but far enough in so that I can fold the seam allowances to the inside) and one down the midline.
[caption id="attachment_5238" align="alignnone" width="908"]
You can barely see the basting, but you can see the ends of the basting threads hanging out of the fabric on the top and at the bottom of the sides.Once that was done, the next step was ironing in the folds. I did this after sewing on my first mask in this style, but realised it would be much easier to do it on a flat piece afterwards. There's two lines to iron in for each fold; moistening the fabric a little did help in making the creases nice and sharp, and the basting helps to keep the layers from moving against each other.
[caption id="attachment_5237" align="alignnone" width="493"]
Ironing in the second crease of the first fold (and you can see the basting stitches better here)[caption id="attachment_5236" align="alignnone" width="499"]
...and all folds are folded and ironed here.Next step: sewing the shaping bits in the nose and chin section. This is where it gets fiddly, and also where I get to use a stitch snatched from the 11th century linen shirt found in Viborg Søndersø. I cut the triangular bits, leaving a bit of a seam allowance, and lengthening the cut a bit more on the lining fabric than on the outer fabric:
Then the seam allowances are folded in, and the edges get whipstitch-varianted together. You go over the first of the four parts with the needle and through the other three, then repeat this from the other side.
[caption id="attachment_5232" align="alignnone" width="515"]
I actually went over the first two layers in this stitch and through the second two. Oops.The result of this technique is a very neat seam that can be pressed completely flat and does not feel bulky. It's also very pleasant to work, in my opinion, so I'm very fond of this kind of seam.
The nose part gets stitched up just like the chin part. It gets fiddlier the closer you get to the end of the cut - which is why I make one cut a little longer. Once I run out of cut in the outer fabric (having the inside towards me as I work), I stitch only through the inner fabric.
This closes up the last bit of the gap, and makes for a neat finish.
Now the mask has an actual shape - but there's a few more steps to go...
...which will follow tomorrow.
Comments
No comments made yet. Be the first to submit a comment