Latest Comments

Guest - Aislinn Dyestuff Citizen Science.
09. Oktober 2026
This is a great project. I look forward to the results. Thanks for letting us know.
Guest - Aislinn Time for...
09. Oktober 2026
Looks delicious!
Guest - Katrin Sprang Discussion
18. September 2026
Hi Rachel, I have looked for more photos of you, but that was not very successful. I found a link on...
Guest - Beatrix Sprang Discussion
15. September 2026
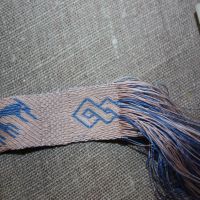
That lozenge pattern element is not a photograph, but a scan. So it should be to scale. But I pinned...
Guest - Katrin Sprang Discussion
15. September 2026
I was not referring to Rachel's reconstruction (is the reconstruction you refer to the one photograp...
SEP.
13
0

Random Linkage.

Here are some random links for you:

German article about dye analysis in textiles. And a second one about the same team and topic.

At the Unperfekthaus in Essen, there's a tablet weaver meeting on November 16 - read more about it here if that sounds like you want to join in.

An early medieval whorl with inscription has been found in Poland.

The Textile Research Centre Leiden has an exhibition about socks and stockings that will run until December 19.

 
0
SEP.
12
0

A few paddling pics - part II

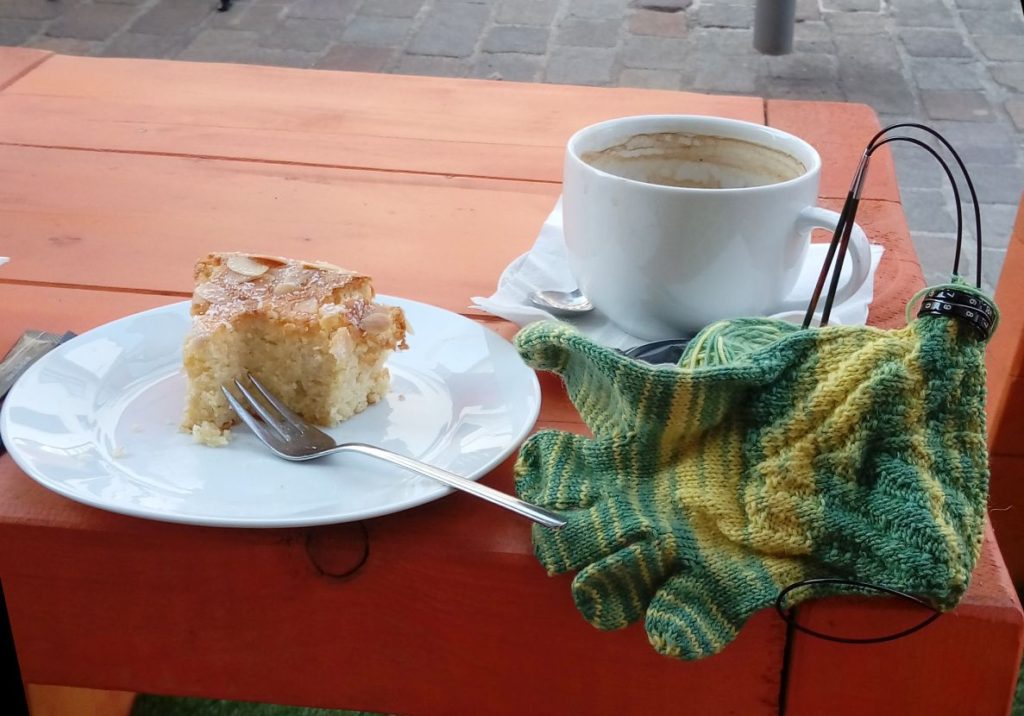
There was, of course, not only paddling and looking at scenery and architecture. There was also hanging out to relax. And, importantly: There was coffee, and cake, and knitting.

[caption id="attachment_4817" align="alignnone" width="640"] Cake, coffee, and knitting socks in Torgau - not my knitting, mind you.


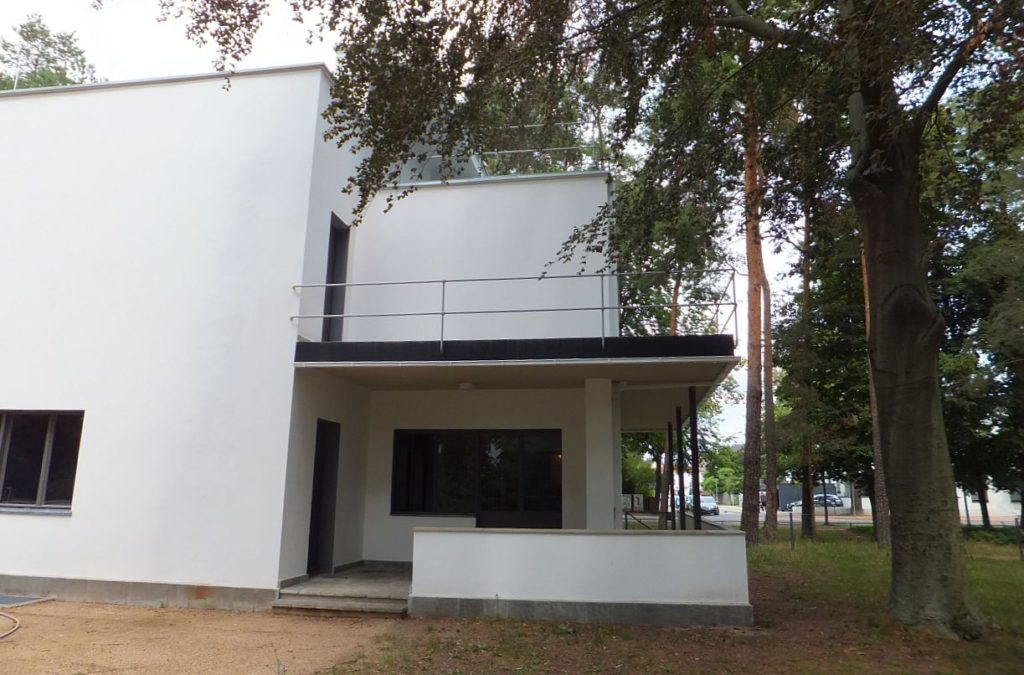
With 2019 being the 100th anniversary of the Bauhaus, and the Most Patient Husband enjoying this style of architecture (I do, too, by the way), of course we had to plan enough time for our visit to Dessau. We did a little walk around the city and then went to visit the houses, which are partly turned into an info centre and partly into a museum, so you can get an impression of how they looked when they were in use originally:

[caption id="attachment_4816" align="alignnone" width="640"] Meisterhaus in Dessau


That was a very interesting part of the journey!

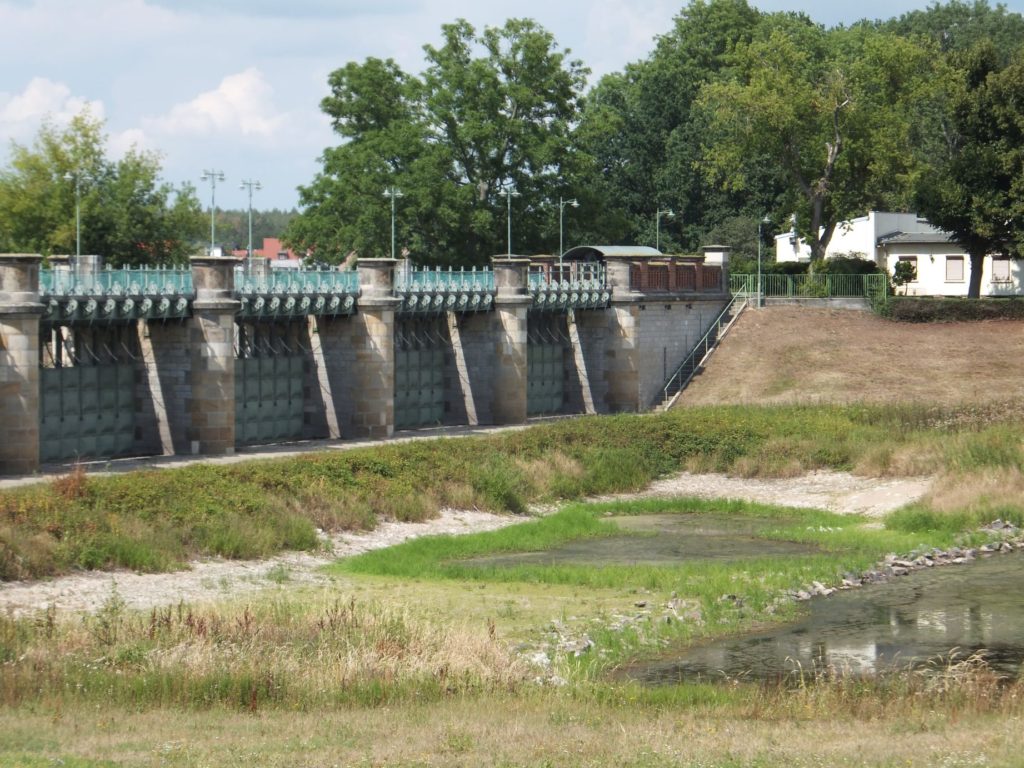
On the next day, we came back onto known territory: last year, we ran out of Saale before we'd run out of holiday time, so we continued down the Elbe to the outskirts of Magdeburg. This time around, though, we knew about the Pretziener Wehr before having paddled past it - and we took a little turn off the river into a flood canal to visit this very impressive weir.

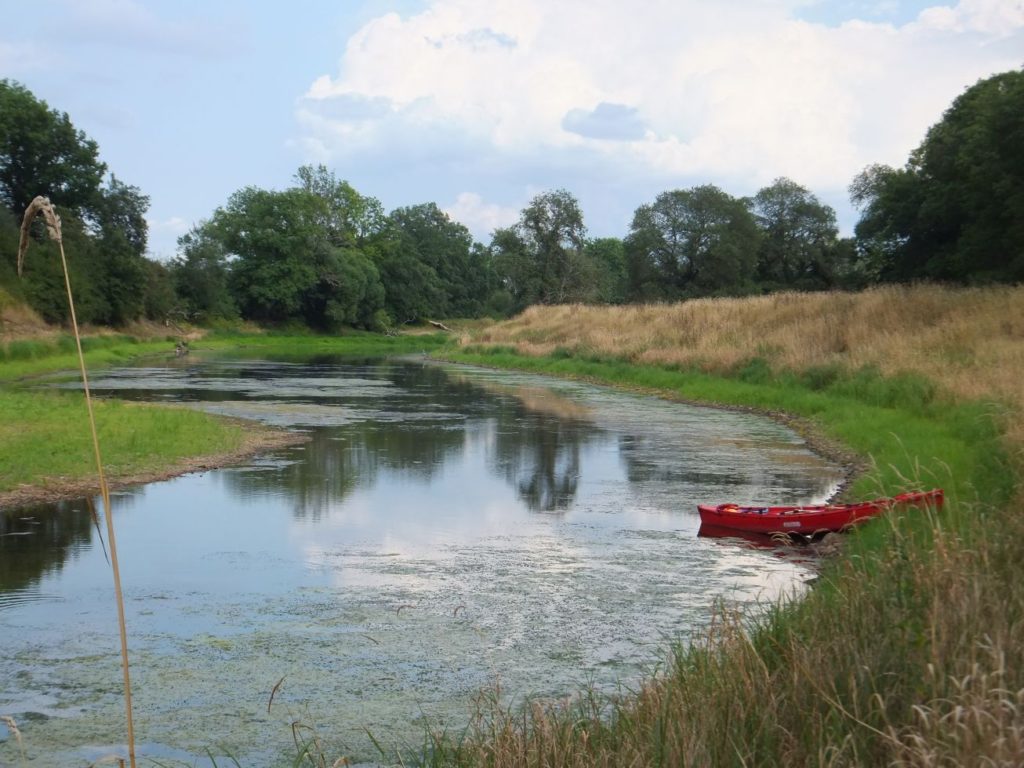
We got stopped by the water levels, though - even for our canoe, it was too shallow for proper paddling. So we left our trusty Serenity and had a little walk.


Which was absolutely worth it. This weir was built in the early 1870s, and it is still in use, having been refurbished (somewhere between conserved and reconstructed) between 2003 and 2010.

[caption id="attachment_4815" align="alignnone" width="640"] Pretziener Tafelwehr


You can read more about the weir (in German only, unfortunately) on the Wikipedia page - and you can watch a video of it being opened during a flood in 2011 here.

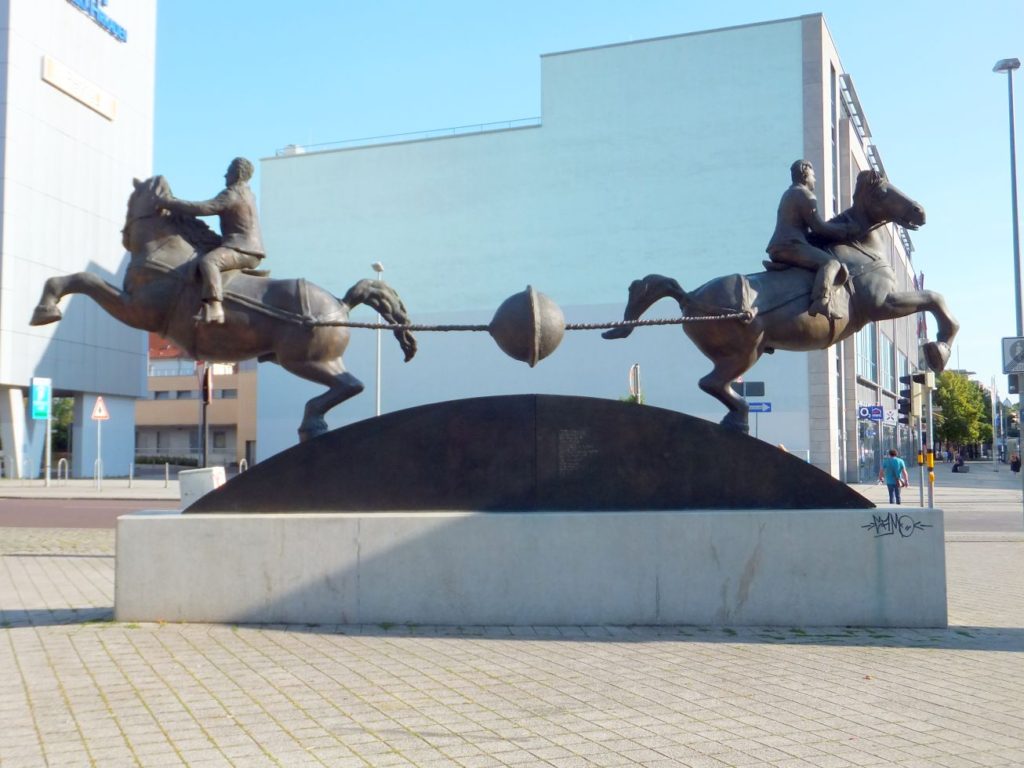
Just like last year, we ended our trip in Magdeburg (though this time, we paddled to the other end of the city before stopping). We had a bit of a tour around, especially looking at the Otto von Guericke memorial spots:

[caption id="attachment_4813" align="alignnone" width="640"] Otto von Guericke and the Magdeburg hemispheres.


Since we were there, and it was on, we also visited a pottery market on the plaza in front of the cathedral. There may have been some buying of pottery (very restrained, though, knowing you have to carry it all home yourself makes restraint rather easy)

... and then our tour was over, and we cleaned and dried and folded and packed everything again.

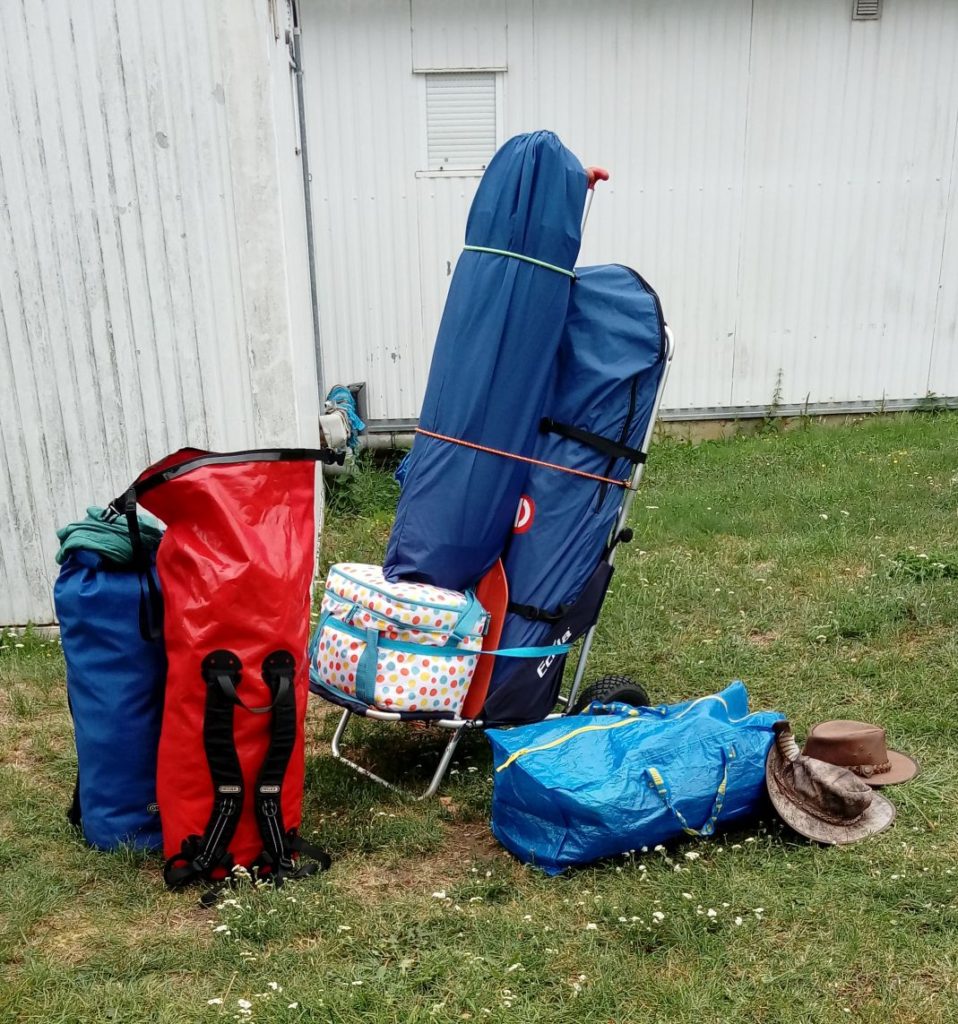
[caption id="attachment_4811" align="alignnone" width="640"] Ready for the trip home... all packed up.


This time, we did a better job packing than the trips before (you learn as you go...) and getting through the train aisles was not a problem anymore. It's still a lot of luggage to handle, and you still need luck to have enough free space to put it, but that we did have and our ride back home went smoothly enough.

It's about 80 kg of stuff taken all together, by the way, with most of the weight being carried on the trolley thing - the boat, the paddles, the tent, and the kitchen equipment including some food. That makes the bulk of our stuff; the two backpacks are at about 15 kg each, and the stray blue IKEA bag contains our personal flotation devices plus some lighter-weight odds and ends, plus things that we need to have handy during the trip.

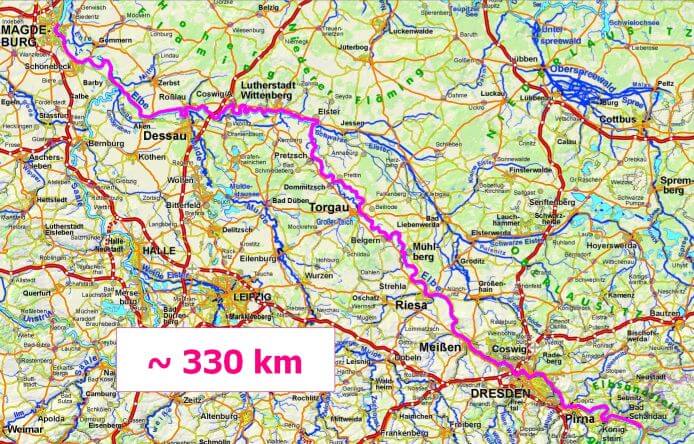
[caption id="attachment_4812" align="alignnone" width="694"] Our complete tour: a bit more than 330 km in 11.5 days of paddling.


It was a wonderful tour, and I loved being able to just pack up everything, hop onto the train and go home - no annoying fetching of a car from the start point of the trip. Which would have been another day, almost, as well: Going back by train all the way to Schmilka and then by car all the way to Magdeburg, and then home. It was definitely one of our better ideas to get a folding canoe!
0
SEP.
11
0

A few paddling pics - part I

Before the summer is all over, and the holiday pics get buried in the digital stack that is ever growing, here is how our paddling trip went.

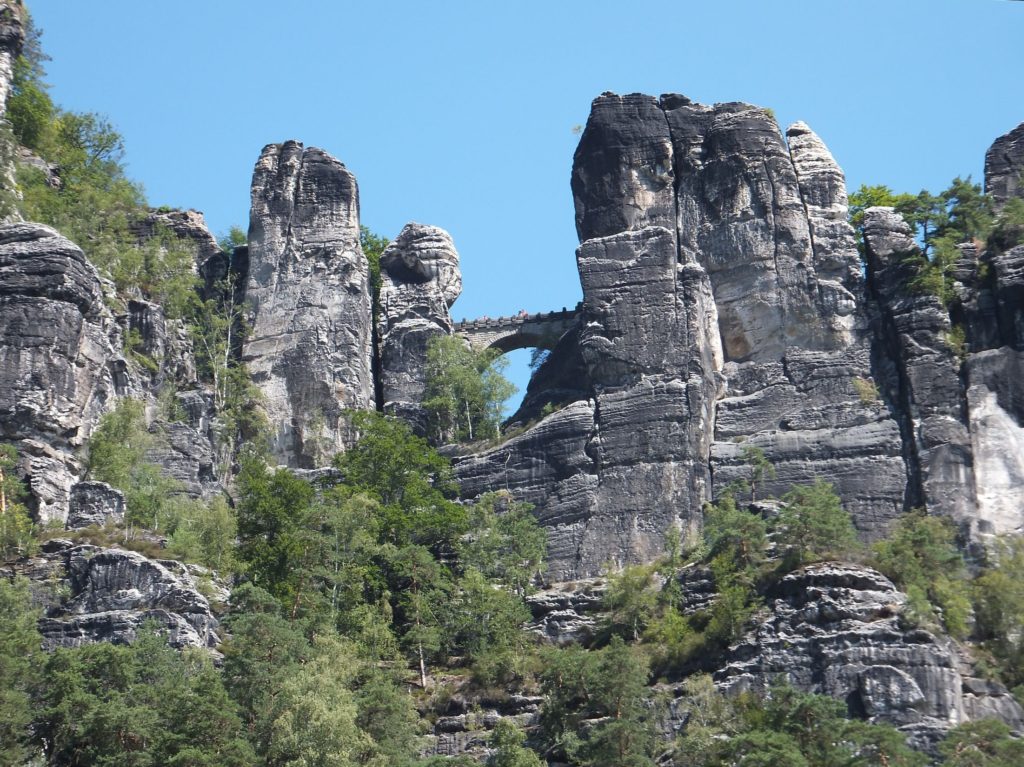
We started out on the Elbe river close to the Czech border, in Schmilka, and got to enjoy the spectacular scenery there:

[caption id="attachment_4821" align="alignnone" width="640"] From Königstein to Pillnitz - Bastei near Rathen


We had very, very sunny weather, and it was really dry the weeks and months before, so just like last year on our Saale trip, water levels were very low. Which means that we had the river mostly to ourselves, no commercial vessels at all - as the water in the river was too low for them.

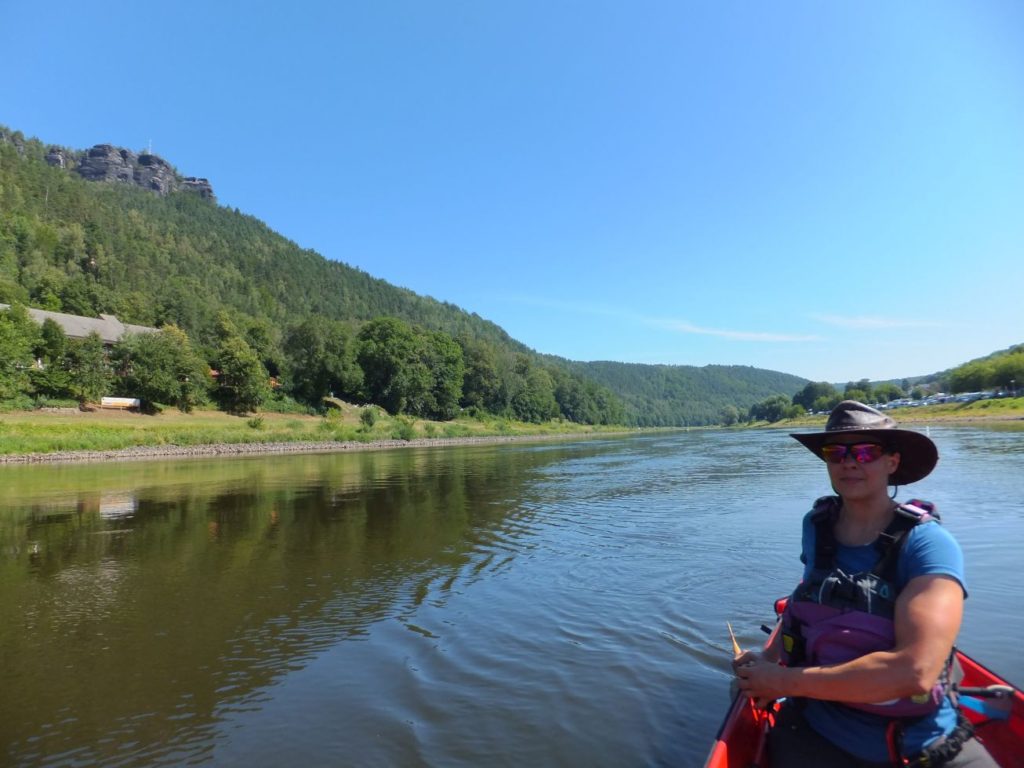
That made for very relaxed paddling wherever we wanted on the river, which was nice for us. The sunny weather also meant applying sunscreen generously, trying to get an early start for the longer days, and wearing sunglasses and hats as protection. So this is me, "hard" at work paddling:

[caption id="attachment_4822" align="alignnone" width="640"] Just taking out the paddle after steering...


We worked our way down the river, enjoying every bit of it. On some days, we really worked our way down - there was a headwind quite often. One time we stopped paddling for a short break and stayed completely in place... on a river that was technically flowing. (Not as fast as it would have been with higher levels, but still.) The wind was strong enough to sort of anchor us in place that day...

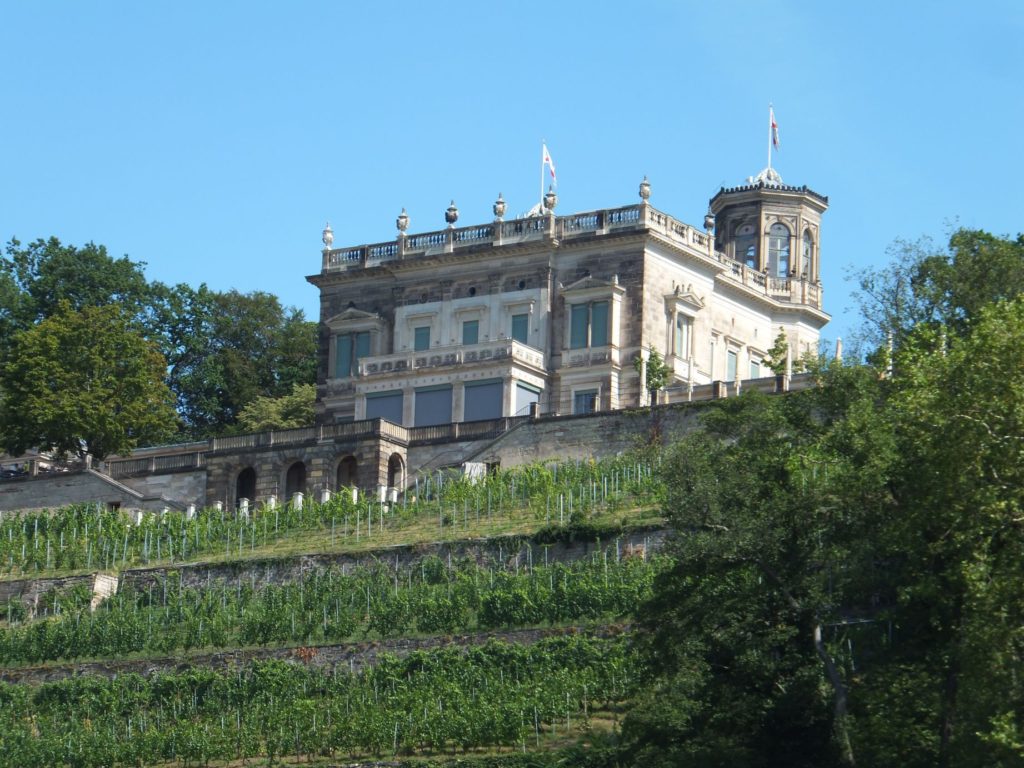
[caption id="attachment_4820" align="alignnone" width="640"] Wine grows here. As do beautiful buildings.


There was a lot of beautiful buildings as well - usually in scenic places on the higher places, right on the shoulder of the river valley. Wine grows in this area, and we often saw vinyards and wineries.

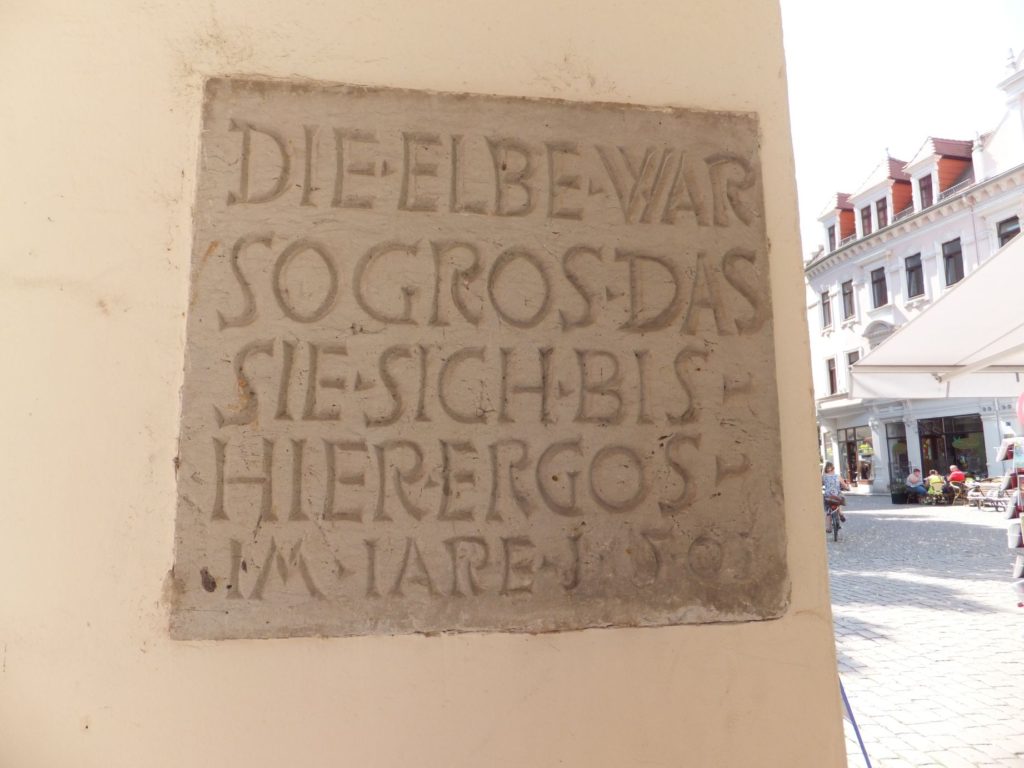
We made a lot of sightseeing stops along the way, of course - many interesting places with a lot of history are strung along the Elbe. One of them is Meissen (where we did not visit the porcelain manufacture, though, even though I come from a porcelain town - too far out from the river, and too many other things to see). While we had these very low water levels, we also saw marks from past high levels during floods. 2013 was a bad flood year, but in Meissen, we also found this mark from 1501, which was at about the same height:

[caption id="attachment_4819" align="alignnone" width="640"] High water mark at a building in Meißen - dating to 1501, when one of the bad floods of the Elbe occurred.


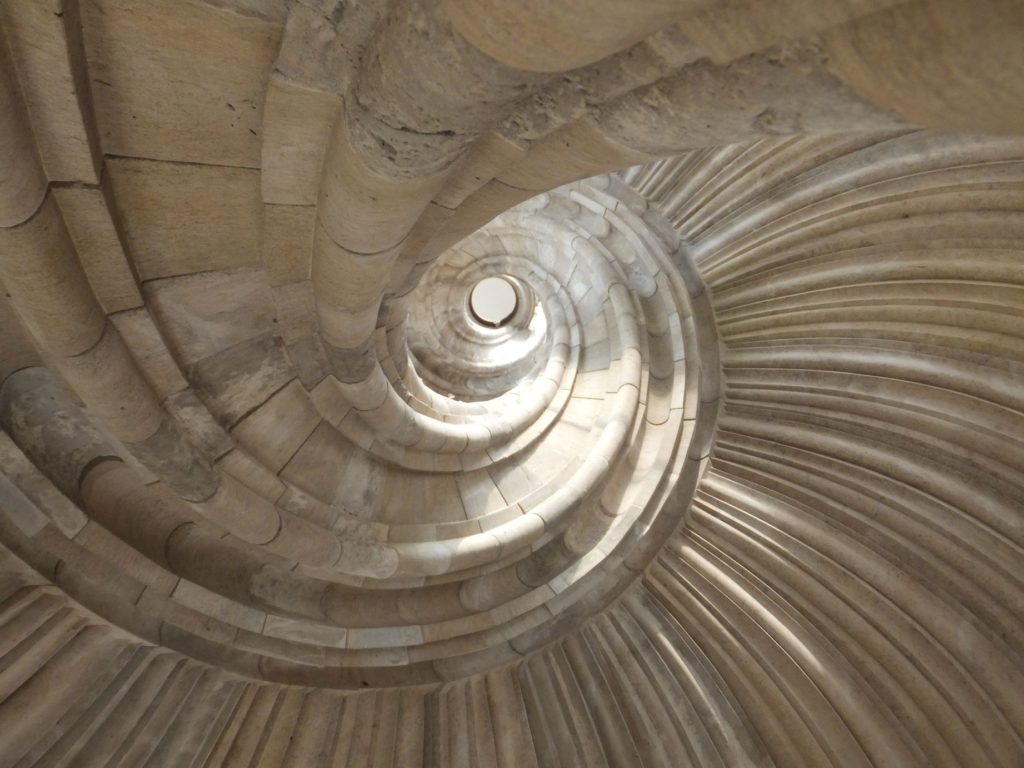
Another place where we stopped was Torgau, which was also well worth visiting, for the spectacular staircase in the castle alone - called "Großer Wendelstein":

[caption id="attachment_4818" align="alignnone" width="640"] Wendelstein in Torgau


One of the fairy tale film productions that the former GDR was famous for was filmed here: Sleeping Beauty. The actress is in one scene shown walking down these stairs...
0
SEP.
10
0

Argh Windows.

Sorry for the blog silence yesterday - I spent most of the day off and on in a chat with Microsoft support, trying to solve a mildly annoying computer problem that I've now had for a while. It's several different smaller things (update is not working, and I get an erroneous "you need to activate your windows" popup thingie, and the troubleshooter cannot start because it feels so troubled). None of them really keep me from working, but taken all together, it just adds together until it did not feel so comfortable anymore.

So I finally called the support hotline, and things happened with the first of the issues which I then thought resolved, but it turns out it isn't - and now, after a good while of trying all kinds of different things, it does seem as if the trouble is somewhere deeper, and as if I'd need to do a more or less clean new install of the system, and that is something that I frankly don't want to bother with right now.

Which means I'll be clicking away popups periodically, and maybe try one or two other things that might or might not help with my update issue. Sigh. First things first, though - there is a stack of stuff that should have been done and dealt with yesterday, among them  some Forum organisation (and I'm getting all excited about that, there will be so many interesting things!), so I'm sitting here, fortified with a cup of coffee, helped by a purring cat curled up between my forearms and the laptop, and ready to go...
0
SEP.
06
0

More about lace chapes.

I wrote a bit about my lace chapes project before the summer break already, but I think it's time for another bit of info on them. So for those of you in need to catch up: Lace chapes, historically speaking, were the equivalent of the aglet on shoe laces. They both protect the end of the lace against fraying and make it easier to thread the lace through a hole. When holding clothes together, such as doublet and hose, easy threading and un-threading is a very convenient thing.

Today, most of the lace chapes (or aglets, or aiglets, depending on who names them) that are sold as supplies for Living History are more or less cone-shaped, rather large (with a diameter of, usually, about 5 mm at the top), and often of a form more frequently found in the early modern age than in the Middle Ages. They are usually bought separately from the lace and then attached by sewing the lace to it through a pair of holes on the top. Here's a typical example, 26 mm long and 4.7 mm wide at the upper end, taken from the shop outfit4events.com:


The modern chapes you can buy always have a hole to attach them to the lace - obviously necessary, since they are sold empty.

Finds of medieval lace chapes sometimes have these holes, sometimes not. In the cases where there are holes, we often still have their original filling - which was not thread, but a rivet. Medieval chapes are also much smaller - often only 2 mm in diameter - and made from very thin material.

Since I've been asked time and again whether I could also offer "proper" medieval lace chapes, I finally got "Project Chapes" underway. I did some research, I asked some colleagues for info and good pictures (thank you again for your support, Beatrix and Gary!), I found a metalworker who said he'd be willing to make chapes. My plan was to have them made, then offer them both fitted to a lace and separately (with rivets to mount them the proper way), just like the other shops do.

Well. There's plans, and there is reality. The metalworker that I contacted was, basically, willing to make the chapes - but he would have to ask a much higher price than would be feasible for me to actually sell them on. Part of this was that when we did the tests together, we did not have the proper (very thin) brass sheet material, which did make a lot of a difference.

So in the end, I found the proper material, I sat down, and I did a few tests myself. With results that make me very happy, but - again - sort of shredded my plans...

Making lace chapes is like so many other craft tasks. If you have the proper materials, the proper tools, and you know which steps to do and how to do them, it is not a big deal. It took me a while to find out what I have to do to get proper results, and to get the tools together that will help me do the job. Especially the riveted versions are still rather fiddly, and I don't have all the proper materials, but I am getting there, slowly.

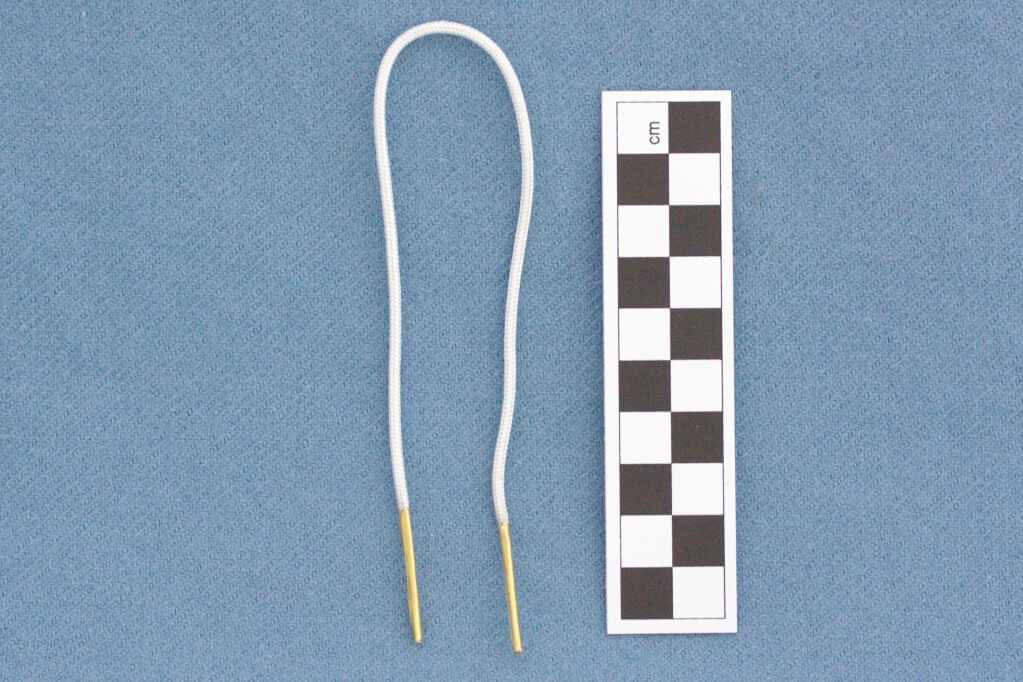
What I found out is this: You really don't need a lot of material, or thick sheet. The original chapes were often made from 0.1 mm thin brass sheeting, and that works wonderfully. The trick for making proper chapes, however, is that you have to work the chape directly onto the lace. There's no "making, then attaching" - it's both at the same time. Which also explains why in many cases, no rivets are needed; the chape is hammered around the lace so tightly that it will stay. In addition, the upper edge gets a slight faceting inwards at the end of the process, securing the chape even better. (It took me a good while, by the way, to fiddle out how best to do this faceting.)

[caption id="attachment_4804" align="alignnone" width="1023"] Chapes on a silk lace, braided, 26.5 cm length overall - that is the length from a find from London, and about exactly what you need to make the half-bow knot often seen on late medieval images that holds tunic and hose together.


This means, however, that I will not sell lace chapes on their own - because that would be useless. In theory, I could sell chapes with holes and accompanying rivets, but riveting these things is such an incredibly fiddly task that it would only result in disappointed, frustrated customers (and that would in turn disappoint and frustrate me). Also, getting the band into the empty metal sheet is hard, and the tighter the fit (which is what you want, the harder it is.

The way I see it from my trials now, if the lace in question is sturdy enough, it is sufficient to hammer the chape around the lace end, and be done. In cases where the lace is rather "untrustworthy", or when you want extra security, it's possible to add a rivet to the whole thing. I haven't got a real idea of when rivets were usually added yet, but I can definitely say that they are not always necessary, and that they are very, very fiddly to insert.

 
0
SEP.
05
0

Arrows vs. Armour!

Patchy internet connection makes for late blogging... but at least I have something interesting for you: a video about testing medieval arrows and their success at breaching armour.

Enjoy!


0
SEP.
04
6

About Yarns.

One of the questions I regularly get is about yarns - specifically about the use of plied yarns. As in "Did they really use single yarns in the Middle Ages for weaving?"

This is a fascinating question, because it shows how strongly we are influenced in our perception and our thinking by what we are used to. Most of the yarns that we can find in shops for crafting are plied, at least two-ply (that is twisted together from two single yarns, for those of you not familiar with that stuff), more often with more plies than that. Typical knitting yarns have four or even six singles plied together - so plied yarn is what we are most familiar with.

If we venture into weaving, most modern machine-spun yarns are rather soft, and not very strong. Consequently, modern hand-weavers use plied yarns for their weaving, at least for the warp. Many machine-woven fabrics do still use singles, but this is not obvious unless you look very closely at the weave, so it is outside our normal perception.

All this, taken together, leads to many people assuming that plied yarns were used for everything hand-made, like they generally are today. This, however, is not the case at all, and the "why" becomes clear once we think about the processes involved.

After preparation of the fibre - by washing and combing or, later in the Middle Ages, carding, the spinning process begins. This is a time-consuming thing, and there is a limit to how fast you can spin. (Yes, even if you learned how to spin when you were very young - just like there's a limit to how fast a given person can run. Or knit. Or cut up carrots. This will be different from person to person, depending on their talent, their practice, their current form, and how focused they are, but at one stage, everyone reaches their personal speed limit, and that's it.) Personally, I get to about 60 m per hour with a drop-spindle and distaff spinning short suspended, and I do consider that a decent speed yet still sustainable for a longer period of work.

A fabric of about 10 threads per cm in both warp and weft would be considered a middling-quality fabric in most archaeological textile terms. For an equally middling-quality garment, I would calculate roughly 3 m in length at 1 m in width, enough for a tunic for a full-grown man or a floor-length dress for a smaller woman. (These are all rough estimates here, and numbers have been chosen to make for slightly easier maths. Because. You know. Maths.)

To weave this amount of fabric, we would need a warp that is a bit longer than 3 m, as ther will be some loss at the top and bottom, plus there's always some shrinkage at the end. So let's settle for 3.5 m length when we warp for our fabric; that means 3.5 m times 100 cm warp width times 10 warp threads per centimetre... makes 3500 m of warp yarn. Three and a half kilometres. With my spinning speed, that would be close to 60 hours pure spinning time. (Realistically, you would add to this the time needed to skein the yarns, and also to dress the distaff whenever the fibre has been used up, so we'd be higher than that - but for our simple example, we'll leave it at this.)

Now we have the warp. The weft will use almost the same amount of yarn, as we have 100 cm fabric width times 300 cm fabric length plus say 20 cm to account for shrinkage times 10 threads per cm of length - so we'll be at about 3200 m yarn for the weft. Again, that's close to 55 hours of work.

We're now at a spinning time count of roughly 115 hours. For weaving with singles. Imagine you'd want to weave with two-ply yarn now... this means you would have to spin twice as thin (which will definitely not be faster, rather it will be slower, due to a number of reasons), and twice the amount. And then, in the final step, you will have to ply the yarn. Let's just assume that everything is done at about the same speed, for ease of calculation - now we have not 115 hours of work, but 345 hours. Or, if we break it over into a modern 35 hour week, that would be 9 weeks and 6 days instead of 3 weeks and 2 days. Both, by the way, only if you actually spend every single second of every day's work hours at your task (and we all know that this is possible, right? Happens all the time everywhere, I'm sure...).

So obviously, plying was not something done all the time, as it would have eaten up all the time. Whenever it was not really necessary, it was not done, and it's not really necessary for weaving fabrics, which would have been the bulk of textile production. There are techniques where you do need to ply for things to work properly - sewing, nalbinding, knitting, tablet weaving, some forms of braiding - but for normal weaving, saving the time and effort would have been a no-brainer in most cases.

Let me get back to the question that started all this. What is really intriguing about this question is how much our modern experience colours our perception of what is normal, and how things are generally done. With the yarn question, it becomes pretty obvious that this is the case, as things are very clear here. There are other topics, other areas, though, where it is by far not as conspicuous. For instance, industrialisation and mass production has also formed our expectations about how things look or should look - which is, often, "totally identical". If you have mass production not by machines, but with a human element in them, there will be differences between the individual items, and that is something we are not used to as much anymore.

An even more tricky aspect of this? We are very much used to most of our daily life things being mass-produced. They are affordable, or cheap, in most cases. Things not mass-produced, but made by hand, can be more expensive, though they are not necessarily that much pricier. Our perception that they will cost more, however, can keep us from even inquiring after a craftsperson about how much a custom-made item would cost. It also narrows our own imagination on what is possible to make. I remember a blacksmith friend telling me about customers coming into their shop to order a fence, asking for a catalogue with the patterns available - and they were astonished, and a felt a little swamped, when they were told that there is no necessity to keep to the samples shown, they could also make up their own pattern ideas.

Things like this, living in the back of our minds, reinforced by our daily life objects, are harder to trace than where the plied-yarns-are-the-only-thing thing comes from. They are, however, just as likely to skew our picture of things, and our perception, which can be rather harmful when trying to reconstruct past industries or societies. Once more, watching one's own brain think and asking some questions about where a concept comes from is definitely a good thing!
0

By accepting you will be accessing a service provided by a third-party external to https://www.pallia.net/

Kontakt