Latest Comments

Katrin Hieroglyphs.
23. Februar 2024
Yes, that would sort of fit that aspect - but you can also go from bits of woods to sticks if you ar...
Bruce Hieroglyphs.
23. Februar 2024
I think the closest English equivalent would be 'Down the rabbit hole'. It has one entrance (No, not...
Harma Spring is Coming.
20. Februar 2024
I'm definitely jealous! Mine disapeared except for one pathetic little flower. But the first daffodi...
Gudrun Rallies All Over Germany.
23. Januar 2024
Vielen Dank für den Beitrag. Ja, wir müssen darüber reden, gegen das Vergessen. Zum Glück haben mein...
Anne Decker Aargh.
17. Januar 2024
This is less likely to have an effect on your personal samples as you likely wrap the same way for a...
JAN.
26
1

Pin-making.

It's been a good while now since I've run out of the brass pins in the shop, but somehow there was this and that and things didn't line up, and I never got around to sitting down and making new ones. 

Today, though, I really felt like doing something practical again for a bit, after all the website and writing things, and I got out the metal-working supplies and started a bit of pin-making.

It begins with preparing the heads, which are made from wrapped wire, then cut into bits: 

Then shanks are cut and hammered into the little head coils, and then I do some more hammering to make sure the heads are decently stuck on the shanks, and then the annoying bit starts: sharpening the tips.

The photo shows half-finished tips on some pins. I'm still not completely happy with the workflow in that part of the process, but at least I'm getting pins already. Some more grinding, and some more testing of possible methods to come... and soon, pins to come back to the shop. Yay!

0
SEP.
22
0

Cascading Stuff, Keywords, and Controlled Vocabulary.

You probably know this phenomenon - you have to do something to some stuff somewhere, and then you start doing it, and then you realise that it would be smart to do something else to something connected somewhere else first. And then... it might just cascade on from there.

Sometimes, that is all well and good, and it's sensible to start at the roots and do things from there up. Sometimes, though, the cascading can be just too much, and it would have been (or would be) better to do the incomplete thing and have it dealt with, instead of having it spiral out of control, attracting more and more work on its merry way.

The true art is probably to know where to stop, as so often in life.

You can probably guess that I'm not writing this out of the blue, too... the current cascading effect that I have to (potentially) deal with is, of course, connected to the photo database migration. (Which is progressing, hooray!) The old programme had flat, non-hierarchical keywords, and the new programme can do hierarchical ones, which is very nice and very welcome. The keywords themselves, though...

I've been adding keywords whenever it seemed necessary, and I tried to process and tag every image as it came into the database. Of course that did not work completely, and there are plenty of un-tagged images around. For the ones that do have keywords (which is most of them), they are not always consistent. That is, obviously, not helpful. So the plan is to clean up keyword issues as I'm sorting them into the new hierarchical structures.

In some cases, that's easy. Birds are animals, just as the tags "horse", "flamingo", or "dog" will go under animals. It's getting more difficult with objects. Fortunately, there's lists of hierarchies for object description and tagging available, developed by museum people and geared towards different focus areas of interest. The Getty Research Institute, for instance, offers a number of vocabularies. (Look for the "Browse ..." line when you are offered a search mask, that gets you to the full set.) For German cataloguing, there is, for instance, the "Objektbezeichnungsdatei" offered by the Digicult-Verbund. Because choosing what to catalogue, and what not, and how to do it, is not at all trivial, there's also literature about that, such as the "Cataloguing Cultural Objects" guideline, a slim and slender 407 pages small, free to download for everybody interested or in need.

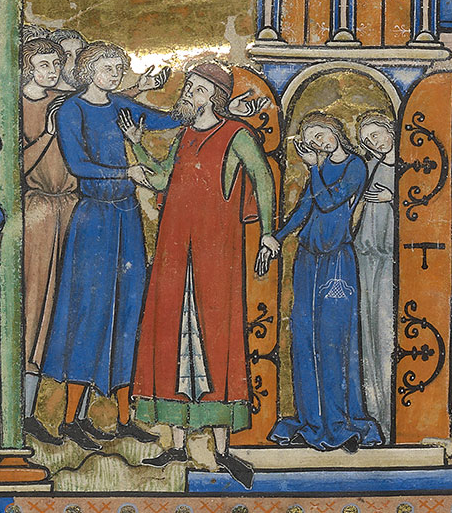
One of my main questions for now is how to handle male and female clothing. For my old database, I had a sort-of-makeshift solution, stating "TunicMale" or "TunicFemale". That was not perfect, but it did work. Now I'm not sure what to do for marking things - do I split my clothing term hierarchy into "male garments" and "female garments"? That means that when searching for something unisex, I'll have to search for two terms. On the other hand, I wouldn't have the problem that when looking for, say, only women wearing hoods that also men come up in the search.

Another option would be to mark unisex garments with an (m) or (f) behind the tag proper, giving me the option of having that as a lower hierarchy tier and having the complete term above this. That's probably the better solution, even though it adds layers to the hierarchical tree - which is also something that should not be done too excessively. Ah well. Difficult decisions, but fortunately not ones that need to be taken right away, I can think about it for a bit longer!


0
MAI
10
0

Finally Fully Degummed.

A while ago I wrote about dyeing silk and different outcomes, depending on whether it had been degummed or not. My degumming try that I referenced back in that post ended up being not completely successful, as some of the gum had still stayed in. 

I finally got around to doing it again, with a fresh sample, and this time I made sure to steep it to death, or something very close - it stayed in the hot soapy bath for a full hour, and I used de-ionised water to avoid any hindrance by our rather hard tap water. 

And here's the result:

As you can see, there's four samples now. The one on the bottom is the silk dyed in the gum, the one on top is untwisted degummed embroidery silk dyed together with the gummy silk. On the small roll in the middle, the bottom one is the outcome of my last trial, partly degummed, and on top is the completely degummed silk. 

It's become very light in colour, even lighter than the silk that was degummed before dyeing. I had expected something like that - either a bit lighter, or somewhere around the colour of the embroidery silk. 

There is definitely more shine now, but it is also much more delicate; I've had several snaggy bits even though it's a twisted silk. 

So my current conclusions are:

If you want to work with silk that has next to no twist at all, leaving it gummy or partly gummy might be a good idea to up the stability. The sericin also seems to take natural dyes much better, so if you want to have really deep, vivid colours... leaving it gummy or partly gummy is, again, your friend. In case you want it to be utterly shiny, though, degumming is the way to go.

Though I had the impression that the thin strands of gummy silk, with about 20 den, are also looking quite shiny. More exploration might be necessary...

0
APR.
21
0

Fair Food.

No, this time I'm not talking about food that is paid for fairly - but fair food as in the things I eat when on a fair. 

There is, obviously, a huge difference between going on a fair as a visitor and going on a fair as a vendor, though in both cases, I tend to bring my own food. Most of the time, the things offered at the food stalls are not, um, top-quality stuff in regards to ingredients and taste, and they are usually also quite high-priced. 

When I go to visit the Spiel game fair at Essen, the usual stuff we're taking along is sandwiches, some fruit, and a bit of chocolate or other sweet stuff. There's a nice breakfast in the morning and the group goes to have dinner at an Italian or other place in the evening. Packing and food prep for that is easy, as it's only the sweet stuff and maybe some extra fruit to pack and bring along, the sandwich ingredients are provided at breakfast time, as is more fruit. So nothing to think of or prep in the days before.

When I'm on a fair as a vendor, it's a wholly different picture. Sometimes breakfast is provided, but that's the exception; usually it's pack your own for all the event. Which means packing food that is ready to eat, does not need to be refrigerated, is more or less sensible, easy to eat a bit of and put away again (in case customers come along while you're munching), and preferably also tasty.

Bread and smoked sausages as well as boiled eggs are among the typical things that fit these requirements. Chocolate, of course - my rule is to take one bar of chocolate per day, just in case things happen and there's no time to eat properly. Carrots, radishes, and cucumbers are good choices for getting some fresh stuff that does not wilt when you look at it oddly. But something that is not bread is also very nice to have.

One of my not-bread-meal staples for these occasions is Quarkauflauf - which is, more or less, a crust-free cheesecake with fruit in it. And today's the first time since ages that I'm prepping this. With Zwetschgen as the fruit, that lovely variety of plums that I like so much, and that I find is unrivalled in Quarkauflauf. I don't really know why I haven't made this since the last fair, but I can tell you that I am very much looking forward to this fair food, to be consumed this weekend in Hohenlohe!

In case you're in the region, come see me at my stall, the fair runs Saturday and Sunday in Blaufelden. And if you have suggestions, or a favourite food to take along on travels or events, let me know in the comments - it's always interesting to hear what other people have to keep them going on events!

0
APR.
01
0

Riding Slits, Part 2.

Here's a comparison of a mockup tunic with slits cut in, with and without middle gores around those slits: 

Simple tunic with riding slit cut in, from left to right: front view without middle gore, with middle gore, back view without middle gore, with middle gore.

Well, the horse is missing from those images (due to lack of handy horses around here), but you can see that the slit functions, of course, in both instances - with and without a middle gore. However, the version with gores remains much more "closed" even in the riding position. Especially noticeable in the view on the back, where the slit is not visible even in this leg position.

The whole issue gets properly interesting, though, when you are standing normally:

From left to right: front view without gore, with gore, back view without gore, with gore.

As you can see, the tunic does not close properly at the back if there's no middle gore inserted. This is standing position; the slit issue gets worse, and more noticeable, once the wearer starts to move - when walking or running, the slit will gap open, unless you insert the middle gore.

So that's something you'd definitely want to do for your coverage. Not only to avoid flashing your undies, but also because the slit, staying open, will make things rather drafty in cooler weather!

What you can also see in those standing position pictures is that the fall of the tunic changes with the insertion of the gores. This is significant because riding slits are closely related to riding, which means horses, which is an expensive and status-y thing to have not just today, but also in the Middle Ages. Owning a horse that is used for riding is not something everyone can afford.

Consequently, if you're wearing a tunic with riding slits, that indicates that you have a certain amount of wealth, being a horse-rider. If that changes the fall of your tunic... it's not a big thing to insert a middle gore, with or without slit, leading to the same fall of the tunic regardless of being a horse-rider or not. So that could be an explanation for the middle gore to be found in men's tunics, whether slitted or not, but not in women's dresses. 

From the archaeological record, I know of no garment that is certainly associated with a woman with middle gores set in. There's piecings for panels in some of the later dresses (like the Golden Gown of Queen Margaret) that sit in the center front, but they do not change the fall and drape of the garment away from the straighter, more slender silhouette in the front. The fall-changing middle gore is never present. There's also no example of a slit tunic without a middle gore. 

To me, this makes perfect sense - you do not need a riding slit in a woman's dress (the bunch-up problem is solved differently, if the woman does ride a horse), but you want the slender look that is easier to achieve with a straight front and back panel in your dress. In men's garments, if you cut in a slit, you definitely need the gore to cover up the unmentionables; that changes the tunic to give it a different fall and drape. That, in turn, may have been associated with a "manly" look, or with higher status, or both, and said associations probably led to the universal adoption of the middle gore in men's garments.

1
MäRZ
31
0

Riding Slits, Part 1.

My recent crossdressing post has provided some confusion to Kareina - and since it's a really interesting topic, that riding slit thing, I'll try to make things clearer here.

I wrote: 

You need middle gores in the front and back to keep a riding slit closed when not in use (and there are no riding slits without gores in any archaeological find).

In the archaeological record, we have men's tunics both with and without a riding slit. What they have in common is the middle gore set into the front and the back.

The tunic from Moselund, Denmark, dated to c the 12th century. Image courtesy of the Danish National Museum; find the large images here: https://samlinger.natmus.dk/dmr/asset/217385 and https://samlinger.natmus.dk/dmr/asset/217384

The gore on its own would not provide enough room to sit astride a horse without the fabric riding up the legs, at least not in most cases. The Moselund tunic, for instance, is rather long, so it would have to be very, very wide for that to work. If you look at artwork from the Middle Ages, you will notice that the existence of the slit is made clear, but it's always "closed", as in there is no underwear shown. 

Detail from MS M.638, fol. 3v, The Morgan Library. The Morgan Picture Bible, Paris, France, ca. 1244–1254. Persistent URL: http://ica.themorgan.org/manuscript/page/6/158530

The way we are shown that there is indeed a riding slit is rather ingenious: There is a vertical line, and because that is usually rather inconspicuous, often the edges of the lower part of the slit are shown turned outwards, with the lining of the garment clearly visible contrasting with the outer fabric. This is the case in the image above, where a fur lining is shown. The two men next to this man have simpler slit tunics, but you can also clearly tell they are slitted: the corners at the bottom of the slit overlap, and are slightly mis-aligned. The same goes for the green garment worn underneath the red fur-lined one on Main Guy. 

A riding slit, for it to work properly, also has to be long enough. A lot of the modern interpretations in Living History have a slit cut in, but it does not reach up far enough - it has to come up to about crotch level, front and back, if you want to avoid bunching of the tunic. That, of course, is a problem if you do not have the middle gores set in, because a simple slit will inevitably stay open (especially if you hem the edges, which is the smart thing to do) and thus, if it's cut up far enough, expose your underwear. Which, back in time as today, was not something you'd usually go for.

0
MäRZ
08
0

Egtved Update. Rings.

You're long overdue an update on the Egtved Project, right? It has slipped into the background a bit with all my writing about the website stuff and issues - though there was work on it going on in the background. Spinning and weaving have both been finished by now, but today, you're getting an update on the corded skirt, and especially my friends the Endless Number Of Rings.

Looking at the cords, it is relatively clear how they were made. There was no such thing as a cord twister back in the Bronze Age, after all, so the possible methods of getting the cords twisted are a) by hand or b) using a stick or something similar to twist them up strongly and then countertwist them together. For the rings, it's not quite as obvious. 

The rings at the bottom are completely covered by wool fibres, wrapped around a core and looking very smooth, tight, and orderly. Similar rings can be found at the bottom of the belt tassels of the Trindhoj and Egtved finds. In Hald's publication about the Egtved skirt, she assumes that there is a knot (a single overhand knot) at the end of the cords, that they are then sort of closed into a ring shape, with the ends touching at the bottom, and this ring is then wrapped with fibre.

I have tried a few different methods to get a nice, tidy, tight ring, and to me it looks like there's quite a number of different ways to achieve this. The method I've settled for now is a two-step process, and I'm not sure how plausible it would be for the Bronze Age, but it's at least not completely out due to not having the tools available in that time.


I'm winding my fibre around a little stick, forming a nice, tidy, tight roll. Not too tight, though, and considerably longer than the actual circumference of the little ring, as that seems to work better than making a thicker, shorter roll. I do make a single overhand knot in the cord as Hald suggests; for me, this mostly serves to make sure the ring will sit at the correct height. Measuring the cord to get it to the length it should have is one of the things that gave me a bit of a headache, by the way - these cords are really stretchy.

I then slide the fibre roll off the stick and pull the cord ends through the roll, in opposite directions. The ends come out at the top, and I go over to the other side and back down into the wool roll with each end, aiming to go about a third to a bit more than a third downwards. I will cut off the remaining cord end later on, and the ring will close up. 

On the picture, you can still see the ends of the cords sticking out of the rings; you can also see the rings hanging out on top of the printed-out Egtved Skirt image that I use as a reference and size guide. Getting the rings the correct size is something that felt, and still feels, like a real challenge, as there's only limited information from the picture. They are only seen sideways, apart from the very last one on the very leftmost end of the skirt, which is sort of half-visible - so I don't know how closed they look, or how their tops really look, or how thick they seem from their front. 

The sides of the rings look a bit squashed up in some places, but after a few hundred years of snuggling up to each other, well, I'd say that can be expected.

This is how my rings look right now, lined up on a stick for a comparison: 

I'd say that's close enough for all practical purposes. And I'm really looking forward to what it will look, and feel like when everything is strung up properly! 

0

Kontakt