Latest Comments

Guest - Aislinn Dyestuff Citizen Science.
09. Oktober 2026
This is a great project. I look forward to the results. Thanks for letting us know.
Guest - Aislinn Time for...
09. Oktober 2026
Looks delicious!
Guest - Katrin Sprang Discussion
18. September 2026
Hi Rachel, I have looked for more photos of you, but that was not very successful. I found a link on...
Guest - Beatrix Sprang Discussion
15. September 2026
That lozenge pattern element is not a photograph, but a scan. So it should be to scale. But I pinned...
Guest - Katrin Sprang Discussion
15. September 2026
I was not referring to Rachel's reconstruction (is the reconstruction you refer to the one photograp...
JUNI
20
0

More from the Mini-Loom, Part 2: Tensioning.

Next step for the loom setup was getting the weights... and there's another thing that does not scale down easily. I had looked for typical weight per thread numbers, but a quick search did not give me any conclusive data, there was no time for more than a really quick search, and so I basically fiddled around a bit with some items and the kitchen scales and then sort of decided on a weight per guesstimate.

Off into the fishing tackle shop, then. I had decided on 20 weights (10 per row) with about 65 g of weight, each tensioning a bundle of 11 threads - this means about 5 g of tension per thread, which, I hoped, would be easily sufficient for the smooth cotton warp.

The friendly man in the tackle shop informed me that there were 64 g weights available. They were not only available, but also in a sufficient quantity, and they were covered in a sort of camouflage paint (thus closing in the lead, much to my appreciation), and had a suitable form and shape - sort of pear-shaped, with two flattened sides. So I happily went out of the shop with my 20 weights. This part of the loom, by the way, is the most expensive part - the little bits of wood that it is made from were all scrap wood.

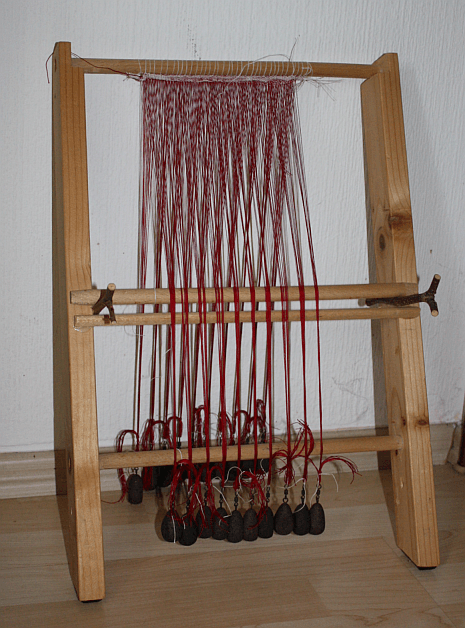
Back at the loom, it was bundling the threads of the front and back layer into bundles of 11 threads each (the last, obviously, of only 10 threads), tying them and attaching the weights. I chose to do the tying with a slipknot and then tied the weight in with a bit of linen thread.

setup_1
You can see how it all hangs nicely in bundles, with almost all the weights at the same height. The weights give it a nice tension, and the whole thing is surprisingly heavy when you lift it - the small size of the weights is misleading to the eye.

Next step: Heddles... which was something that I sort of dreaded.

A lot.
0
JUNI
19
0

More from the Mini-Loom, Part 1: Warping.

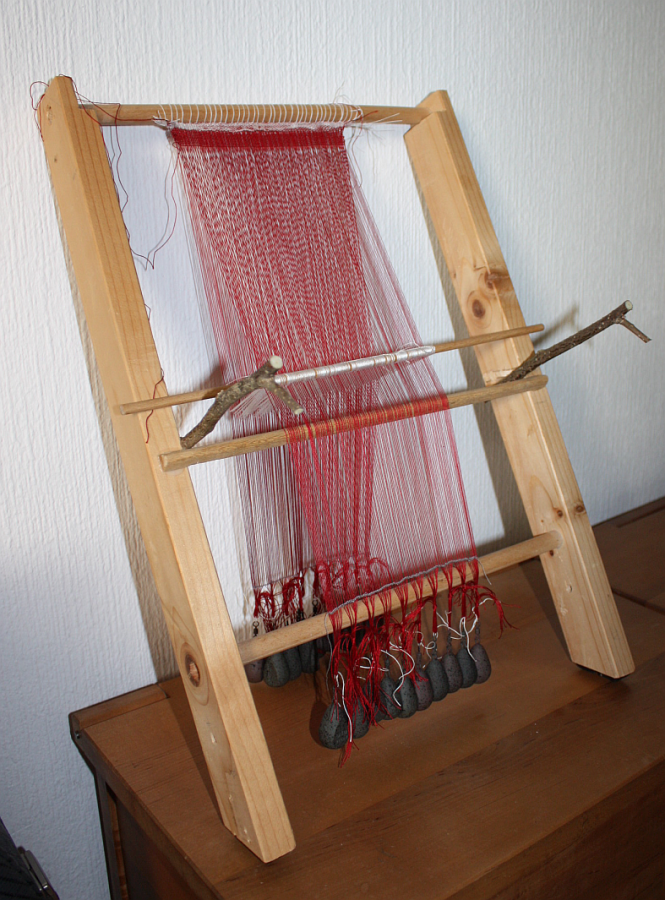
The miniature model loom is set up, and functioning, and it was a really fascinating project to do - plus I'm really, really happy with the result. Which looks like this:

loom_1
Setup took quite a long time - as was to be expected, as I'm a) not super-experienced regarding warping and loom setup, and b) not everything scales down to model size, especially not the time needed to do each individual task.

So... it all started with warping the red threads with help of the white starting border. You set up a warping frame and a rigid heddle for the band (at least that is what I used), weave a few passes on the starting border band, and then you draw loops through each band shed, bringing the loop around the warping frame.

This was a pleasant task, though I did end up with slightly irregular lengths of warp thread, and the edge of my starting border was not as nice as I'd have liked (but that was possible to fix after setting up the warp, at least to an extent). If I had already decided on how many warps to a weight I would set up, I could have separated the batches in this stage; but as everything sort of was still in flow decision-wise, I just did three batches (which also accounts for the warp length irregularity).

Thread length irregularity, by the way, is another thing that will not scale. You'll easily end up with one or two centimetres length difference, maybe even more if you have stretchy thread and real tension issues, and that will be no real issue on a warp length of, say, 2 metres. If your whole warp length is only about 35-40 cm, though, 2 cm difference are a lot, percentage-wise!

So once that warping was done, I attached the starting border to my top beam. On a proper large loom, that beam would have a lever and brake so it could turn to wind the woven cloth onto it. In my model, it is firmly glued in between the sides and thus not turning, so there'll be no demo of how to take up the woven cloth. Should I ever build another model loom, though, I would consider making a proper top beam, even though it adds another weak point in regards to transportability.

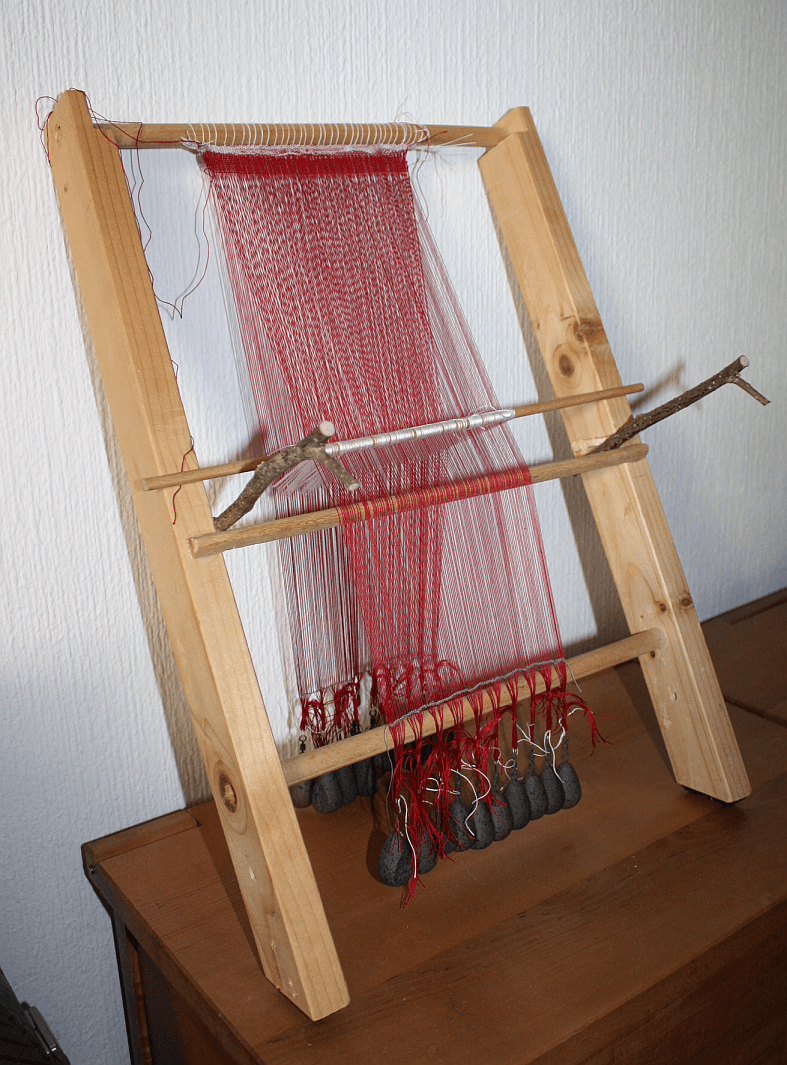
little_loom
You can see the attached warp in its irregular bundles here, and you can also see the very, very messy bottom edge of my starting border, due to bad tensioning in the warp of the border and to bad alignment of the warping setup. (Which I didn't bother to correct, as I was counting on being able to fix it to a good enough state later on. Yes, yes, I know. Shocking.)

The finished warp is about 16 cm wide and has two layers of 109 threads each. Warp threads are a plied mercerised cotton yarn (intended for embroidery, originally) and the starting border is white linen yarn. I had thought about using wool for the cloth, but for several reasons settled on the cotton. First of all: durability. Not that wool isn't durable, mind you - but the model might sit in a basement cupboard for longer periods of time, and I don't want to pull it out again after, say, a year or so to find that some moth has found her way to my loom model and decided it would be a fine thing to feed her offspring. Then, second: scaling/tensioning issues. Wool tends to be a bit stickier than cotton or linen, and that might require more weight per thread, which I'd rather not have; also, doing it properly with wool would have meant doing it properly using single yarns spun in the correct direction, and while I have quite a bit of handspun yarn that might suit hanging around here, with my lack of practice regarding loomy things, I'd rather not do the first try for something like that on a miniature model. So cotton it was.
0
JUNI
16
3

Too little yarn error. Again.

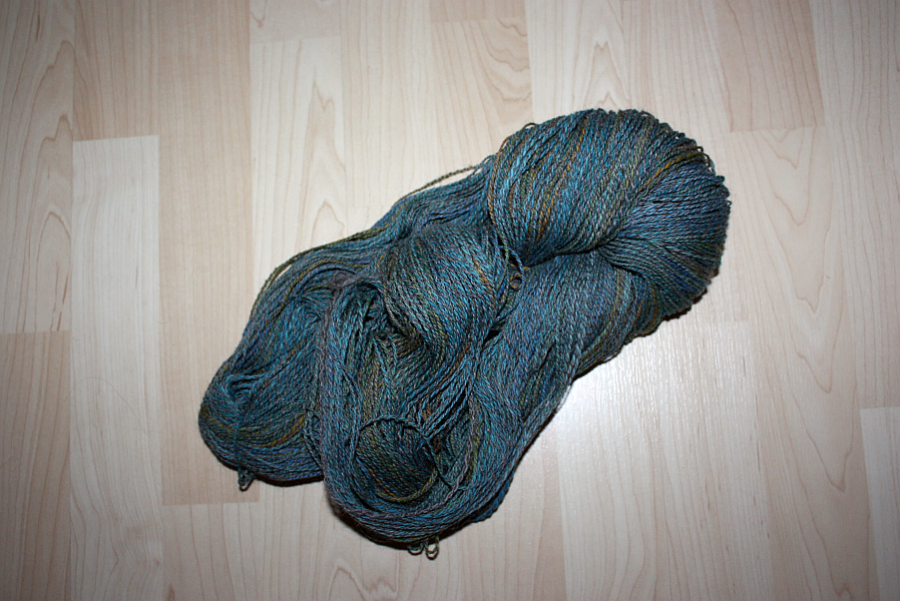
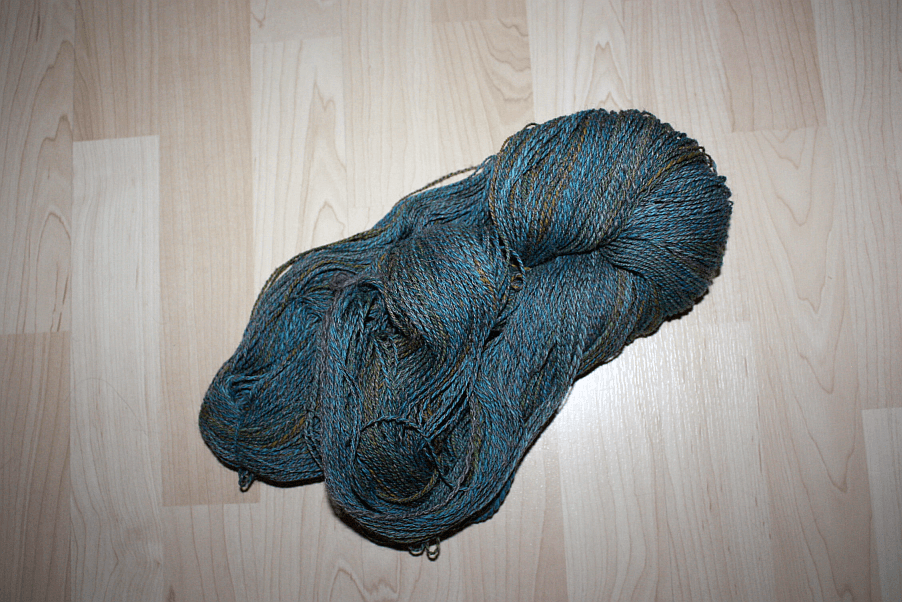
skein
I've told you about my spinning project, and my glorious decision to ply the yarn spun from the dyed top with nice, grey Gotland yarn, to get more length. Well, it is finished now, and it looks really nice. It also knits nicely, and results in a pleasing fabric. Only problem?

It's not much. I have 278 g of yarn, but this weight only runs to a scant 458 m according to my length-measuring thingie. (Damn you, high twist resulting in high-density yarn!) Which is definitely not enough for something sweater-like... so now I have the usual not-enough-yarn problem again.

Sigh.

Maybe if I spin up some more plain Gotland, ply that, and use the two threads alternatingly?
0
JUNI
15
0

Holiday reading!

It's a holiday here today, so you're getting some reading stuff from around the net which will hopefully amuse you:

Making a disease from a remedy - how Trotula gets misinterpreted in medicine papers.

Disability, fraudulent beggars and medieval surveillance.

Fictional languages get a real-world breakdown. This is a really fascinating video, and if you are at all interested in languages and pronounciation, I thoroughly recommend it.
0
JUNI
14
4

More miniature stuff.

There's some more mini stuff going on here at the moment, though this time, it is actually work-related... and weaving-themed.

When I explain textile techniques, one of the basic things that come up again and again is weaving - especially the topic of warp-weighted looms. Explaining the natural and artificial shed, and how weaving is done on that loom type, is easier done as demonstration, but obviously there's not always a loom available.

So, when in the situation of having to explain this stuff ages ago for a seminar, I cobbled together a small functional model of a warp-weighted loom. The "cloth" that I set up for it, though, was very narrow, and the heddles were not well done, and the weights were... well, let's say "cobbled together" does really just do it justice.

Now there's another explaining occasion coming up on the horizon (well, actually, on the pretty close horizon), and I decided to set the loom up again, properly this time. Which means actually doing a bit of maths to figure out a sensible loom weight weight (does that make sense?) and thinking about scale a little.

Scaling down textile stuff... it's a pain in the neck. One of the basic problems of scaling down things for models is getting the textures right. If we're thinking textiles and especially garments, this includes fall and drape of the things - and that typically means yo need to use a much finer, thinner material than the original is made of.

This can be possible in some instances, but when you have a fine, drapey fabric from the start, you'll run into the nigh-impossible very soon. This, by the way, is the main reason why I have never done garment reconstructions on a smaller scale than human-sized, and why I am not a fan of showing clothing (reconstructions) on dolls. It just won't work with the original material, and scaling down small stitches and seams is another can of worms I'd rather not open.

Another scaling-down problem is the size-to-weight ratios of things. Obviously, for a for-show-only thing, this is not relevant - but if you want a functioning model for demonstration purposes, it will bite your behind quicker than you can say "volume". If you take a cube with 2 cm side length, its volume is 8 cm³. Double its side length to 4 cm, and it will have 64 cm³ volume. Now if you want to scale down a warp-weighted loom and wish it still to function, you need a minimum tension for each thread, and you'll have more threads per cm on your loom than in the original fabric, so you will need more tension per cm - and you have less space for loom weights if they are supposed to look roughly in scale. Which means... you need a material with higher density than the original.

For the first instance of the loom, I just used wooden globes with a bore through the middle, giving just enough weight for the shed to open (albeit a little unwillingly). That does not look good, though, nor does it work really well, and especially won't really work for a wider weave.

Since I want to get sensible tension on the threads, though, I might find myself in a fishing tackle store later today, to buy lead weighs originally intended to lure carp to their doom. And then I can move on to get this loom set up - because right now, it looks like this:
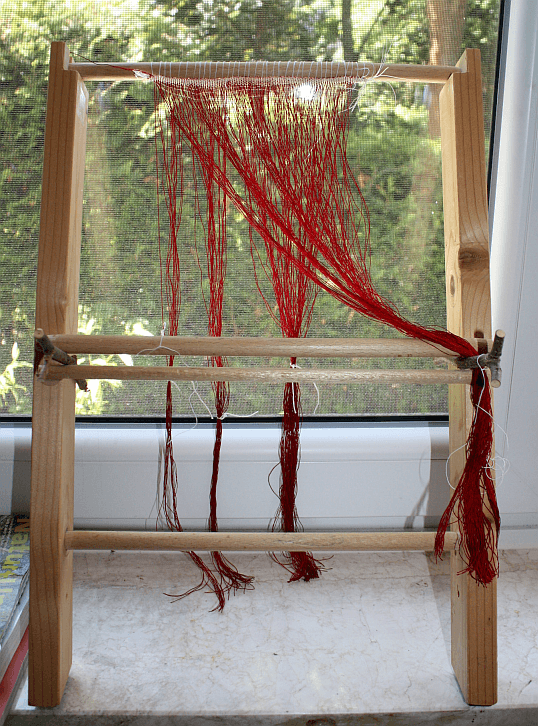
little_loom
...and that's a little unfinished, and a little sad. Also, I'd like to have it working properly on Monday... what was that quip about the last minute being so important, or else nothing would ever be finished?
0
JUNI
13
0

Was lange währt...

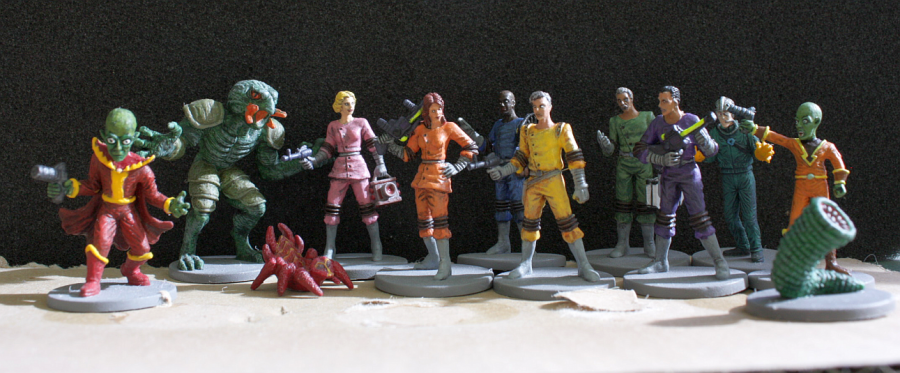
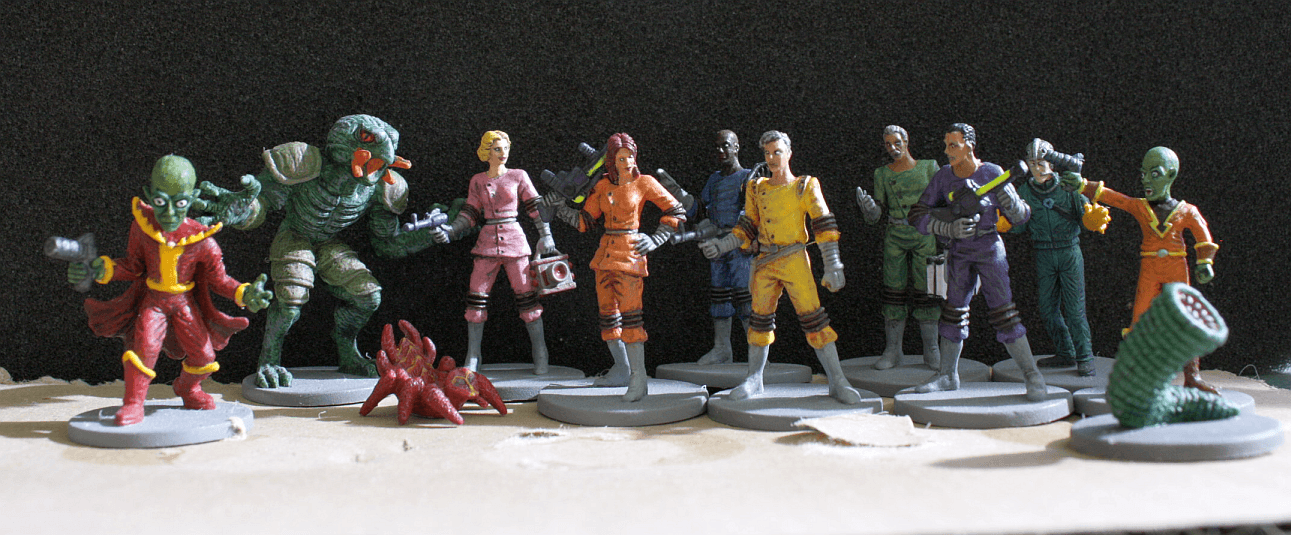
The trusty online dictionary tells me that the English equivalent to the German "Was lange währt, wird endlich gut" is "Good things come to those who wait". Which is a fancy way to tell you that finally, finally... the miniatures for the Space Cadets game are painted and varnished and matte-varnished.

FINALLY.

I've had a lot of fun with them, and then I sort of fell into the trap of wanting to have them perfect, which meant that it was still fun, but a very long-term type of it. Also, some of them were really hard to paint with all the nooks and crannies, and tiny details. Which meant that I had to be relaxed and awake and fit enough for the painting, and there had to be enough light, and that was not always the case, especially not when there were lots of other things to do, so they took a bakcseat for a while, until I pulled them out again, and did some more work on them.

Then they were finished, and we did our research homework on how to seal them. The savvy Internet told us that a very good way would be to use glossy varnish as a first coat, as it's more durable than matte varnish, and then use an anti-shine coat on top. Which means that if you handle them a lot, they will get shiny first, before there's real damage to the paint - and you can just re-matte-coat them. (And that's probably way, way over-engineered, but hey. Who cares, right?)

So we had the plan, we had the varnish, but what we did not have was the coincidence of a) decent and warm enough weather, b) no wind and c) time and leisure to actually apply the coats.

Until this weekend, when all came together and I could finally, finally finish them off. So here, after this wall of text, is your picture proof:

minis_together
I'm quite happy with how they turned out - and now we can go and save the Earth as Space Cadets!
0
JUNI
12
1

Status here...

In case you couldn't see the blog these days - I'm trying to switch the site over to SSl, and as usual, not everything is going all smoothly all the time. So - some figuring out on how to get this switch done is on  the agenda.

Other agenda things: Write up the article for the NESAT publication. There was some Bernuthsfeld work done today (there's always a few more details that need to be looked for); there was some knitting-related stuff (Margit is writing up a pattern for socks, and we're planning to offer a few of the patterns she is showing as testknits). Emails with requests were handled - in short, it was one of these days where lots of small things happen, but in the end, it feels like nothing much was done. (Which is not true, but can be really irritating at times.)

So... a fairly typical Monday, I'd say. And now I hope this blog post will be nice and visible, and the comment section will behave, too (I've been told it has been acting up, but I haven't found out why yet).
0

By accepting you will be accessing a service provided by a third-party external to https://www.pallia.net/

Kontakt