Latest Comments

Guest - Aislinn Dyestuff Citizen Science.
09. Oktober 2026
This is a great project. I look forward to the results. Thanks for letting us know.
Guest - Aislinn Time for...
09. Oktober 2026
Looks delicious!
Guest - Katrin Sprang Discussion
18. September 2026
Hi Rachel, I have looked for more photos of you, but that was not very successful. I found a link on...
Guest - Beatrix Sprang Discussion
15. September 2026
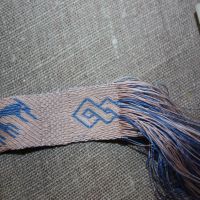
That lozenge pattern element is not a photograph, but a scan. So it should be to scale. But I pinned...
Guest - Katrin Sprang Discussion
15. September 2026
I was not referring to Rachel's reconstruction (is the reconstruction you refer to the one photograp...
DEZ.
09
2

Sending Stuff Away.

Having a webshop means sending stuff away - in my case to all corners of the world. (To a lot of them, at least.) Which can mean a multitude of different tariffs depending on the size, weight, and place the package has to go to.

Which means that sticking the appropriate stamps onto a package... can take a bit of research beforehand. I ship most things using the German Post (which is now called either Post or DHL), and for any address questions I go and consult Frank's Compulsive Guide to Postal Addresses (and thank you so, so much for that, Frank!).

In the end, packing things up, putting the address and appropriate postage on a package are a task that needs concentration (so you get it all right) but is still sort of dull. Which means anything that makes it more fun is a nice thing, and much appreciated.

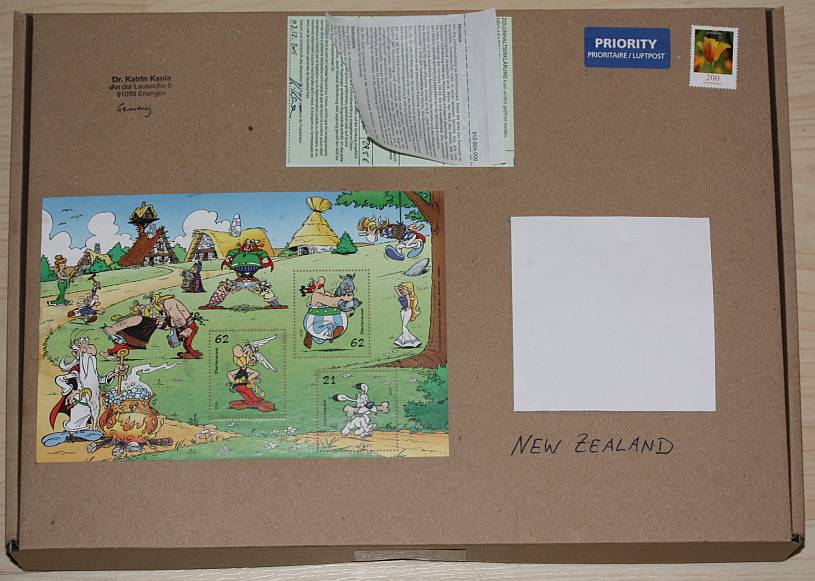
And my, have I been having fun recently... because the German Post brought out an extra-special fancy stamp featuring Asterix this year, and I've bought a small stack of them. So if you ordered something at my shop, and the postage I have to stick onto it falls into the right tier, your package might look something like this:

asterix

These stamps always make me smile, and I'm really happy that I get to use them on actual mail that goes out to hopefully make other people smile as well - even if it's just for a few minutes before tossing the package into the paper recycling. (Though if you know a stamp collector, they might appreciate it, too...)
0
DEZ.
08
4

It's Blogiversary Day!

Another year is over - it really flew by... and today, my calendar reminded me, gently, that it is blogiversary day. I started this blog in December 2008, when I was starting to work freelance full-time, so it is turning seven today... which means that I have actually been blogging for about a fifth of my life.

It was a wild and crazy year, 2015, with 205 blog posts up till today; with not only one, but two books published (the Beast, which I did together with Gillian, and Working Medieval Gold Embroidery, which I did on my own). I went to a few yarn fairs or other fairs, there was a Textile Forum again, and there also was the Great Relaunch of the blog and website.

I had no huge museum project to do this year, but there were a number of presentations, demonstrations and workshop, and plenty of work went into development of a few new things for the shop - spindle sticks in different types of wood and the large gold embroidery kit that I had been thinking about for years already, to just name two of the things.

There were also, you might have noticed, a few more pictures than before, as one of my friends told me off for not posting piccies often enough... which may have led to a few more gratuitous cat pictures thrown in with the others.

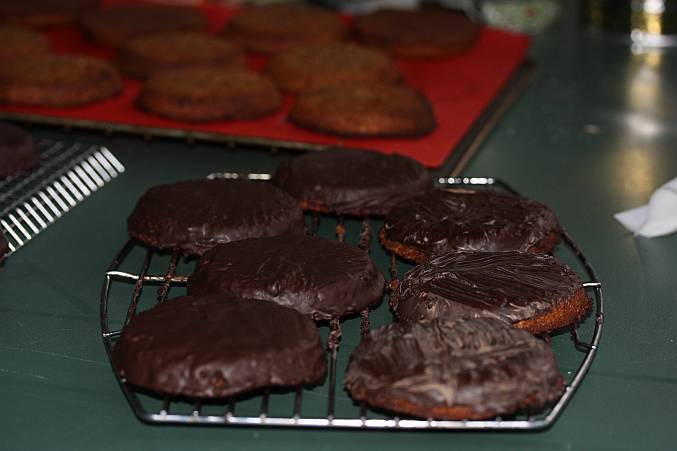
Now the year is winding down, and though I have a few more things that need to be done (as in I can hear that whooshing sound of a deadline rushing by), I can also start winding down a bit already. The seasonal baking is well on its way to being finished (yesterday saw the gingerbread baking being completed, apart from a little chocolate coating that still needs to be applied), we've made most of the plans for the holidays, and the weather is also starting to get more wintery.

[caption id="attachment_2071" align="alignnone" width="677"]Nuremburg-style gingerbread, all baked, chocolate-coated up and waiting to go into its storage tin. Nuremburg-style gingerbread, all baked, chocolate-coated up and waiting to go into its storage tin. The choc cooled off a little quickly, leading to the matteness and white layer on top. It will still taste fine, though - and my baking has a clear sequence of priorities that goes a) really yummy, b) lots of it and c) looking okay.


It was a good year, 2015. There's still a little bit of it left, and I plan to enjoy every little bit of it - I hope you will enjoy it right along with me!
0
DEZ.
07
0

Baking Season.

I've been sharing a seasonal baking recipe every year for a few years now, and I can see the day coming when I will run out of recipes... as while I have about a dozen different cookies on the plate when the baking spree is all finished, five of the dozen are made from the same basic cookie dough, only turning into different contraptions by filling and topping them.

So here you go - the basic cookie dough that I use:

500 g flour (wheat or spelt)
250 g butter
120 g sugar
1 pinch of salt
2 egg yolks
1 pck vanilla sugar

Make a mound out of the flour, sugar, salt and vanilla sugar; cut or crumble in the cold butter until it is finely mixed in with the flour. Mound the mixture up again, make a well in the middle, put in the egg yolks. Quickly knead together until it forms a solid ball of dough; it should not stick to your hands anymore. (The original recipe called for 250g sugar, which makes them very, very sweet. If you prefer your cookies even less sweet, you can cut down the sugar a little more.)

Let it rest in a cool place for at least one hour - though it can stay in the fridge for a few days as well (won't hurt it).

Roll out, cut out cookies, and bake them for about 6 minutes at 170°C in a convector oven.

I roll the dough out very thinly, about 1.5-2 mm thin, and it takes exactly 6 mins in our oven for the edges to just start turning golden - that's when I take them out.

I leave some plain, some are filled with praliné and topped with chocolate, some are filled with red currant jelly and topped with chocolate, and some are topped with praliné and a layer of marzipan. (Roll out the marzipan on a bed of powdered sugar, cut with the wrong side of the cookie cutter you used for the cookies, and stick on with melted praliné.) I also have a sheep-formed cookie cutter, and these get a choc or praliné cover on their bodies, where the wooly bits are, then are dunked in ground nuts or almonds to make them fluffy.

Voilá - five different types of cookies from one batch of dough.

The other seasonal recipes that I blogged in the past are:
 
 
0
DEZ.
04
1

Very Old Knitting, Part 5.

Slipping stitches is nice, and can be very helpful, but it takes time. Also, it tends to annoy me when I have to do an abundance of it... so I was thinking of alternative methods to get the new stitches to go through two previous ones, but without slipping stitches. I was thinking about just knitting into the row below in addition to the current row, or about having two needles parallel in the knitting... and, as we were hanging out together, I told the most patient husband of them all about this, and explained about the necessity to slip stitches with the other method because otherwise the stitch to discard won't go over the newer ones in the proper direction.

After mulling this over and thinking a minute about it, he asked "Why don't you just align them differently?" Brilliant man. So once I had yarn and needles handy again (this might have involved buying a set of simple metal needles to live in my handbag, because you can always find a use for metal sticks, and there was yarn in the bag already) I tried both my ideas (which did utterly not work, both of them, but it was interesting to see how spectacularly they failed to work) and then the different alignment.

So here you go, courtesy of the Most Patient of All Husbands, a second method to do compound knitting, with no slipping at all as long as you work in the round.

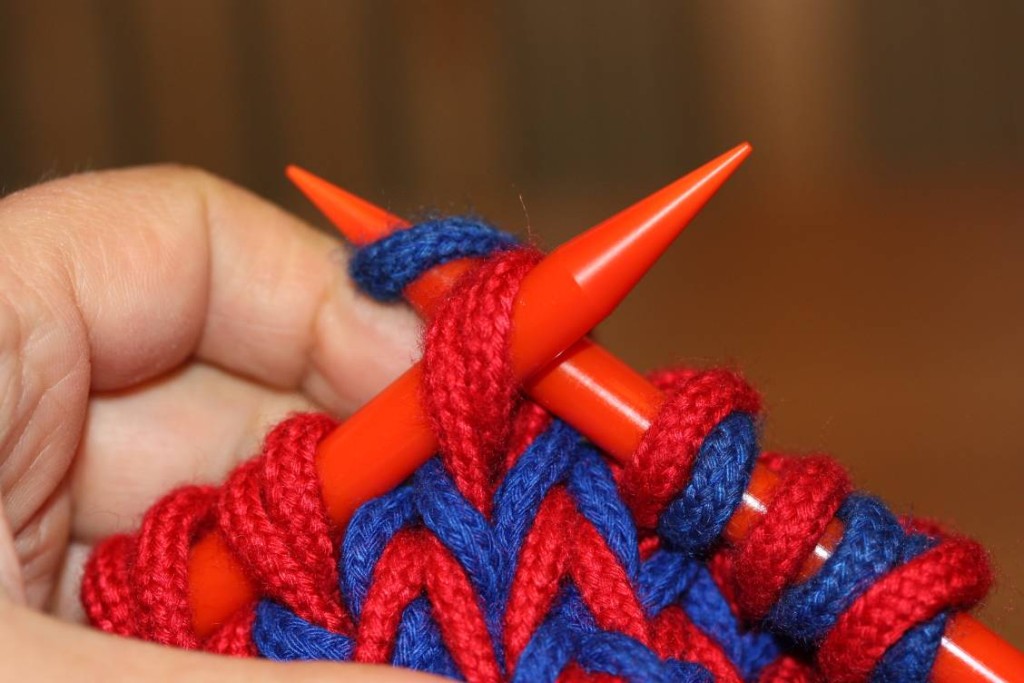
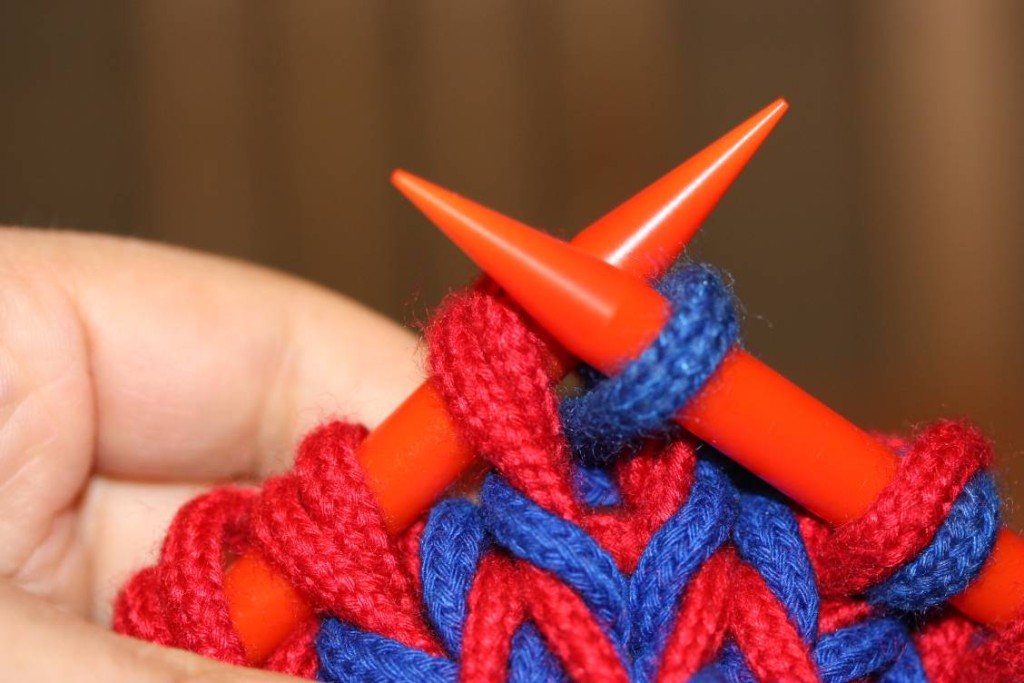
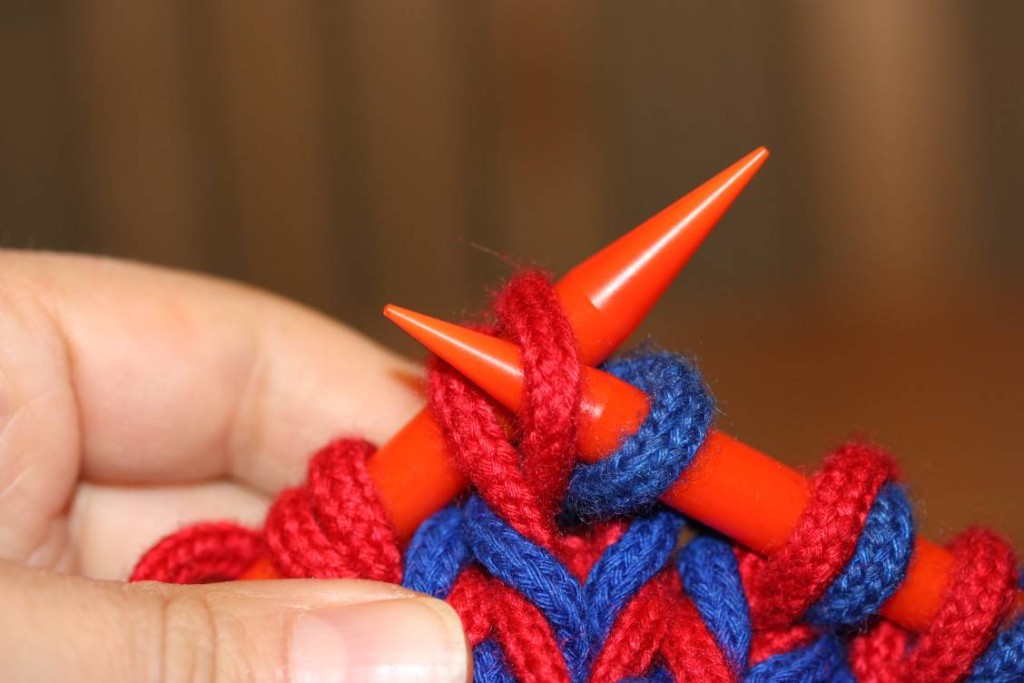
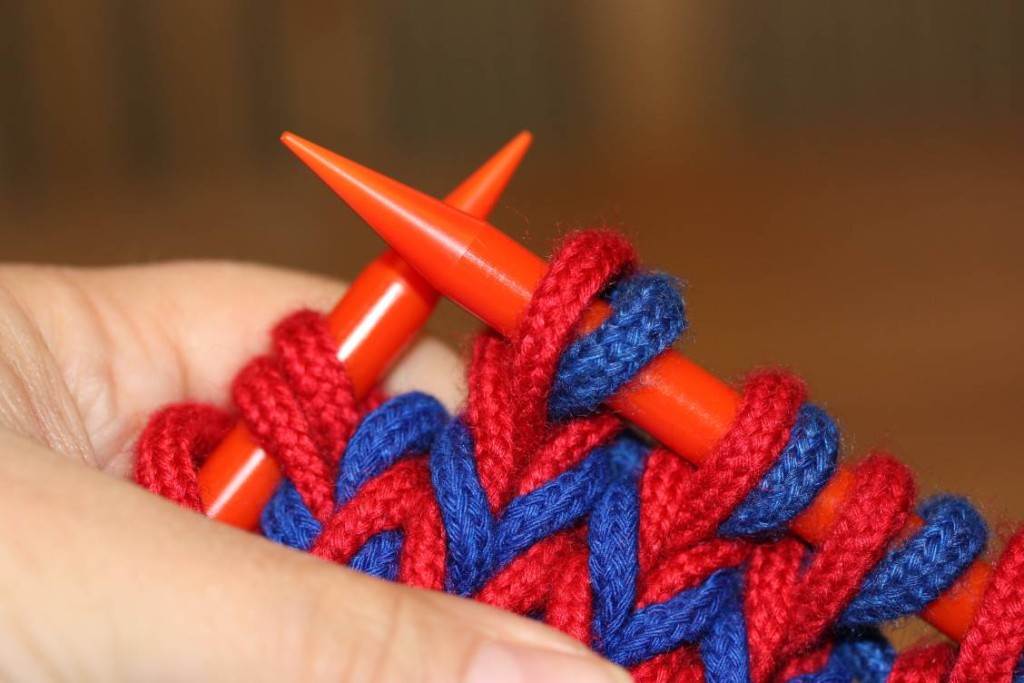
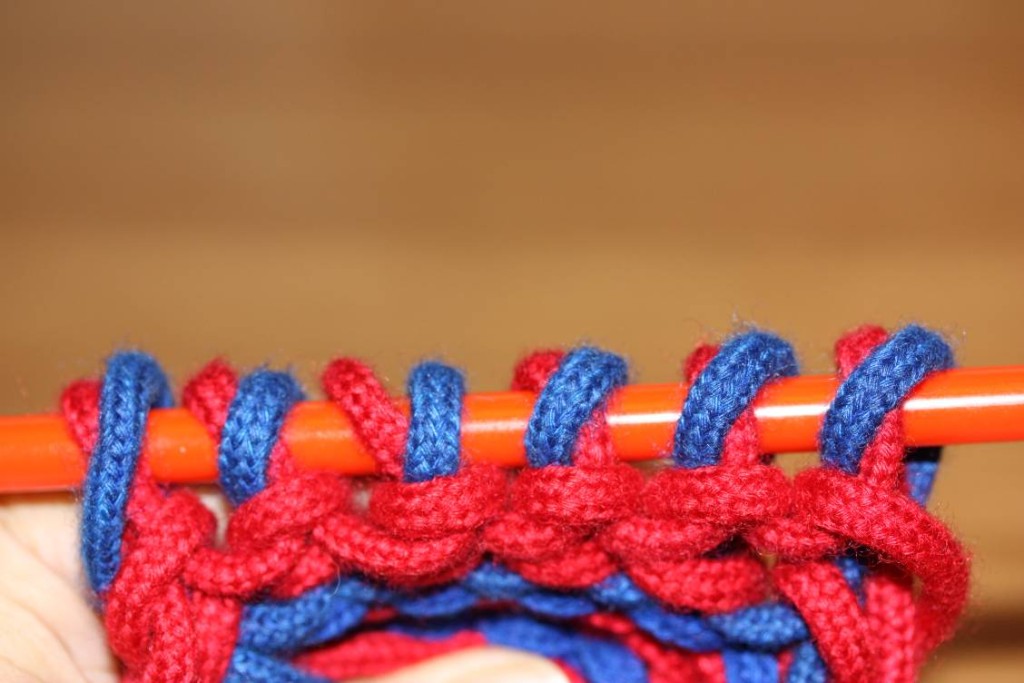
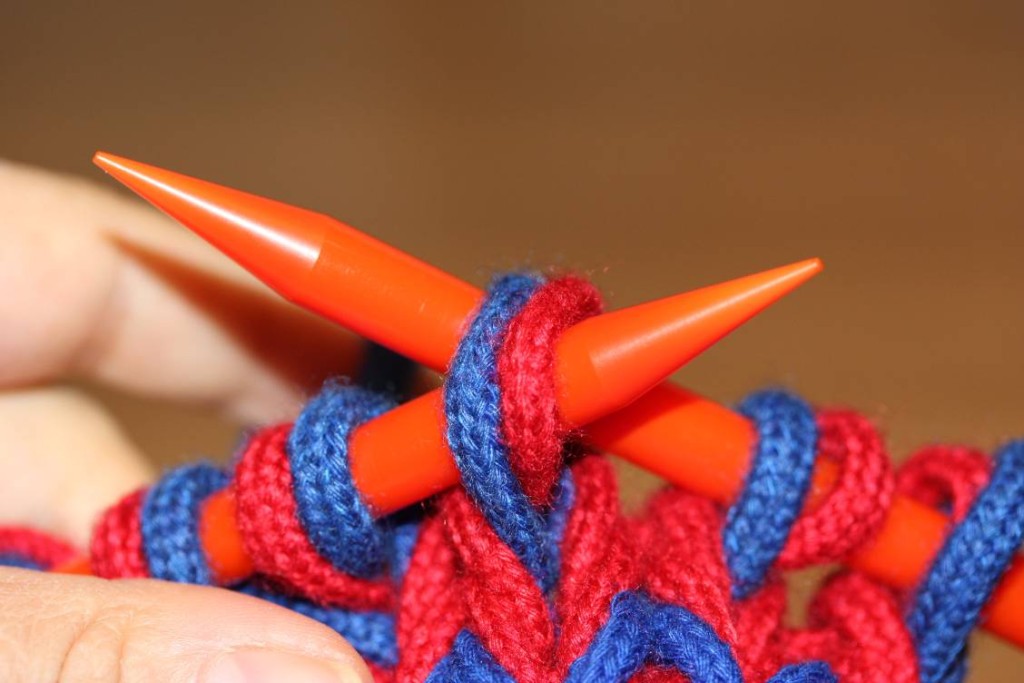
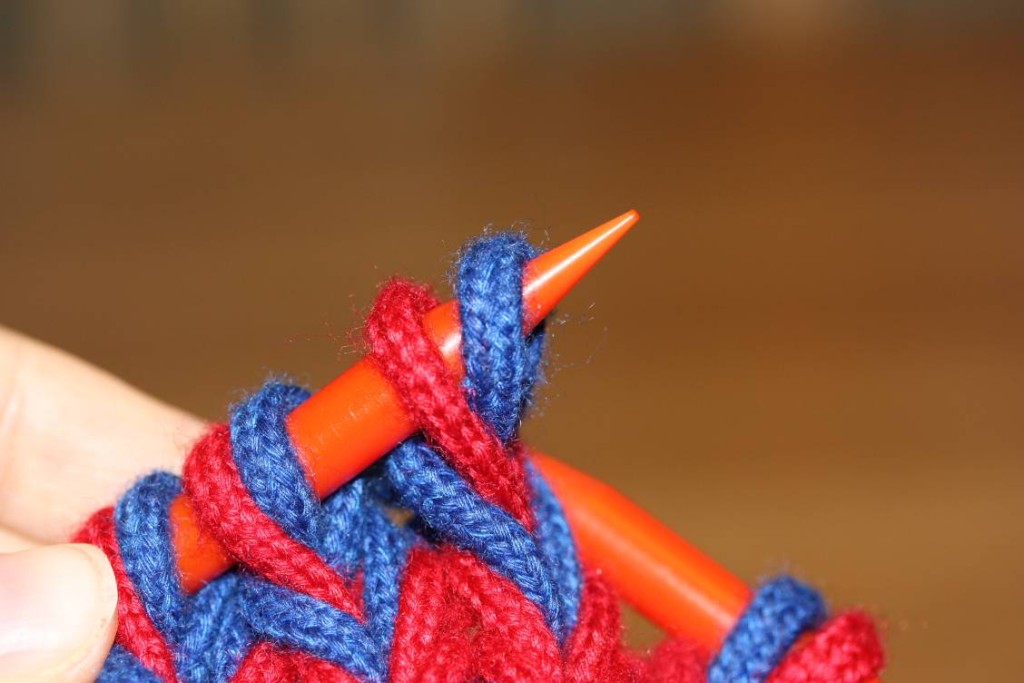
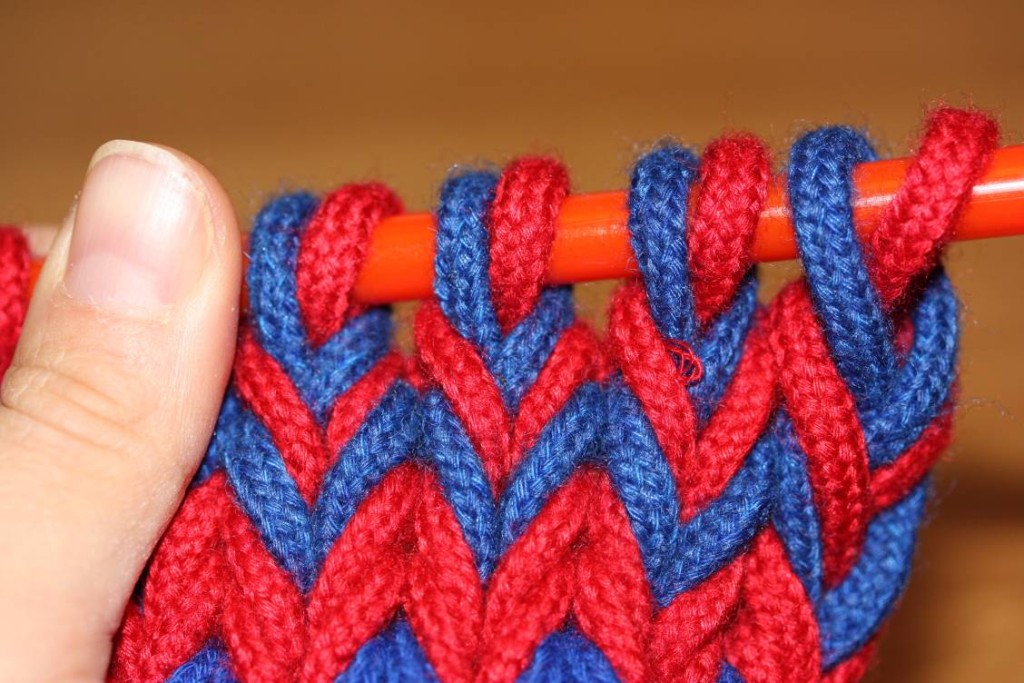
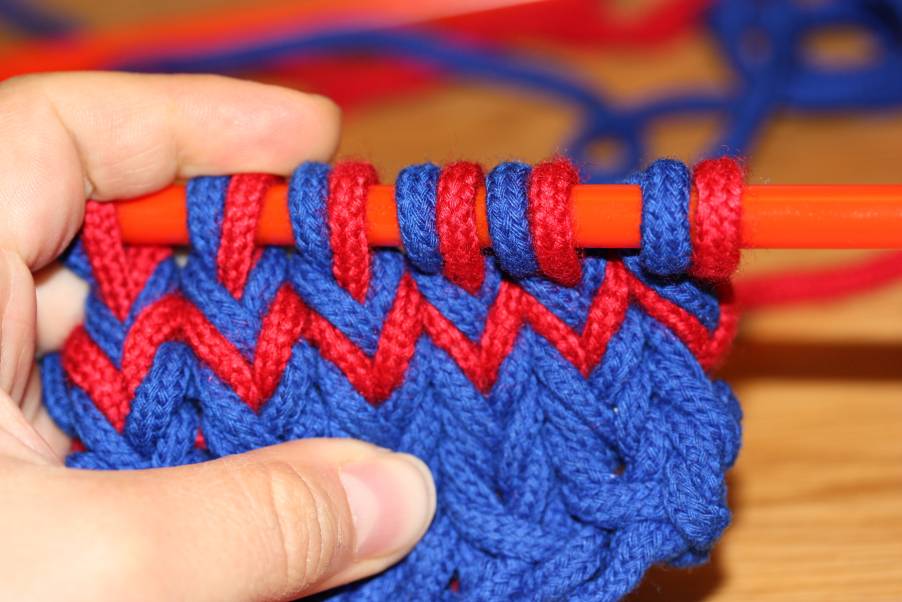
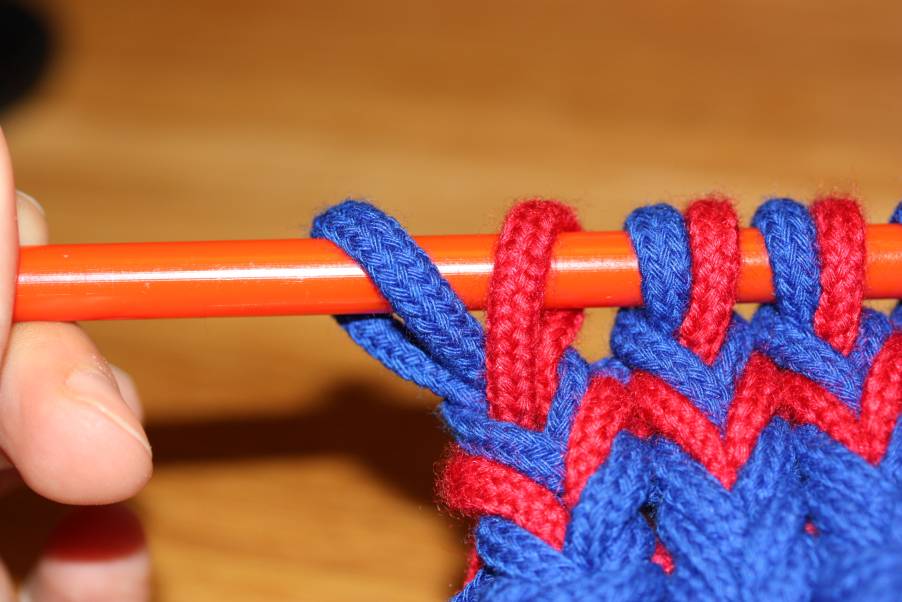
All stitches are aligned with the right leg behind the needle. The older stitch is now always on the left side, the newer stitch on the right side of the pair.

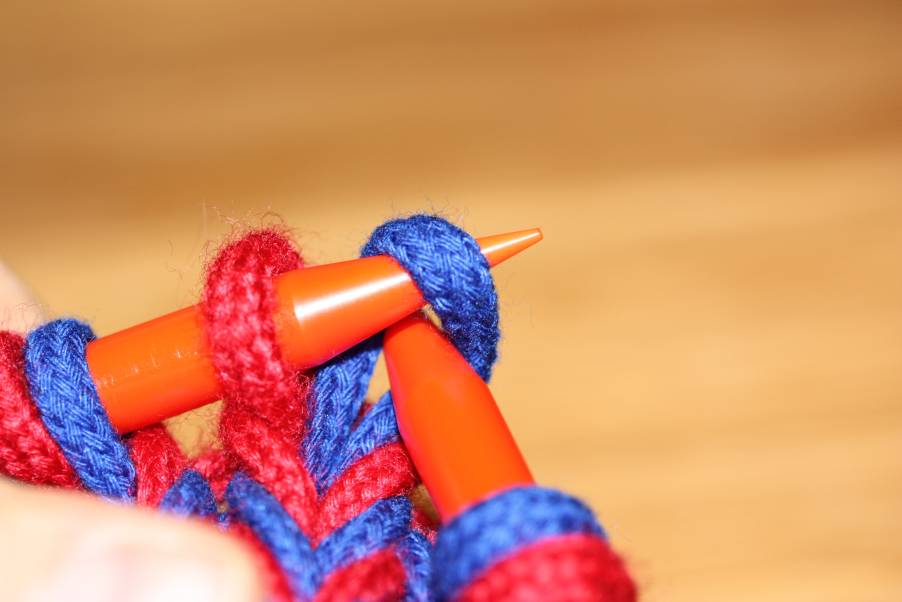
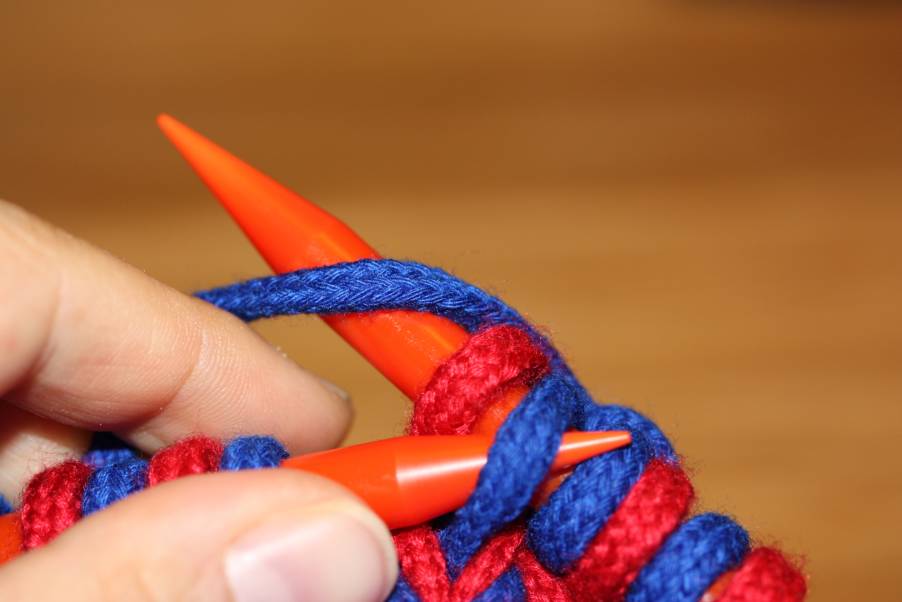
[caption id="attachment_2062" align="alignnone" width="640"]Insert right needle straight through both stitches on the left needle and wrap yarn from back to front (so the right leg of the new stitch will lie in the back)... Insert right needle straight through both stitches on the left needle and wrap yarn from back to front (so the right leg of the new stitch will lie in the back)...


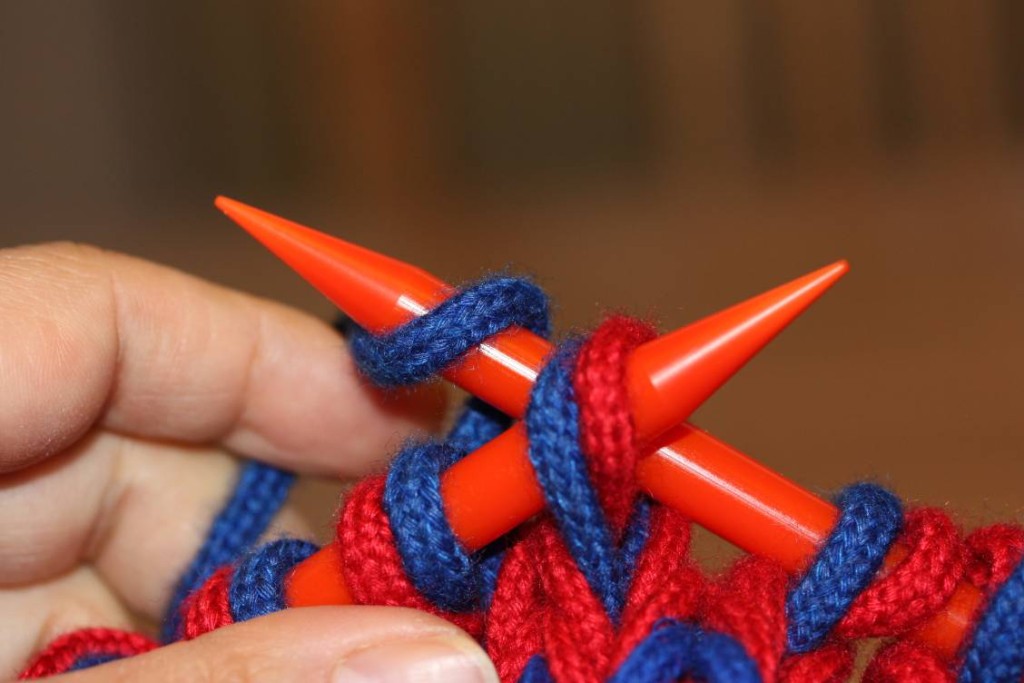
[caption id="attachment_2061" align="alignnone" width="640"]...draw through both stitches on left needle... ...draw through both stitches on left needle...


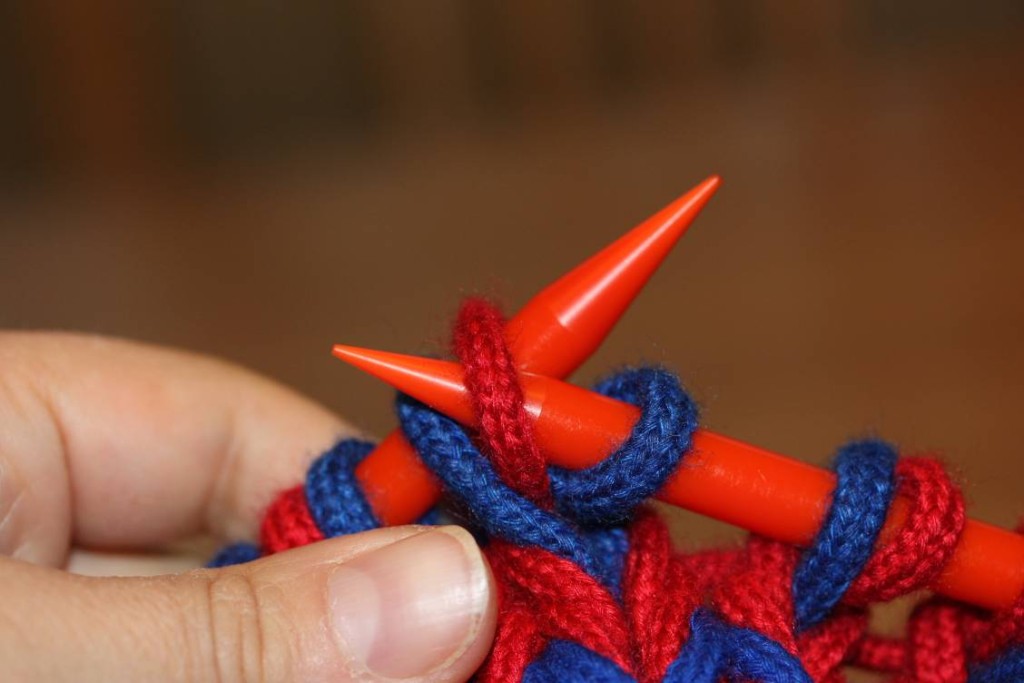
[caption id="attachment_2060" align="alignnone" width="640"]...and move the first stitch on the left needle over to the right. ...and move the first stitch on the left needle over to the right.


[caption id="attachment_2059" align="alignnone" width="640"]The new stitch lies on the right, the older stitch on the left. The new stitch lies on the right, the older stitch on the left.


[caption id="attachment_2058" align="alignnone" width="640"]View from the back - you can see how the stitches sort of cross over each other on the needle. View from the back - you can see how the stitches sort of cross over each other on the needle.


This is nice and relatively fast to work, and involves no slipping. There is a little danger of stitches swapping positions, though, especially in the first and last stitch of the row, mostly due to them being much looser. Knitting in the round eliminates that problem, and it also lets you work without having to deal with a return row, because that... well. That's an entirely different beast.

To get the stitches that have to be discarded to move over their new counterparts in the correct direction, there needs to be some slipping of stitches again. I tried doing a return row, similar in method to the original instructions, and lo and behold - there were twisted stitches again:

[caption id="attachment_2057" align="alignnone" width="640"]Insert left needle through both stitches on right needle. Insert left needle through both stitches on right needle.


[caption id="attachment_2056" align="alignnone" width="640"]Wrap yarn from back to front around right needle, pull through both stitches... Wrap yarn from back to front around right needle, pull through both stitches...


[caption id="attachment_2055" align="alignnone" width="640"]... and transfer first stitch on left needle to right, dropping the second stitch off the needles. ... and transfer first stitch on left needle to right, dropping the second stitch off the needles.


[caption id="attachment_2054" align="alignnone" width="640"]Then transfer both stitches to the left needle. Then transfer both stitches to the left needle.


[caption id="attachment_2053" align="alignnone" width="640"]The result after one more regular row: after the return row, the stitches that were discarded are twisted... The result after one more regular row: after the return row, the stitches that were worked in the return row are twisted...


I'm quite sure that the twisted-stitch issue can be resolved by different alignment or some other shenanigans. There remains, however, an interesting fact: no matter which method, the original or this one, working in one direction only is much easier than turning around and working knitting in the flat. So knitting with stitches through two previous rows instead of just one seems to be much better suited to working in the round, not in the flat.

Which sort of fits into the picture of early knitting being done in the round only, as far as we can tell from our evidence. So maybe there was a point in time when flat knitting, going back and forth in rows, was developed and it didn't work so well with the stitches in double depth, leading to the development of the knitting through just one previous row? Who knows - but maybe, some day, we'll have a few more knitting finds to help with these questions.

I hope you enjoyed this series about knitting - and if you find a better method, or a good way of working the return row, please let the rest of us know in the comments!
0
DEZ.
03
0

Finally a new website for the Forum.

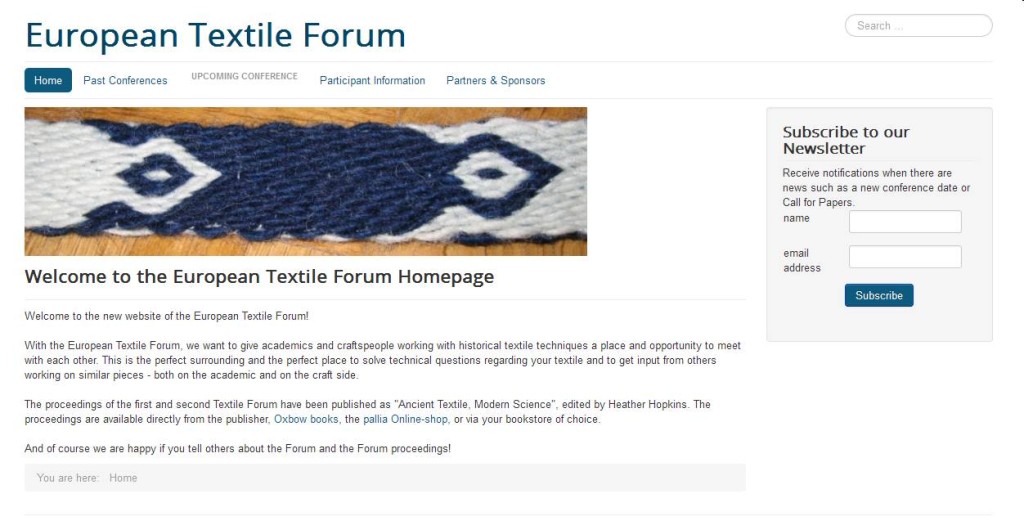
Yes, I'm sure the last thing you want to hear about (again!) is the website stuff I've been dealing with... but bear with me one last time, as it's not my own website. Instead, it's the site of the European Textile Forum - which also had to transfer to a new server when I was changing my provider.

I took the opportunity to do some long-overdue overhauling of the site as well. It's not completely done yet (there's more stuff lined up to be made available again, in the new structure and hopefully in a more accessible way), but it's online, it's serviceable, it now also runs on Joomla! and there are a lot of small, behind-the-scenes changes that should make organising work for the next Forum a good bit easier for me. (Easier is always nice.)

[caption id="attachment_2048" align="alignnone" width="640"]etf-screenshot This is how the page looks now - much nicer than before, I think. I hope you like it, and like always, if you have feedback - it's more than welcome!


I asked my new Internet guy to make the connection to the new place yesterday, and it went through delightfully fast, so you can now join me in enjoying the new site. And if you're interested in the Forum, or know somebody who might be, there's a newsletter you can subscribe to and we'll send you the occasional news and Call for Papers.

(My new Internet guy, by the way, has the wonderful company name Schwarzkünstler. That translates, literally, as "black artist", and that would have been someone in the printing business way back when printing was still new and it was still considered an art. Which means, as the internet is sort of the new form of print in a way, I get to have a little private squee for that name every time I see it. Which is very, very often at the moment, with all the logging in and transferring files...)
0
DEZ.
02
0

Aarhus Uni gives you an early present!

Aarhus University Press has a long list of books in their catalogue, and they include Else Oestergaard's "Woven into the Earth", the wonderful book about the garment finds from Greenland. They also have a monthly campaign of one e-book that they post on their site, downloadable for free.

Guess what this month's ebook is? Right - Woven into the Earth. Go here to download it, and feel free to spread the word. The book is absolutely wonderful and a must-have if you are interested in medieval garments. (h/t to Christa, who found this first.)

Other delightful news - the open-air museum village in Düppel, where I went to give a presentation this summer, has won a cultural award given out by Berlin. Congratulations!
0
DEZ.
01
0

Very Old Knitting, Part 4.

Time for some more knitting stuff! In the last installment of this little series, we've identified the stitches in the row worked from the left onto the right needle as the culprit for the twisted stitches - or, to be more precise, the alignment of these stitches. The stitches worked in this row sit with the right leg in front of the needle, and when they are pulled over the newer stitches off the tip of the needle, their legs cross.

Oh, and I've taken the whole shebang over to utterly oversized demo needles - so things should be clearer visible now. The "regular" towards-the-right row is knit in blue, the return row in red. As you can see, the blue stitches are all twisted (left leg crosses over right), while the red stitches all are untwisted.

[caption id="attachment_2043" align="alignnone" width="300"]The result of the return row: the stitches are untwisted. The result of the return row: the stitches are untwisted.


Remember the observation that the stitches lie differently from the first post in the series?

[caption id="attachment_2042" align="alignnone" width="300"]Stitch alignment as resulting from following the instructions correctly: red stitches with left leg in front, blue with right leg in front. Stitch alignment as resulting from following the instructions correctly: red stitches with left leg in front, blue with right leg in front.


The instructions result in a different alignment of the stitches, so that the stitches of the return row (which is worked onto the left needle) are sitting with the right leg in the back. Consequently, when working only the return row, all stitches will be untwisted, resulting in the correct fabric. When working the two rows alternatingly, the towards-the-right row (blue) stitches are twisted and the return row (red) stitches aren't.

There are two possibilities to deal with this. As you are slipping stitches a lot anyways, you could just slip the two stitches individually on the towards-the-right row, re-aligning the first one (the one on the right) so that the left leg is in front.

[caption id="attachment_2041" align="alignnone" width="300"]One option: realign the stitch to be pulled over so the left leg is in front of the needle. One option: realign the stitch to be pulled over so the left leg is in front of the needle.


Or you wrap the yarn around the needle the opposite way when knitting the towards-the-right row.

[caption id="attachment_2040" align="alignnone" width="300"]Wrapping yarn the other way around, so the left leg of the stitch will lie in front. Wrapping yarn the other way around, so the left leg of the stitch will lie in front.


Both options will work, and you will end up with the fabric as intended: each stitch going through two other stitches instead of just through one, as modern knitting does as a rule, and with no twisted stitches. It will still involve a lot of slipping, however, even if you work in the round.

So, to return to one of the earlier questions... is there a less slippery, possibly more efficient way to do this? Stay tuned to find out more!
0

By accepting you will be accessing a service provided by a third-party external to https://www.pallia.net/

Kontakt