
Latest Comments

Guest - Aislinn Dyestuff Citizen Science.
09. Oktober 2026
This is a great project. I look forward to the results. Thanks for letting us know.
Guest - Aislinn Time for...
09. Oktober 2026
Looks delicious!
Guest - Katrin Sprang Discussion
18. September 2026
Hi Rachel, I have looked for more photos of you, but that was not very successful. I found a link on...
Guest - Beatrix Sprang Discussion
15. September 2026
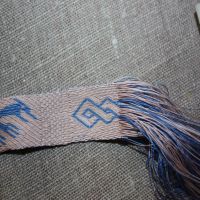
That lozenge pattern element is not a photograph, but a scan. So it should be to scale. But I pinned...
Guest - Katrin Sprang Discussion
15. September 2026
I was not referring to Rachel's reconstruction (is the reconstruction you refer to the one photograp...
NOV.
02
0

More Weaving.

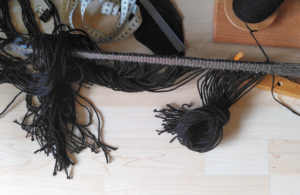
There's been some more weaving - I've progressed to about 106 cm from the 155 cm of the section with cords in the corded skirt.

Weaving this skirt, like all kinds of weaving or, indeed, about all kinds of craft work, has its own specific rhythm. I'm vastly enjoying it to settle down into that rhythm when working. Because there's three loops drawn through each shed, and I'm doing two sheds as one section at a time, it's a longer and somehow different sequence than "normal" weaving of a band, or even normal weaving of a starting border (which is what doing the corded section resembles quite a lot).

I'm only doing two sheds at a time to have as little difference as possible in loop length, as I find it makes the following steps easier. The weaving itself is a specific two-hand operation, with my right hand holding the shed open, holding the foundation cord for the loops a bit away from the band with the middle finger, and the first finger hooking the weft and handing it through the shed to the left hand, which pulls the loop and places it over a post on my measuring stick thingie. Repeat this two more times, then change shed, do another three loops, change shed and press in the weft before plying up the individual loops. This starts with the last of the loops from the previous sequence, which was stored and held under slight tension on my left pinkie toe - because otherwise, the tension from pulling the next weft loop will eat this one, and that is not good.

So - first loop to go is the stored one, freeing the pinkie toe to take the first loop from my post. Then the five others get plied up, everything gets placed behind the measuring gadget so this sits right next to the stored loop, and the next sequence starts.

These things are like a kind of a dance, using hands and fingers and in some cases also the feet, or other parts of the body. They take a while to develop, and the motions of different people working may be similar, but everyone will have their own specific movements and quirks and solutions. That, too, is lovely to watch when looking at someone crafting.
0
OKT.
29
0

The Answer... Once More.

I've made more progress on the corded skirt, even though it's not very visible. That is mostly because most of the time spent on this project today went into spinning more yarn for the cords...


but there was a bit of weaving, too. I'm now at about 42 cm (the Answer!) of 155 for the corded part. I'm also making "progress" on my podcast backlog list, because both spinning and weaving are a very good opportunity to listen to all these stories and discussions that I have in my subscription list.

It is a lot of fun to weave, and cord, this skirt, but it is taking its sweet time. Also, after a while of sitting on the floor in the weaving or cording position, I really need to remember to take a break to stretch and move a bit. Otherwise I'm feeling it when I finally do get up... it's a slightly weird working position in both cases, and it does take its toll on the hips after a while.

It also does take a good bit of concentration to get everything done as it should be - so I am looking forward to the extended weekend a lot now. We have a bank holiday on Monday here in Germany, so I'll be back on the blog on Tuesday.
0
OKT.
28
0

So many tests.

One of the things when doing a reproduction or reconstruction that always happens? More testing and trying out methods and materials than you'd have anticipated.

There's often that nagging feeling that there might be a better method. Or a better material. So you're looking at different ways of doing stuff, sometimes completely different, sometimes just a slight variation of what you tried before. At some point, though, there's a working method that does, yes, work - and then it's best to stop messing around and stop looking for something even better, even neater, even closer to the original... even though it may be tempting.

The optimal outcome is when you get to do enough testing beforehand that you end up with a really nice method when starting the actual piece... and that, usually, means more preliminary tests than planned for. Especially when it's a small but important thing that, on its own, is made rather quickly, testing it once more, practising it again, and trying out another fibre can be sort of addictive.

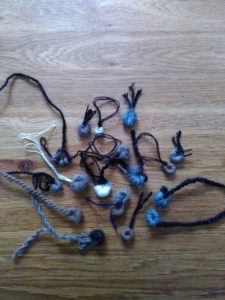
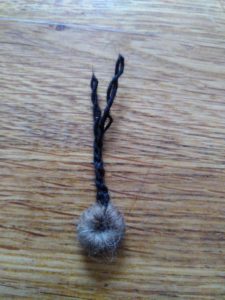
Case in point? The wool-wrapped rings on the bottom edge of the Egtved skirt. Yes, I did get some practice in with making such rings on the belt tassel... but they were still rather awkward to make, took a long time, and I was not overly happy with how the fibre behaved while working the rings.

Especially "took a long time" is a key thing here. With more than 300 rings, each minute that one of the rings takes will make a difference of more than 5 hours total work time. One minute adds up. The rings on the original also look very nice and neat... which can be achieved by picking the right wool.


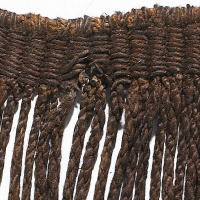
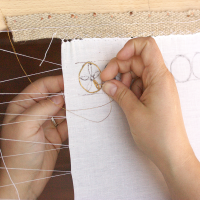
There's a lot of different possibilities to make these rings, starting from what happens with the ends of each cord to how they are inserted into the fibre wrap or how the fibre is wrapped around them. My current favourite process involves a skewer stick, two needles, and longer ends to work the rings, and its end result looks like this:


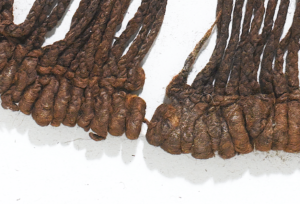
Here's a picture of some of the original rings for comparison:

[caption id="attachment_6529" align="alignnone" width="300"] Detail from this image from the Danish National Museum.


So... what do you think? Is it a match?
0
OKT.
27
2

More Photo Thoughts.

Since writing about the photo-taking spree, I thought that maybe it would be a thing to share some of my tips with you, regarding taking photographs of objects... just in case. Right?

First of all - if you are planning to take photos in a museum (which for most of us will be the most common thing), make sure that you are allowed to do so. Museums normally do not allow the use of flash, and often the use of a tripod is also forbidden. You might get allowed that if you ask nicely, and explain what you want to have the photos for. Make sure you know the museum's wishes on whether the pictures may be shared, or published, and under what conditions.

When taking photos, using the flash is out because of the potential of light damage to objects, especially textiles. It's also not much use anyways, as the glass cases will reflect the light, rendering your picture unhelpful.

So. Ideally, you want to have a camera that can do raw photos (digital negatives), and have a "fast lens". I've had good results with tuning exposure down in the general settings, going for slightly to considerably underexposed pictures, then upping exposure in the post-production. A dark picture can be lightened, but a blurry picture stays blurry. Some modern lenses and cameras offer a stabilising mode - that can definitely help.

Sometimes you can get away with actually touching the lens to the glass of the case (not all museums will suffer you to do this, and I've been told off for it more than once); that helps to stabilise these always-shaking hands that humans have. If you may use a tripod, do. In that case, a remote control for taking the photos is a good thing, otherwise your tripod might still vibrate from your pressing the button.

Try to keep your lens parallel to the object, so you can have a good depth of field; that is especially important if you are using a zoom lens or macro lens.

Using a white balance gadget can save you a good bit of time in processing your images afterwards.

Take a lot of pictures. And then some more. Thanks to digital photography, that is not costing an arm and a leg anymore as it used to in the times of analog film, so maybe invest in one or two good, fast storage cards extra and then click away.

Finally, and possibly the most important bit of advice: Make sure you'll know afterwards what you did take pictures of! When I'm doing museum photography, I always, always make sure to take a picture of the explanatory plaque as well; that holds the description of the piece and its inventory number. When I sort my images, I add that number to the description text in my photo database together with, duh, the name of the museum (which is usually not on the plaque...) - and if there are copyright or publishing restrictions on the photo, I make a remark of that as well.

Any thing that you have found especially helpful (or not helpful) when taking photos in museums, or in research situations? Let me know!
0
OKT.
26
0

Research Trip...

I had the huge pleasure of doing a research trip yesterday - connected to my colleague Andrea's project of researching the so-called Albecunde belt. (I've posted about that here, with an image of the band.) So I packed my photo equipment and my digital microscope and some tablet weave samples to cross-check things if necessary, and met up with Andrea. Then we went to Speyer together, to see the band recovered from an unknown cleric's tomb, dated to the 9th or 10th century. Like the Albecund band, this was woven as a band with letters, in red silk.

It is, also like the Albecund band, a simple thing - monochrome threads, made of fine silk with no twist, and all tablets threaded the same way and turning in the same direction for the background, then switching turn direction for the pattern (which is letters). The Speyer band also has a strip at each side that was originally decorated with a bit of simple brocading in silk.

We took a look, and tried to figure out how the original colouring may have been (as there were differences in colour in the side strips depending on whether the brocade had covered a spot or not), and of course we took photos. So many photos! I learned a lot from the mostly blurry photos from the last trip, so this time, there was a proper tripod with an arm to position the camera properly over the object, and getting the lens in plane with the band. There was also a proper digital microscope instead of the cheap children's play version that I had available last time, and oh, what a difference that made.

Now I have a huge amount of photos to sort through. The most important bit, though: There really is no twist in the silk that was used for the warp, and there is the same very strong twist angle to the tablet-woven cords as in the Albecund belt. Both of these are key to making the visual impact of the pattern as strong as possible.

The only thing I need now is a few extra days (or maybe weeks) of time to play around with untwisted, un-degummed silk...
0
OKT.
25
0

The Belt, Finished.

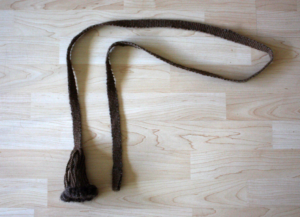
The belt has finished drying after its final soak now - so it is all done and ready now!


It was not hard to do - not the weaving, nor the cord-twisting, nor the ring-making, though all parts had a little tendency to be fiddly. The wool was slightly sticky (which was remedied with the application of some size), twisting the cords took a bit of time until my fingers got back into the smooth action, and wrapping the end rings with fibre did turn out to be the fiddliest thing of all of the process.

I will definitely look into improving my method for the many, many ring ends on the skirt! At least after some more tries now I know that the fibre has an immense influence on how the wraps look, and how easy they are to make. Which means that I might end up using a different wool fibre than the one I had planned to use, as the results are just so, so much better.

It's amazing how sometimes small differences between materials can have a really, really huge impact. Have you had a similar experience with two kinds of wool that appeared not so very dissimilar at first glance showing very different behaviour, or very different outcomes?
0
OKT.
22
0

Egtved Progress.

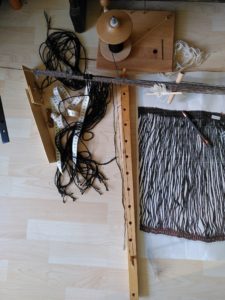
There I am, making slow but steady progress! The belt has been finished, and now I'm back on the corded section of the Egtved skirt:


Yes, I'm working on the floor - I put the warp there on a hunch, and I'm very glad now that I took that decision. While it may not seem as comfy for working as seated at a table, it gives me the possibility to use my foot (or, to be precise, my left big toe) to assist with things. The wooden piece you see in the middle of the photo is used to measure off the cord lengths, and I hold both this measuring thing and, on top of it, the last loop pulled through the previous shed, in place with my toe. That way I don't have to do too many loops at once, which results in loops crossing each other, and me having to sort them out again, and/or in distortion of the weave or changes in loop length. This way, I do each shed's loops as a separate batch, pulling them out, then letting them ply up. Then they are put out of the way. After a while of weaving, I've taken a break from that and started twisting the cords; to have something else to do for a change, and to prevent huge tangles from having too many cords to deal with at once (though I suspect that would not happen, really).

The cords are much longer than the ones on the belt end, and quite a bit thinner, so they do feel and behave rather differently. I'm also not yet happy about the rings, there will have to be some more tests to find the right amount of fibre to wrap around to arrive at the proper size and thickness for the rings. Unfortunately there's no picture showing them clearly from all sides, so part of this will remain guesswork.

To the right of my measuring and weaving tool, you can see the to-scale-printout of the original skirt, which serves as my guideline and to check if I'm about right. This is immensely helpful to have, it's so difficult to work just from descriptions and written measurements!
0

By accepting you will be accessing a service provided by a third-party external to https://www.pallia.net/

Kontakt