
Latest Comments

Guest - Aislinn Dyestuff Citizen Science.
09. Oktober 2026
This is a great project. I look forward to the results. Thanks for letting us know.
Guest - Aislinn Time for...
09. Oktober 2026
Looks delicious!
Guest - Katrin Sprang Discussion
18. September 2026
Hi Rachel, I have looked for more photos of you, but that was not very successful. I found a link on...
Guest - Beatrix Sprang Discussion
15. September 2026
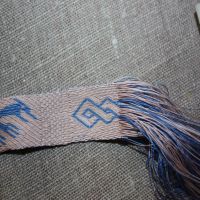
That lozenge pattern element is not a photograph, but a scan. So it should be to scale. But I pinned...
Guest - Katrin Sprang Discussion
15. September 2026
I was not referring to Rachel's reconstruction (is the reconstruction you refer to the one photograp...
FEB.
23
1

Bayeux Tapestry - Now Online!

You probably know that - you're looking at some newsfeed or something on the internet, and suddenly something really cool and exciting pops up. That is just what happened to me, leading to my finding out about the Bayeux Tapestry online.

In a project to make the embroidery more accessible and digitally available, the whole 70 metres have been photographed and then pieced together into a large panorama - which is now freely accessible online. So you can have a look at whatever piece you want to, and even zoom in quite a bit. Here's the museum's info and intro page to the Online Tapestry.

I've spent some time already squinting at the stitches in different parts. Of course, I immediately had an Oliver Twist moment when clicking on the zoom-in button, when I would really have liked to have just one more... but didn't get it. Still, it's wonderful, and probably allows a closer look than going to visit the original piece!
0
FEB.
08
0

Braiding, Hair and Other Stuff.

Braiding is a fascinating technique - there's so many different braids that can be made, just by passing strands over each other, and there's a good number of different ways to go at it as well.

That starts from using just your fingers to hold the individual strands, which are fixed at one end, continues with the use of loops held on the fingers or the hands, and ends at the use of more elaborate tools such as braiding stands or braiding tables, weights, and weighted spools for the individual elements. The last is used, among other things, in kumihimo (the Japanese art of braiding), but was also employed in Europe for braiding hair.

In case you're not familiar with that, there was a time in the 19th century when it was totally en vogue to have jewellery or artwork done with human hair, as a keepsake and especially as a remembrance item for deceased loved ones or family members. You can read a bit more about this topic here, and the book referenced whenever hairwork is mentioned, "Self-Instructor in the Art of Hair Work", is freely available on the 'Net, for instance here at archive.org or via googlebooks or Project Gutenberg (if you're not in Germany, that is - Project Gutenberg is blocked off for German IPs, because, ah, stupidity.)

I've thought about trying to do some hair work with my own hair now and then, basically whenever I stumbled across this topic, but I've never actually put together all the necessary things and actually tried it. Maybe some day I will, before my hair gets too short (age is having an effect here - my braid used to be quite a bit longer five or ten years ago!).

Anyway - there is a distinct similarity between this technique used for hair work, with weights attached to the many individual elements and braiding with the help of a stand, and kumihimo. In case you're interested in the latter, the American Kumihimo Society is running a virtual meet-up with several workshops on March 20&21. Registration is possible for both members and non-members; you can learn more about the virtual meet and the workshops here.
0
FEB.
03
0

More goldwork.

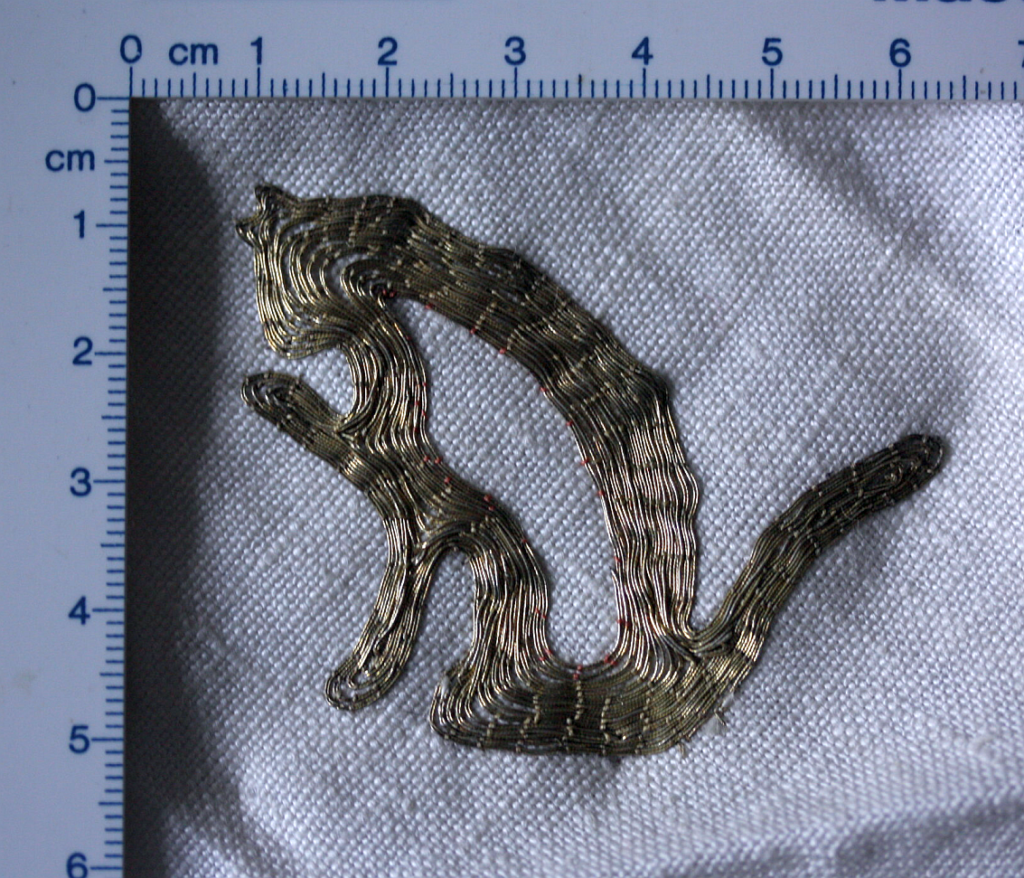
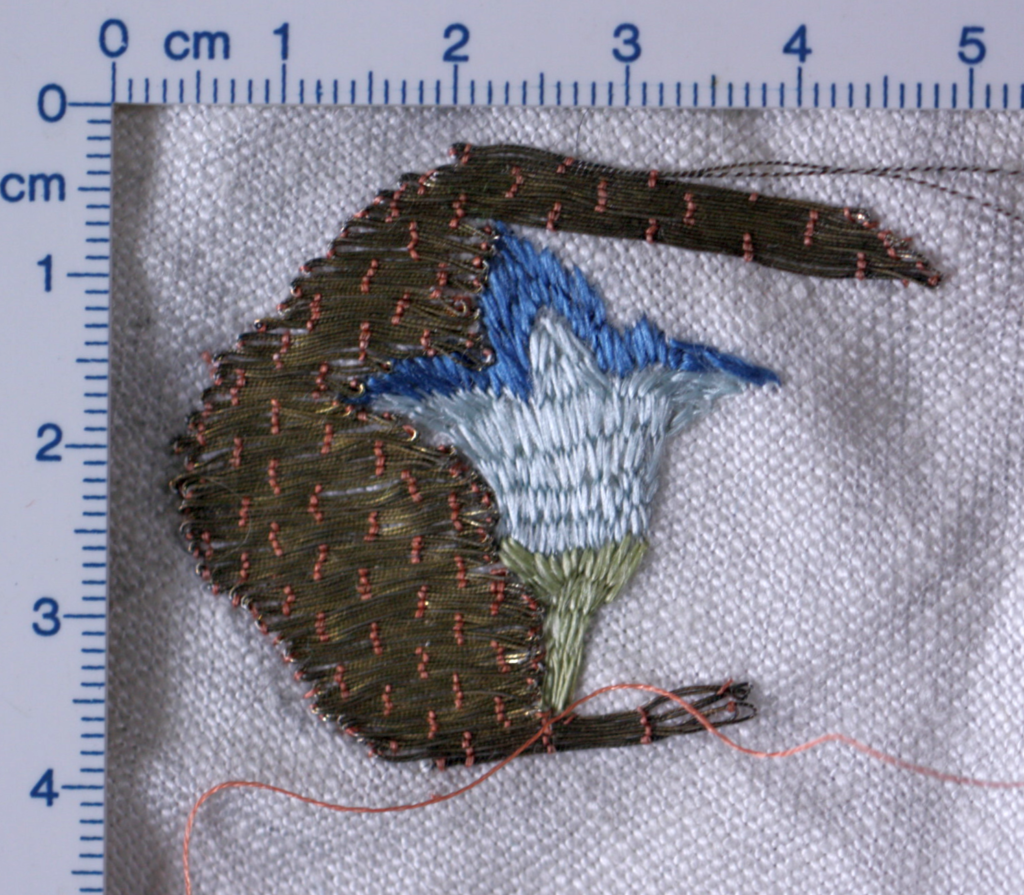
Here's another picture of embroidery featuring gold - this is the sample (unfinished, of course) where I did the counting of how many threads were lying side to side:


The silk parts are worked in split stitch, the gold is couched down with a red silk thread in the same thickness. As you can see, I was not very good at this kind of stitching when I made the sample - which was quite a few years ago! I did this bit mostly to show how the silk and gold would look together, and how split stitch can be used to cover an area. So it was stitched on a rough charcoal drawing as a template, and the gold patch also only outlined with coal, still faintly visible and not very rounded or symmetrical.

Like most of my sample bits, this has been dragged around and stuffed into baskets and boxes and taken out and fingered and then stuffed back in wherever it came from. I've also cleaned (gently washed) all my samples at least once by now. The gold has developed a little bit of a patina due to all this, but it's still pretty and shiny when light falls on it. So - it does hold up quite well!
0
FEB.
02
0

Gold Embroidery Maths.

I've been asked recently about how much gold thread to calculate for covering a given area - so I've taken out my samples and took a look, and did some maths, and maybe that's interesting for you, too.

The gold thread that I have in the shop is about 0,2 mm in diameter - so if we assume that it will be couched down perfectly, one thread right beside the next, and there's no significant gap between threads, 50 threads next to each other are needed to cover a width of one centimeter. For a stripe one centimeter wide and ten centimeters long, accordingly 5 metres of thread are needed - plus a little more, since it's necessary to have a little bit of thread to pull to the back of the fabric.

When I had my gold embroidery starter kit fairly new, I found a volunteer to test it for me, and these are the results of stitching with 5 m of gold thread:

[caption id="attachment_5805" align="alignnone" width="640"] This is how much ground you can cover with 5 m of gold thread.


That's roughly in the area of the 10 x 1 cm stripe. As you can see in the picture (hopefully - it's really hard to take a good photo of gold embroideries!) there are areas where the threads overlap a little, and areas where there are narrow gaps, and that can even itself out or, if you tend more towards one or the other, it will reduce or extend your covered area slightly.

As to the number of threads lying beside each other, I did some counting on a piece where I had threads couched all in parallel, and I got about 21 to 23 threads on 5 mm - so about 42 to 46 per centimeter. Which is close to the theoretical 50, but not quite there, just like I would have expected.

For calculating thread needs, thus, 50 cm of thread per square centimeter seems to be a good ballpark number - it should give you enough wiggle room to anchor your thread ends and safely cover that area, even if you have a little bit of overlap here or there.
0
JAN.
22
0

Experimental Archaeology Exhibition...

The MAMUZ, the museum in Asparn/Zaya in Austria, is preparing an exhibition about experimental archaeology (more about it here, in German). The exhibition will then move on as a wandering exhibition, showing objects from archaeological experiments and explaining the objects, and the experiments, in video clips.

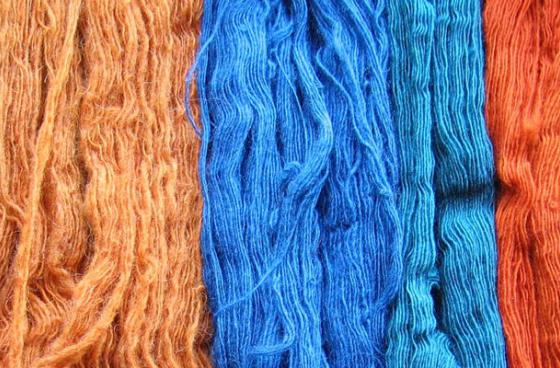
So I've been busy doing video stuff, including the cutting and editing, and doing all the other bits and things necessary to prepare. What ate a lot of time - much more than I had expected - was making a colour sample card as the object to go in there to represent the Pompeii Dyeing Experiment.  This started in 2012 with a first run, and there was an add-on made in 2013, followed by two more runs of the experiment in 2016 and 2018. The aim was to find out how a metal kettle would influence the results of the dyeing process, both due to the presence of metal in the mordanting bath, in the dyeing bath, and in both.


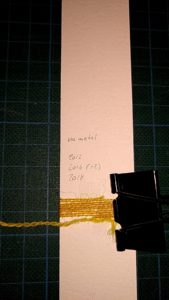
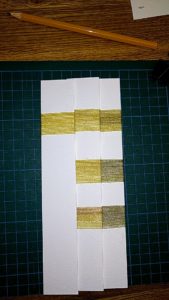
For the exhibition, I wound the samples onto strips of cardboard, grouped by kind (mordant, dye, both) and by metal. Nine turns of the thinner wool, used in 12/13 and 2018, and six turns of the thicker wool used in 2016. All neatly in the same position on each strip...


...and it's amazing how much of brain such a simple task can eat.

My personal main takeaway from this experiment, by the way, is the importance of repetition - plus a much higher appreciation of just how much variation natural materials can introduce, and how much of a role sheer luck plays in even the best controlled experiment.

In the 2012 run, we ended up with a reddish colour on the yarn dyed in the copper and the clean lead kettle - which made a kettle made from lead with an oxide layer on the surface the neutral kettle, very close to the actual control dyed in a glass jar with no metal plate added at all. In the following runs, we were never able to reproduce that reddish colour - apart from the iron, our samples all turned out pretty yellow, and much the same across all kettles. If not for that chance aberration in the first run, we would have thought that there is no real difference between the kettle materials, at least not when using madder or birch leaf as a dye.

I'm actually tempted to run the experiment again next time that the Forum will happen (2021, I'm looking at your autumn with a critical eye!), with weld as a dyestuff instead of birch leaf, and see if results are giving us a clear difference there.

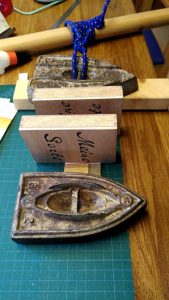
Anyway - the card has been finished, which involved lots of glueing, and the use of some of my bookbinding equipment, and now it will go on its way to Asparn!

[caption id="attachment_5775" align="alignnone" width="169"] Pressing with weights until the glue has set...
0
JAN.
21
0

EXARC Textile Chat coming up!

There's another EXARC Textile Chat taking place this Saturday at 15:00 Amsterdam time. This month, the topic is "colour" - to brighten up all our days, something very welcome in this rather colourless time of year.

[caption id="" align="alignnone" width="393"] The image that goes with the Textile Chat session... clicking it should bring you to the event info page.


If you're not familiar with this event yet: It's an informal text chat on the EXARC discord channel, where anyone interested in historical textiles is welcome to join in (or just lurk, if you prefer). You can read more about how to join in on the EXARC website for the event.
0
DEZ.
16
0

"Bake" Mosaic Knitting Pattern

Naomi Parkhurst is making knitting stitch patterns (which sometimes include mosaic patterns) out of words, using a special encoding technique. Fittingly for this time of year, she's encoded the word "bake", and I think it looks really pretty. You can take a look at it here.

Speaking of baking - we're done with all the "necessary" seasonal baking. Though there's some egg white left that needs to be taken care of, and I'm intrigued by a Finnish seasonal thing called Joulutorttu. So there might be something in the near future still!
0

By accepting you will be accessing a service provided by a third-party external to https://www.pallia.net/

Kontakt