")
")


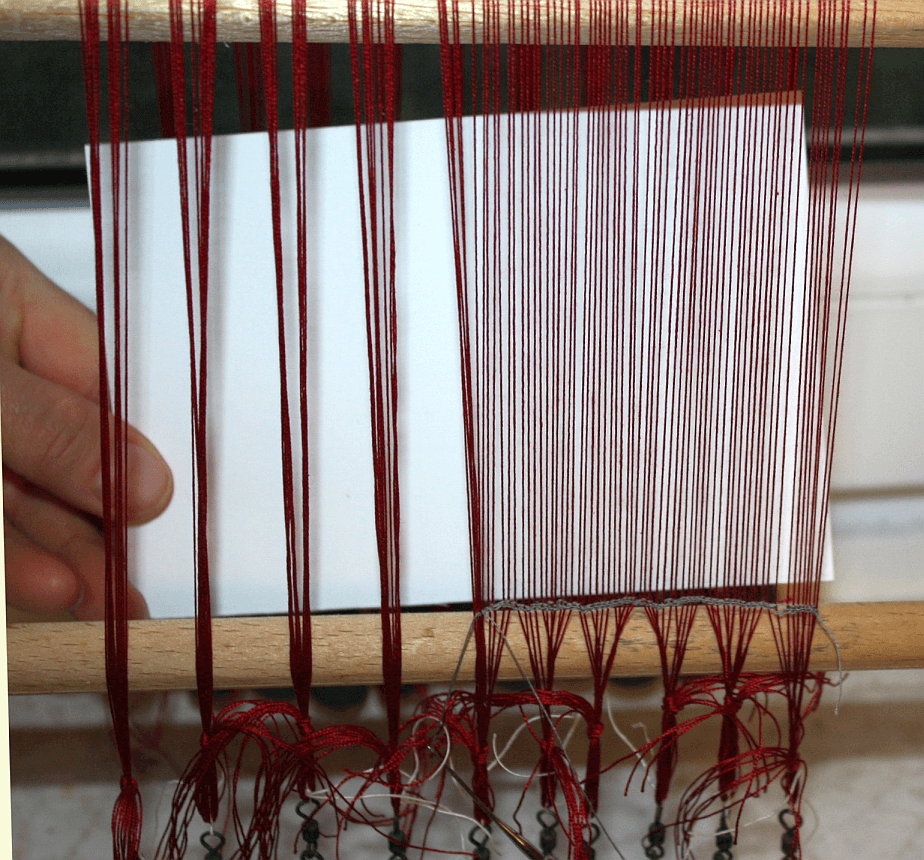
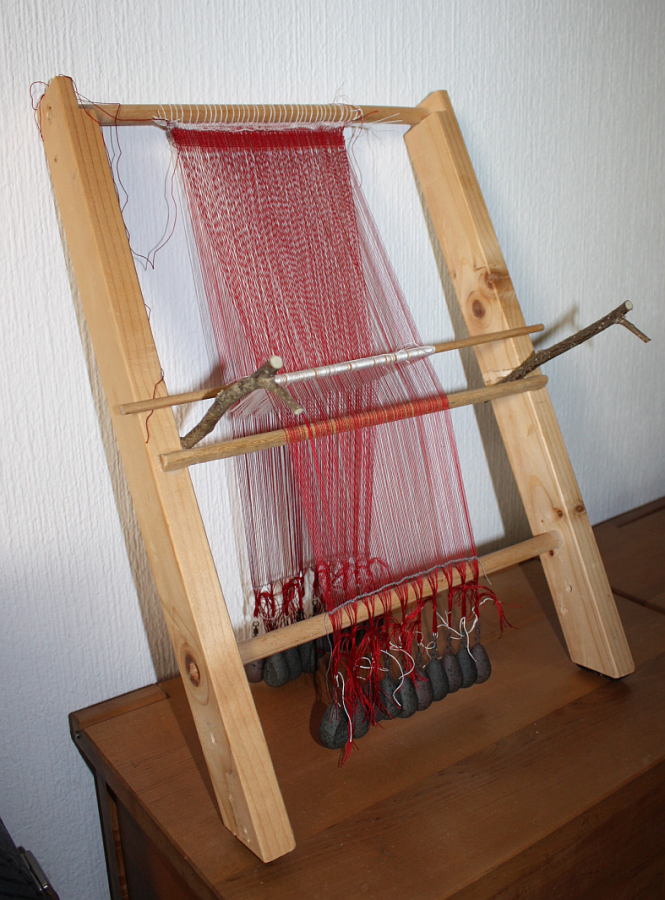
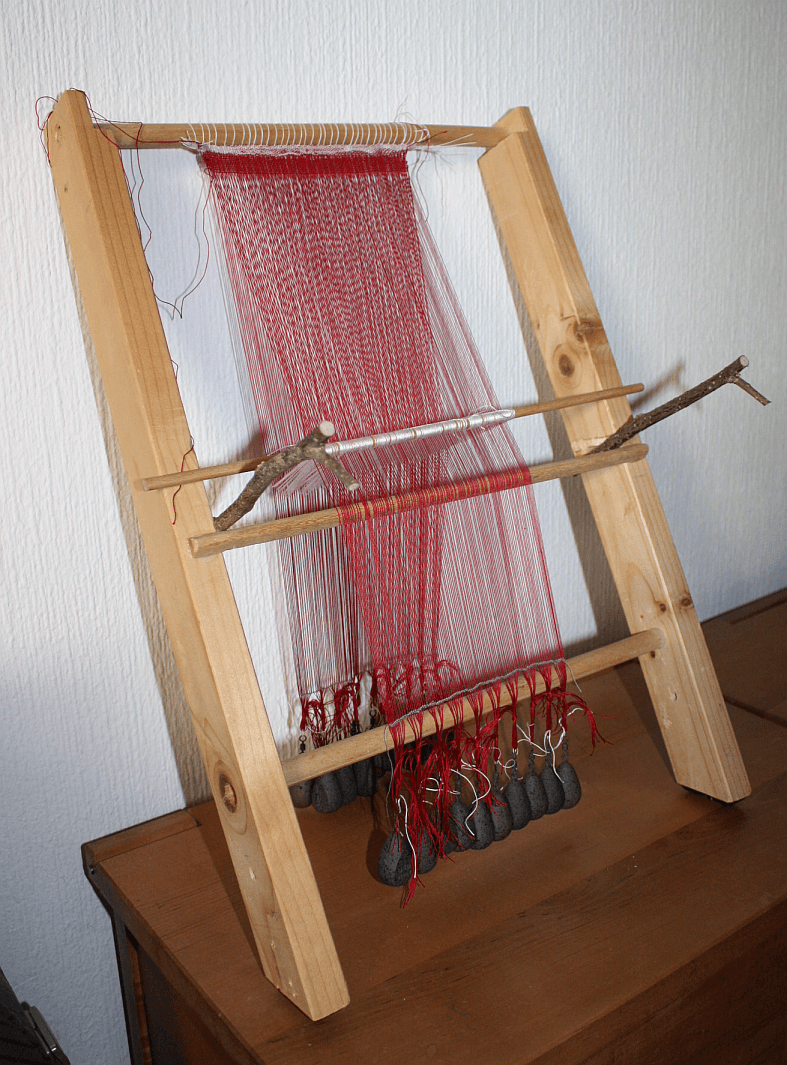
So now the loom model is done, and I'm quite happy with it, and here's picture proof of how it looks with the natural shed open:
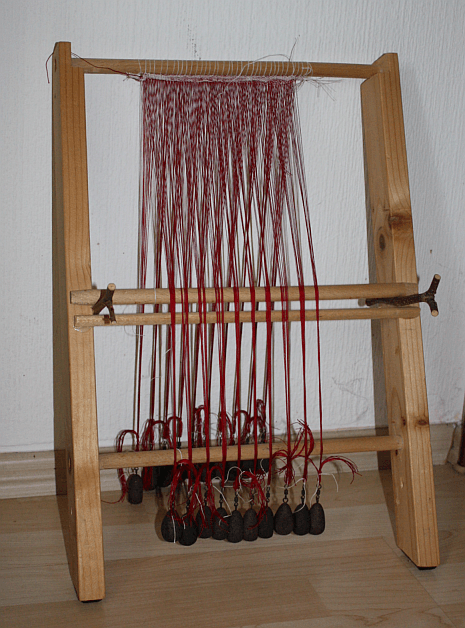
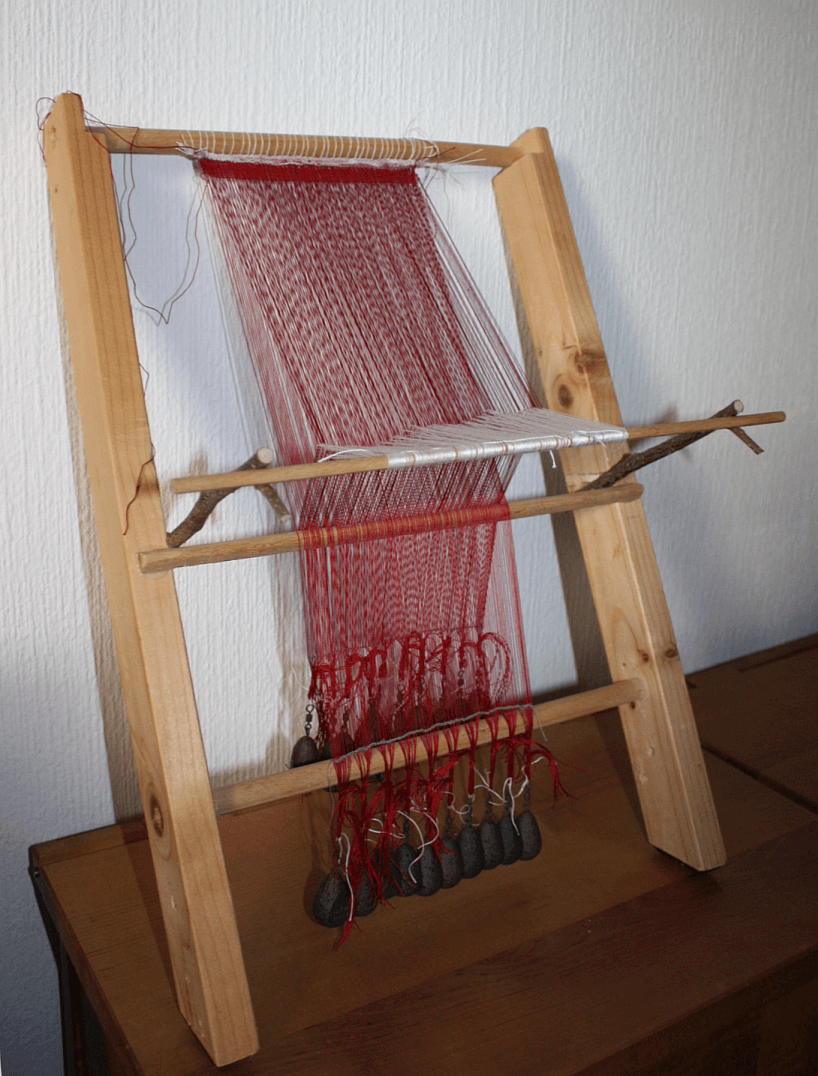
and the artificial shed open:
And did I mention that it is ridiculously easy to make mistakes when setting up a loom? Here's picture proof of that, too:
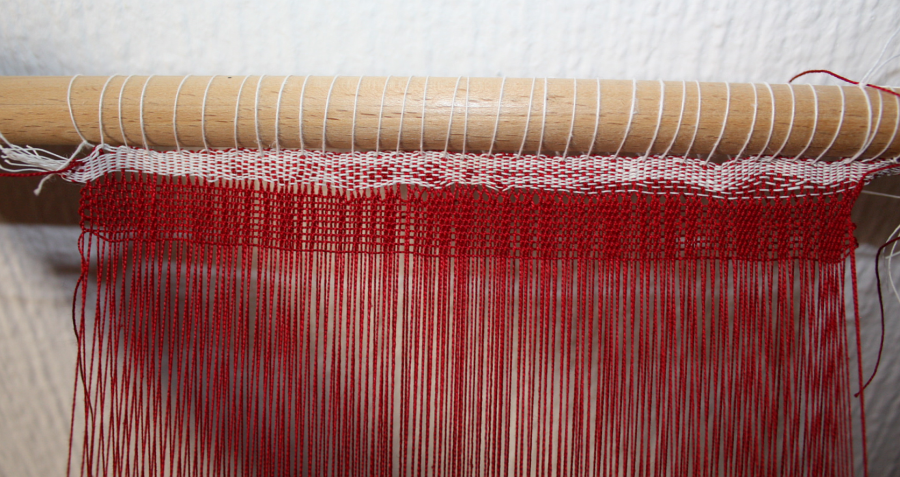
It's not too obvious, but I made a heddling mistake, and there is a double thread in one of the sheds, mucking up the order. You can see that the starting border looks a bit less horrible now that I have tensioned the warp and shoved the side in, though it still has issues on the right-hand side. You can also see that there is a nice crossover of the warp yarns on the left of the fabric, just as it should be, and then there is a different, more obvious crossover of the warp yarns on the right-hand side, after I made that heddling mistake. It was clear to me that there has to be a mistake when I finished heddling, because there were two back layer threads where only one should have been at the end, but I didn't take the time to find the mistake or re-heddle.
And actually, while it is not entirely flattering for me, and is a little awkward to say "hey look, I messed up here, that is how a weaving fault looks", I have decided to leave the loom as it is - because yes, it does give an opportunity to tell people "look, setting up a loom is not as easy as you might think, and making mistakes is easier than you'd suspect, and you can see how one single little mishap leaves its mark right through the whole fabric, and things like this can also help conservators and archaeologists identify an individual fabric or find out how things were cut from one fabric"... so it's a teaching opportunity, and well worth feeling a little awkward for.
Plus it's not bad to be reminded from time to time to be humble in regard to these old techniques, and that the skills and mastery of our ancestors with these seemingly simple tools were really, really incredible.
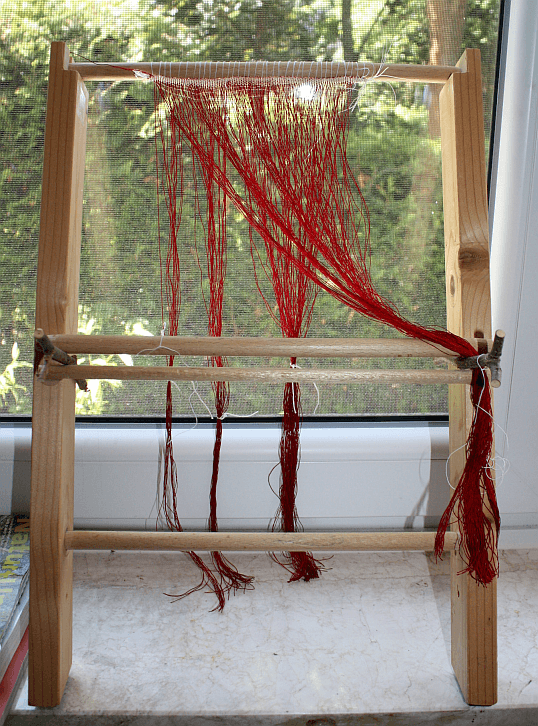
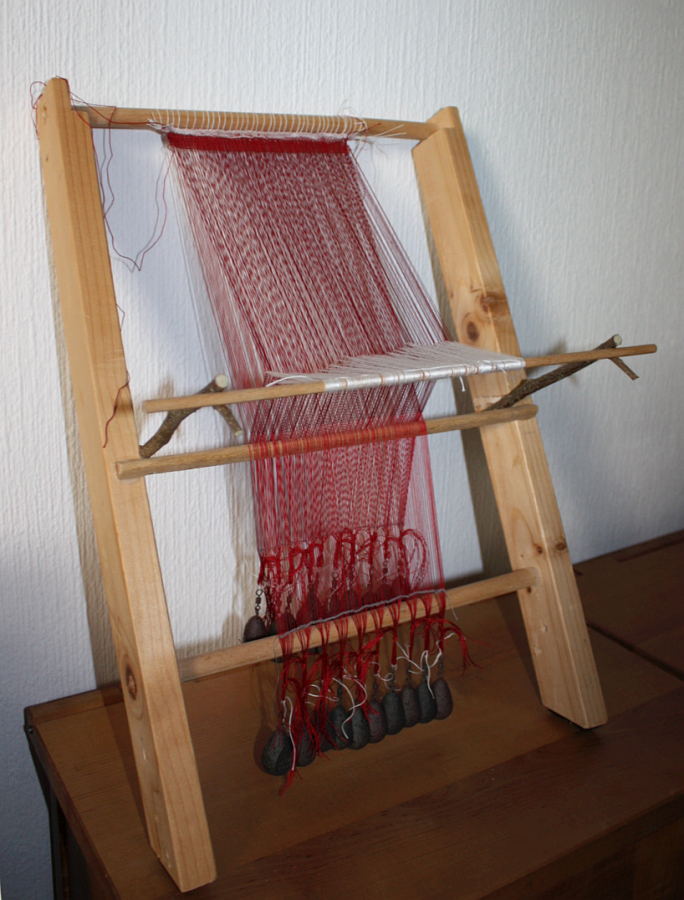
and the artificial shed open:
And did I mention that it is ridiculously easy to make mistakes when setting up a loom? Here's picture proof of that, too:
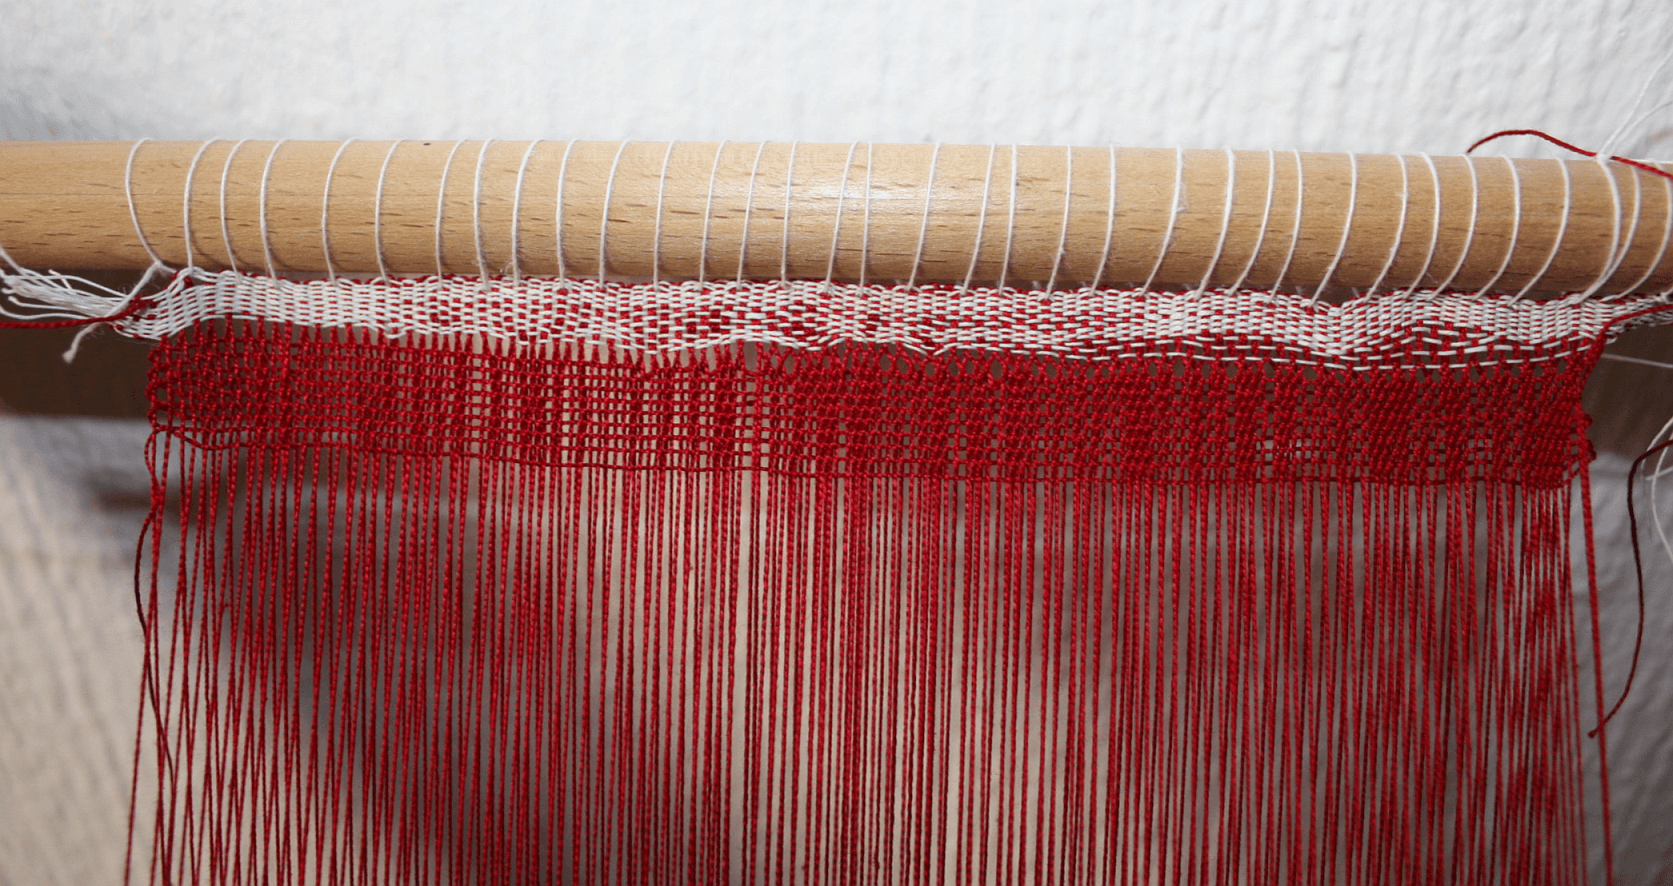
It's not too obvious, but I made a heddling mistake, and there is a double thread in one of the sheds, mucking up the order. You can see that the starting border looks a bit less horrible now that I have tensioned the warp and shoved the side in, though it still has issues on the right-hand side. You can also see that there is a nice crossover of the warp yarns on the left of the fabric, just as it should be, and then there is a different, more obvious crossover of the warp yarns on the right-hand side, after I made that heddling mistake. It was clear to me that there has to be a mistake when I finished heddling, because there were two back layer threads where only one should have been at the end, but I didn't take the time to find the mistake or re-heddle.
And actually, while it is not entirely flattering for me, and is a little awkward to say "hey look, I messed up here, that is how a weaving fault looks", I have decided to leave the loom as it is - because yes, it does give an opportunity to tell people "look, setting up a loom is not as easy as you might think, and making mistakes is easier than you'd suspect, and you can see how one single little mishap leaves its mark right through the whole fabric, and things like this can also help conservators and archaeologists identify an individual fabric or find out how things were cut from one fabric"... so it's a teaching opportunity, and well worth feeling a little awkward for.
Plus it's not bad to be reminded from time to time to be humble in regard to these old techniques, and that the skills and mastery of our ancestors with these seemingly simple tools were really, really incredible.