Latest Comments

Guest - Aislinn Dyestuff Citizen Science.
09. Oktober 2026
This is a great project. I look forward to the results. Thanks for letting us know.
Guest - Aislinn Time for...
09. Oktober 2026
Looks delicious!
Guest - Katrin Sprang Discussion
18. September 2026
Hi Rachel, I have looked for more photos of you, but that was not very successful. I found a link on...
Guest - Beatrix Sprang Discussion
15. September 2026
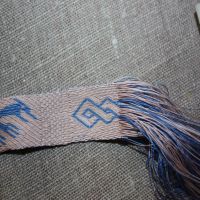
That lozenge pattern element is not a photograph, but a scan. So it should be to scale. But I pinned...
Guest - Katrin Sprang Discussion
15. September 2026
I was not referring to Rachel's reconstruction (is the reconstruction you refer to the one photograp...
JAN.
21
3

I have new socks!

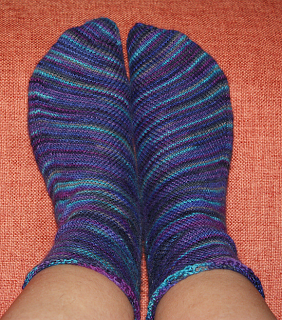
A few days ago, I have finally finished binding off and weaving in the ends of my new socks.

After knitting a pair of Skew socks one sock after the other (which brought a problem in size, since one was done with very different tension than the other) and modifying the pattern so it would fit my higher instep, I had decided to do another pair, and that time simultaneously. Only... with some more tweaking of the pattern since the original heel is not roomy enough for my foot.


So after some knitting, some re-thinking, some maths, some more maths and lo and behold! not a single rip-back, my new socks are now finished. The heel has become roomy and maybe a tad too baggy even (there's a little bit standing out where the heel graft starts), but they fit perfectly otherwise and are oh so comfy.


I think there might be more socks like that in my future - or at least socks with skewed toes, or with otherwise anatomically more correctly shaped toes than standard socks, since I find the fit thoroughly delightful!
0
DEZ.
13
2

Cloth buttons - revisited.

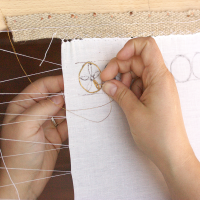
I have gotten a few comments on Friday's description about the button-making, and every one of them was asking for photos.

Well... there is a reason why I did not post photos straight with the description (apart from my usual laziness, of course). Those cloth squares are small, and to catch the process properly, quite a lot of photos would be needed. And you'd still not be able to see some of the things.

So instead I now made a small, rather dark, rather bad quality video where you can see the process almost right to the end - our little camera only takes videos up to a certain time in one go. Together with the description from Friday, you should be able to understand what I'm doing there. The bit that is missing at the end is just some more stitching across the underside and neatening up of the button, with stitches that are different from button to button depending on cloth, placement of previous stitches and whatever else makes some buttons come out almost perfectly round and others quite square.

So... I hope the video is what you needed and thus helps you. Have fun!

0
DEZ.
10
4

The things you pick up.

YearsZM3 and years ago, at a small conference in Bamberg that a colleague of mine organised, I met with a few very interesting and very nice ladies. And with one of them, I somehow got to talking about buttons.

That was not so long after I had made a little hood with buttons after Textiles and Clothing, and I had made my buttons just like Crowfoot suggests: Cut a circle, pull it together by sewing along the edge, maybe stuff it with cloth and strengthen it by sewing through it in circles. That did work, but was somehow awkward, and it took quite a long time to do, and left the cut edges of the button quite exposed on the underside.

And Véronique Montembault then told me about a different method, one that she had reconstructed and now used for her cloth buttons: Cut a square of cloth, fold the corners in and fasten them with a few stitches; then fold the corners in again and fasten them; then fold the corners in again. The last fold-and-pull action tightens the button into a roundish shape; if there are still slight corners left, I stitch into them, pull the thread across the underside of the button and stitch into the next protruding bit. With soft fabric, it sometimes helps to make the button nice and firm to stuff a bit extra material into it before folding corners in the second time, but with firm fabric, just the square is enough. The cloth bits for this method are easy to cut out, do not waste fabric, make lovely little buttons in very little time, and all the cut edges of the fabric bits are hidden inside the button where they can't fray at all.

I did not use that knowledge about how to make buttons differently for years - but now I've made a heap of cloth buttons for the Hartenstein garments, and with every button, I felt really glad that I had been to that conference and met with somebody who gave me that little gem of knowledge (she demonstrated with a dark red paper napkin, by the way) that made my life so much easier now and button-making so enjoyable. And now I'm passing it on.

Cut a square out of your button-making fabric; try 3 cm side length for a smaller button, 4 cm for a large one. Thread a needle with thread, make a knot on the end of the thread and stitch through all four corners of the square, front to back, close to the edges and once more through the first corner; pull gently on the thread to bring them together. Now you can push them down onto the middle of the square. I now stitch a small circle around the middle of the now smaller square, to hold the corners down and strengthen the button top. Now stitch through the four new corners again (all four and the first one a second time) and pull together; this gives you a little pyramid shape, or something resembling a flower with four petals. I fix the middle by stitching just once through the button top and back.
Now the final fold. Like before, stitch through the four corners and the first on a second time. Try to squash the button into a rounded button-form with one hand and pull on the sewing thread with the other hand, making the button nice and tight. Stitch into all bits that stick out on the round and pull them together by criss-cross-stitching on the base of the button. When I'm content, I just stitch through the button to the button-top and back again once and then snip the thread.

And that's all there is to a folded button from a square bit of fabric. Enjoy!
0
NOV.
15
3

Once upon a time...

Once upon a time, sheep's wool was a valuable resource, prized and traded across all of Europe. Once upon a time, sheep's wool was so valuable that a lot of effort went into breeding sheep to get good, well-spinnable crops of wool. Woolen cloth was used to make clothes, blankets, even sails and tents. Garments were tailored from woolen cloth that was so sturdy it would stand decades of wear. Good wool was highly prized.

Today, sheep are bred that will not give a crop of wool, because getting the sheep shorn will cost more - much more - than the normal market price will yield for the wool. Sheep are shorn with no regard to shearing quality, and the fleece taken off is not sorted, but just stuffed into sacks and put away. The only wool that will still get a slightly higher price (which is still in no relation to the worth of good wool as a material) is standard white merino wool, which will then be washed, straightened, and carded to death, resulting in the standard top that you can buy everywhere. Thread spun from that will not be very sturdy in comparison to wool that has not been treated to death.

And for all those of us who would like to work with wool different from this? We now have a problem, Houston. Because worth of the wool has gone down so far that wool will be thrown away (that can cost money in Germany, by the way, because it is "special refuse"), it is often given away for free - and that is further lowering the perceived value of wool. If we let this go on for another decade, who knows if it will be possible at all to get wool suitable for historical crafts anymore?

Which brings me to a question directly related to this. Would you, gentle readers, buy wool prepared in accordance to historical treatment/preparation of wool - that is, not washed (only rinsed, or not been in touch with water at all) and then combed so that you spin in the grease and then wash the yarn? Would you be willing to pay a fair price for wool like this, meaning that this wool would be much pricier than normal, factory-prepared wool? Or are you content with what is offered from the factories nowadays?
0
OKT.
18
0

Sprint to the stopover.

 I'm still working hard on all the different bits and pieces for Hartenstein, including getting enough things prepared that I can take sewing work with me when I'm out of office from Wednesday on to the end of October. Which means that I am doing extra-long hours currently - which for me always means that I need something to relax with, and that is usually books, films and, since last year, knitting.

So here's what is currently happening (at least some of it):

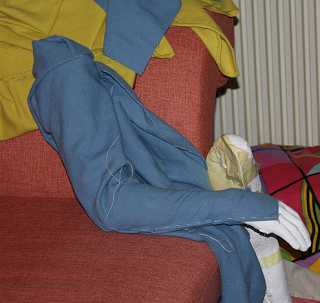
Sleeves are getting sewn in and fitted to the Lady's blue dress...


... the man's mi-parti hood in yellow and blue is getting dagges cut and edge-finished with beeswax...


... and to relax, I'm knitting leg warmers in Kauni rainbow-coloured wool.


As usual, I'm knitting two at the same time, which saves all the hassle of counting and writing down the counts, and I'm just past the knee. The leg warmers are fully fitted, because I have rather pronounced leg muscles, and that makes for a lot of shape and circumference, and I even have to increase rather generously for longer socks, let alone leg warmers.


I like the colour scheme and the long, slow changes of colour very much, and I think it's also nice that the two pieces start at a different place in the colour sequence. (Also makes two-at-once knitting dead easy, what with the different colours and so.)
That said, I'm most probably not going to buy that wool ever again: The colour repeats have a different length, so I'm ending up with green knees on both legwarmers. I can live with that, though - what really irks me is the quality of the yarn itself. The yarn is very irregularly spun and quite badly plied at times, changing from the thickness I would have expected to very, very thin plies - more like sewing-thread thickness at the thinnest bits. Were it my own hand-spun wool, I'd be quite ashamed of it, and it makes me rather fearful how long the material will hold up to being used as an item of clothing. And actually, I'm wondering why I never heard about that quality deficiency before - I heard that Kauni can have lots of knots, but so irregularly spun yarn?
0
SEP.
01
1

Can I have chocolate? Please?

Unfortunately, I think we consumed the rest of our chocolate yesterday while looking at graphs and fiddling with axis setups (the most patient man of them all and myself). Good chocolate. Good graphs.

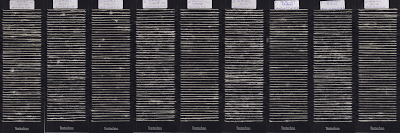
And not only have I graphs, I also have visual survey cards of all the spinner's threads. Which you already know from one of the photos I posted a while ago - but now I have them all. And they are all scanned in and available digitally.

And they are huge.


This has already been resized - generously, I might add, because it did not fit into the blog otherwise. It's Spinner C, by the way - our not too experienced spinner who delivered valuable comparison data to the experiment.
0
AUG.
31
2

Can you believe it?

After weeks (or what felt like ages, at least), rainy mornings, there is actually blue sky above today. And the weather is supposed to get a bit better during the next days. Whew!

Apart from that, I'm making things like this:


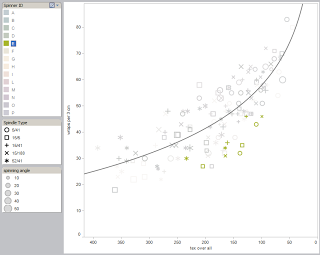
which, in this case, shows the ten thread samples Spinner E spun. E's data points lie in a group underneath the trend line for wraps per 3 cm compared to tex (which compares the weight of thread per metre to its diameter, giving a hint on how tightly spun it is).

And that tells us that E spun a bit looser than most of the other spinners, and did so consistently. Incidentally, E also has a quite "flat" spinning angle, flatter than most of the other spinners. Which perfectly fits together with soft, fluffy threads.
0

By accepting you will be accessing a service provided by a third-party external to https://www.pallia.net/

Kontakt