Latest Comments

Guest - Aislinn Dyestuff Citizen Science.
09. Oktober 2026
This is a great project. I look forward to the results. Thanks for letting us know.
Guest - Aislinn Time for...
09. Oktober 2026
Looks delicious!
Guest - Katrin Sprang Discussion
18. September 2026
Hi Rachel, I have looked for more photos of you, but that was not very successful. I found a link on...
Guest - Beatrix Sprang Discussion
15. September 2026
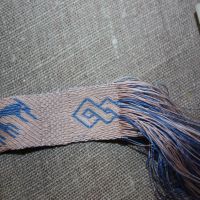
That lozenge pattern element is not a photograph, but a scan. So it should be to scale. But I pinned...
Guest - Katrin Sprang Discussion
15. September 2026
I was not referring to Rachel's reconstruction (is the reconstruction you refer to the one photograp...
MAI
01
0

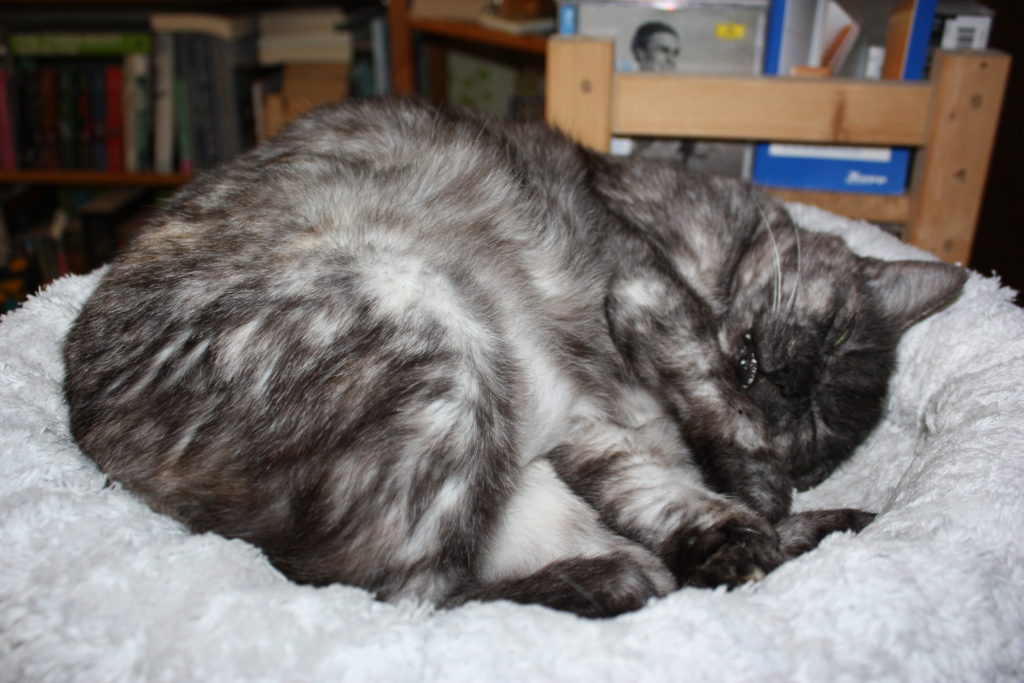
Happy German Bank Holiday!

Germany has the day off today - so you're getting a cat pic instead of a proper blog post:


See you on Monday!
0
APR.
30
0

Mask Making Adventures (part III)

With the basic shape of the mask done, it now needs side, top and bottom seams; some way of adjusting shape and fit over the nose; and some means of fixing it to the wearer's head. So let's get those done too...

First of all, top, bottom and side seams. This basically means folding under the seam allowances and stitching the seams. I opted for a running stitch along the top, and for a whipstitch along the bottom of the mask.

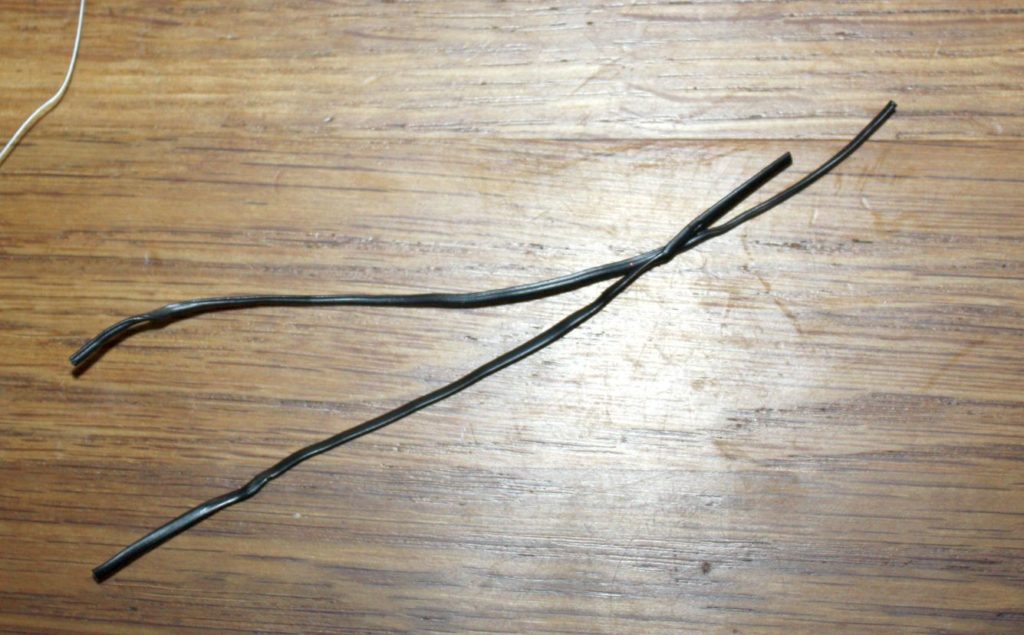
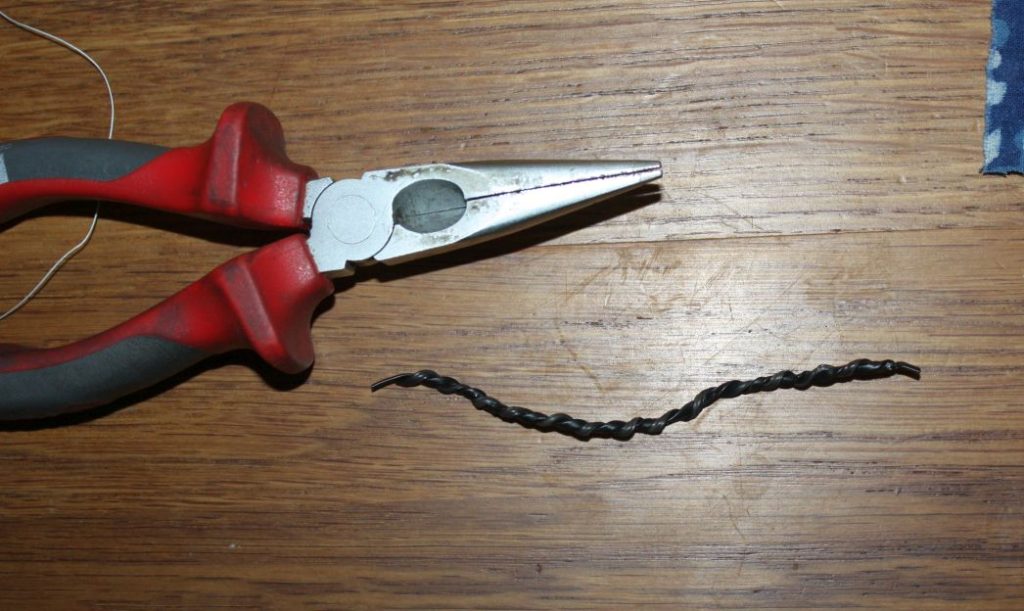
Before closing up the mask at the sides, the nose wire has to go in. I used two trash ties that I twisted together; in the first try, I had a strip of metal from a filing thing, and that was too wide for my facial anatomy, which means it tends to press down on my nose with one of its edges. Not very comfy.

[caption id="attachment_5253" align="alignnone" width="640"] Two trash ties...


[caption id="attachment_5252" align="alignnone" width="640"] ...twisted together...


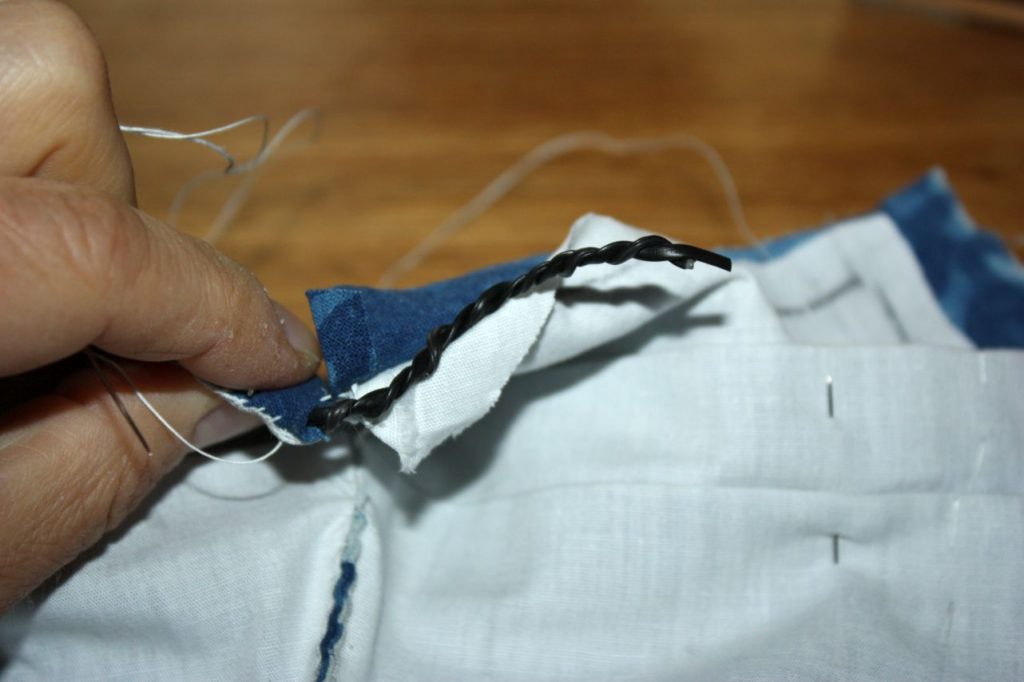
[caption id="attachment_5251" align="alignnone" width="640"] ...and stuck into the mask at the nose part.


Getting the nose wire in is, again, a little fiddly. It also helps to not work the nose part seam from the very edge of the mask, like I did, because then there's no space to fit the wire... unless you take out a few stitches again. (Which is what I did. Obviously.)

I fiddle around until the wire is where it is supposed to be, then press it into the edge seam and stitch right below it.


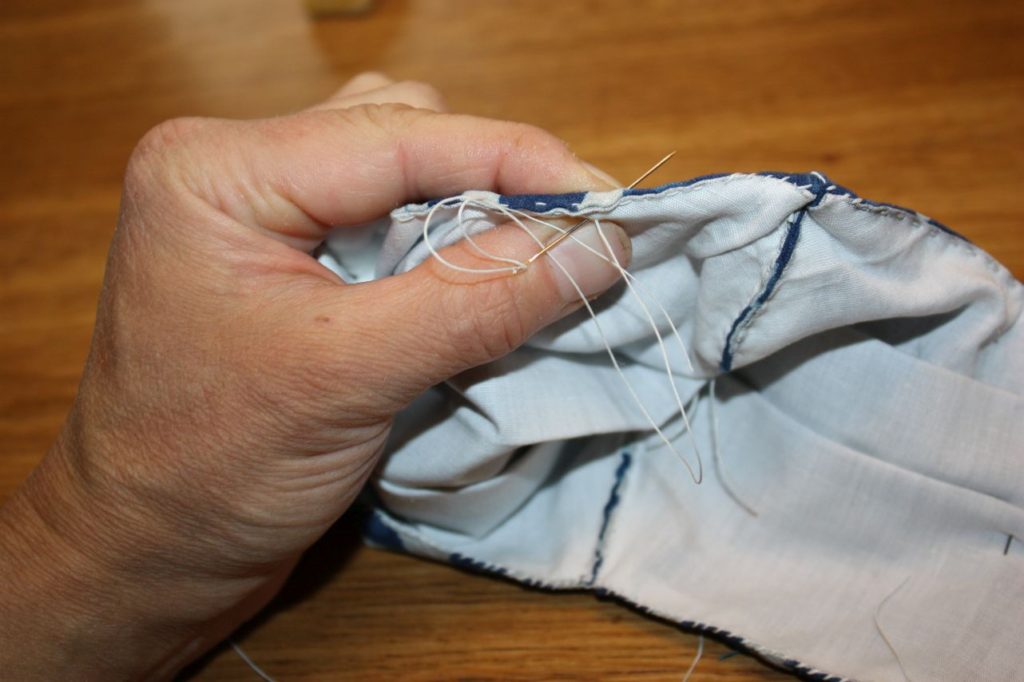
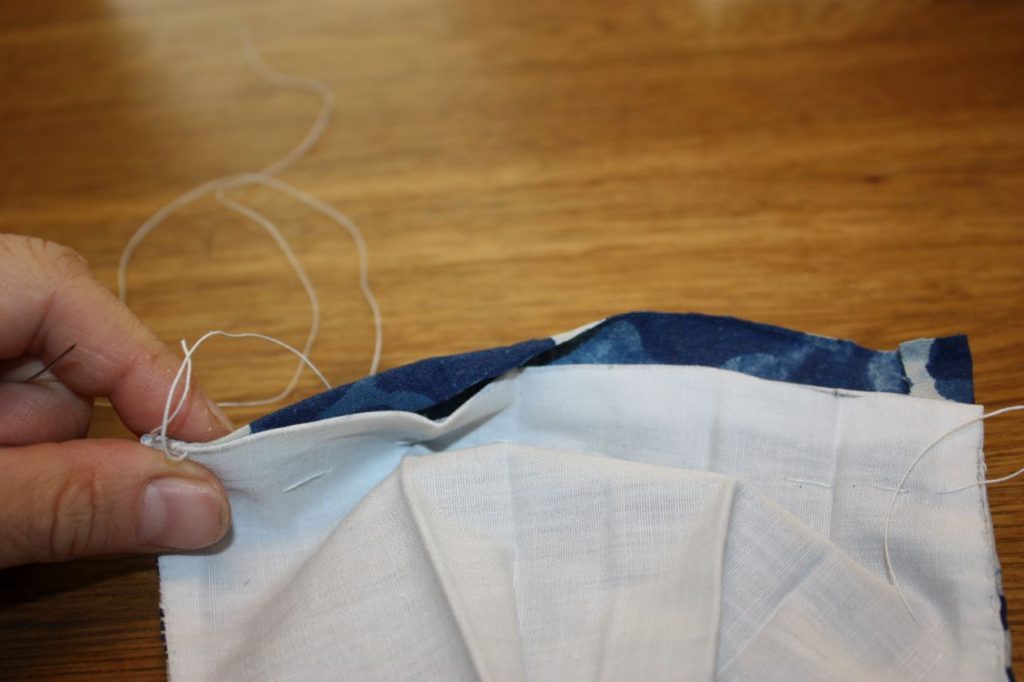
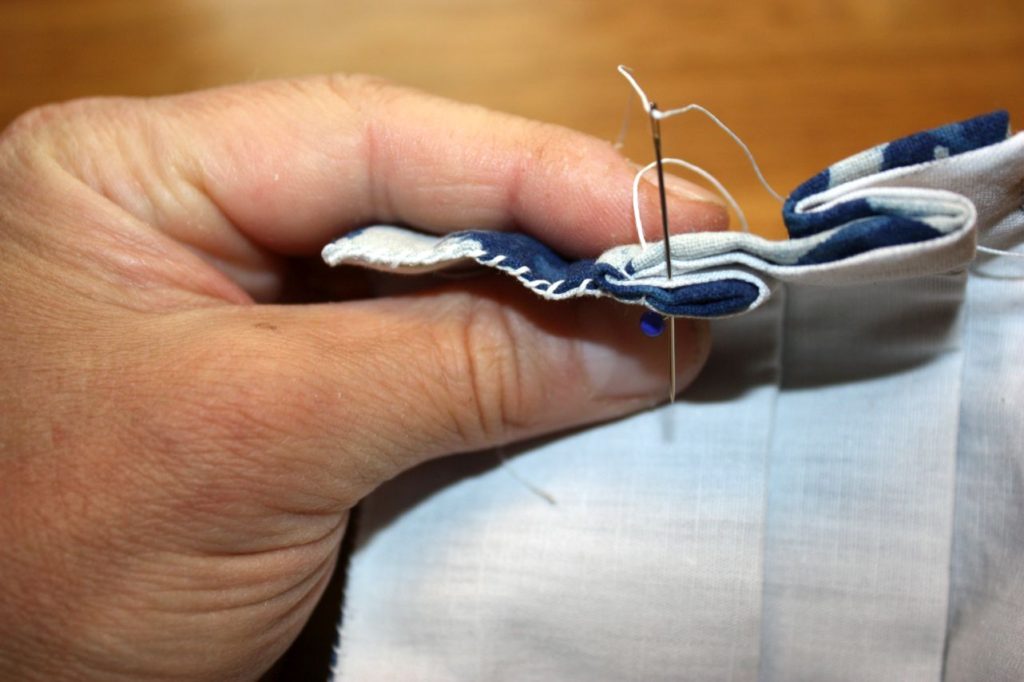
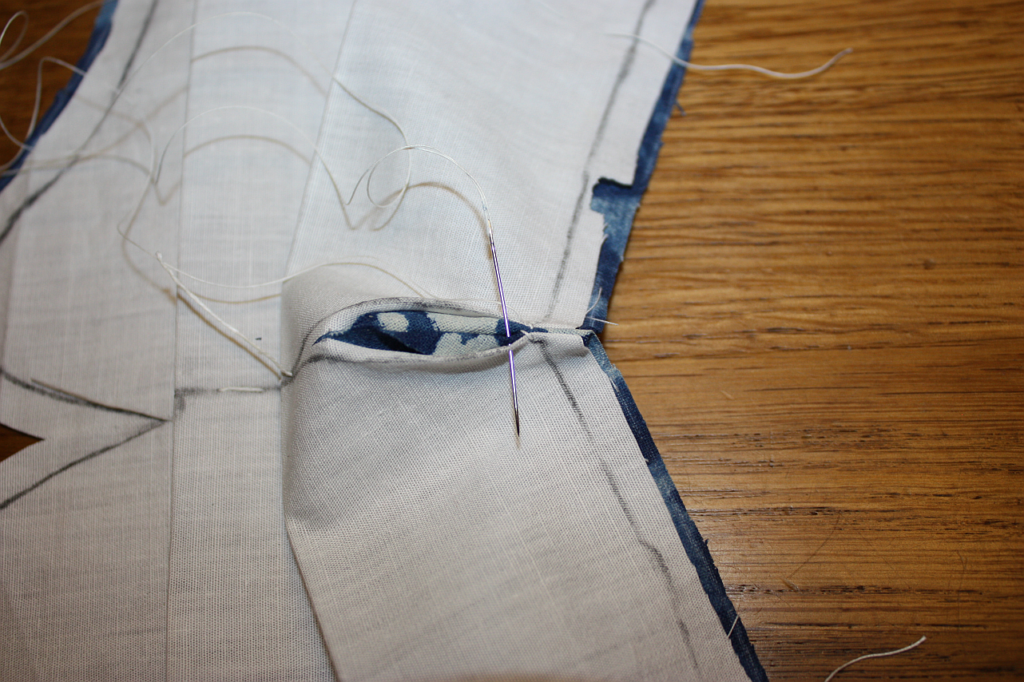
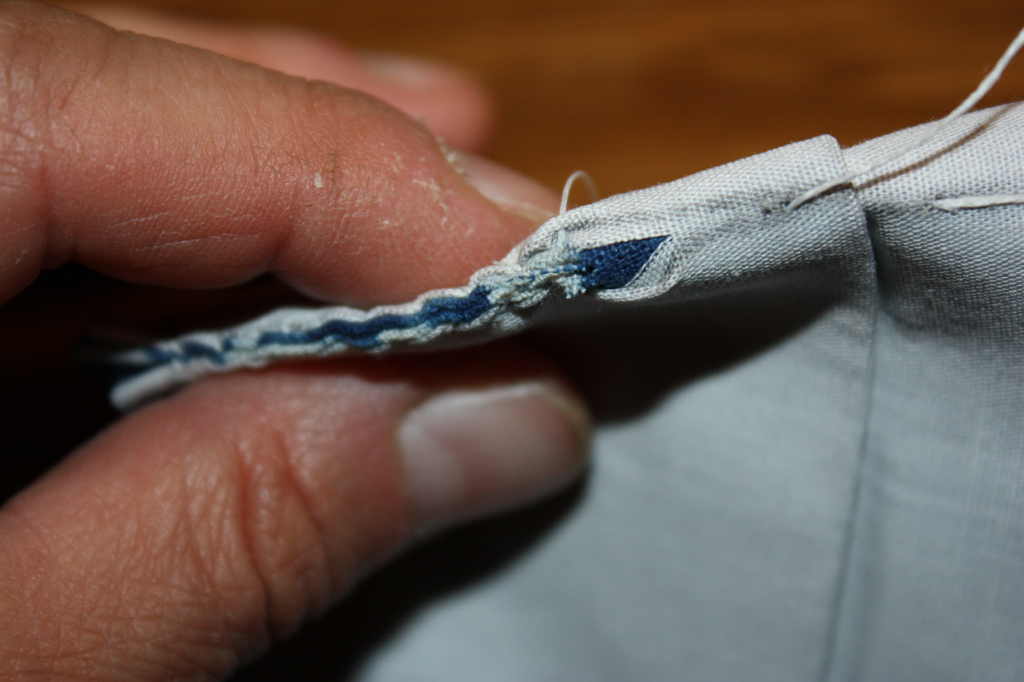
For the sides, where the edges got folded under and then stitched together, I used the Viborg variant again. Another way would be to leave a wider seam allowance for the outer fabric, fold the lining allowance under, stitch a line to fix that and the folds, and then work the extra outer fabric into a tunnel for a strap.

[caption id="attachment_5250" align="alignnone" width="640"] Starting the side seam - folding the edges to the inside, and then folding the folds up again.


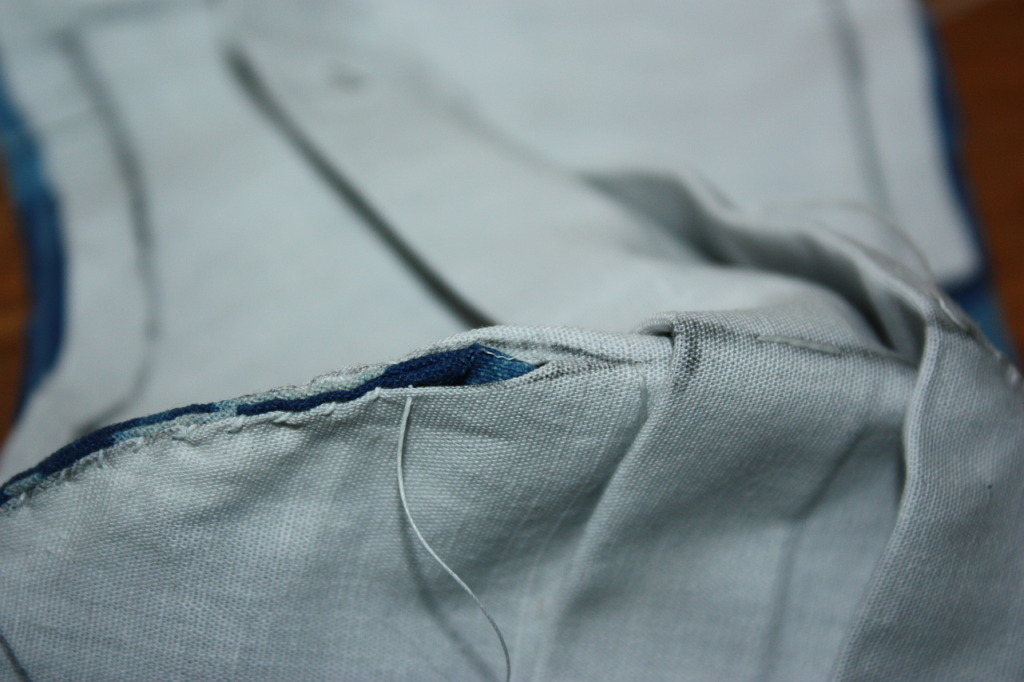
[caption id="attachment_5249" align="alignnone" width="640"] The wonderful Viborg seam again! I'm going over the first two layers on purpose in this instance.


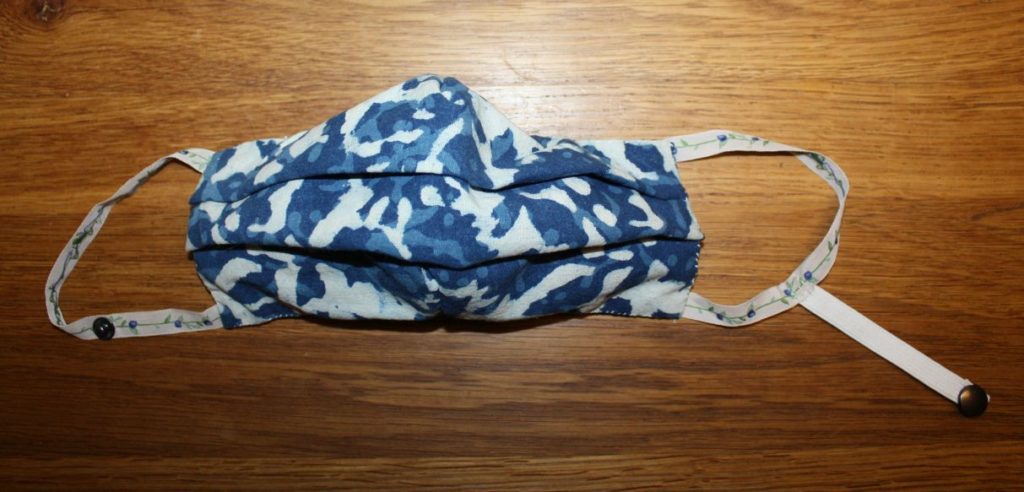
Final step: the attachment points. There's several different ways to hold a mask to one's head, the simplest of which is elastic loops that are pulled over the ears. That's something I don't find too comfy. Instead, I made loops that are a bit longer from proper ribbon; these, in turn, get equipped with a bit of elastic that closes at the back of the head, either with a tiny quick-release buckle or some other type of fastening; in this case, with a sturdy press stud. Because I was lazy, it closes on one of the ribbon loops instead of in the middle (which would have meant one more bit of sewing...)


Finished!


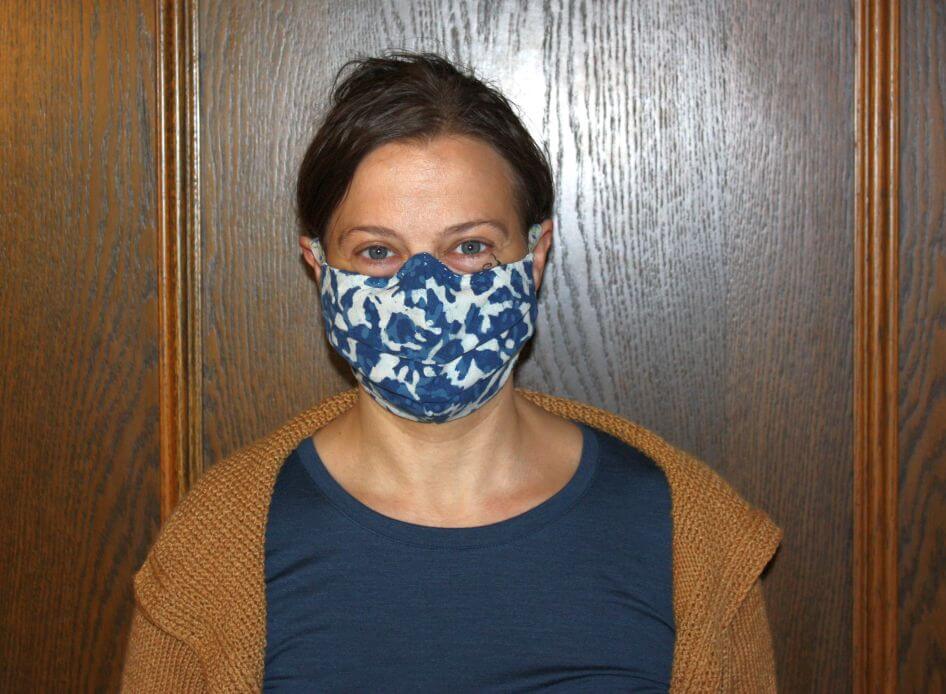
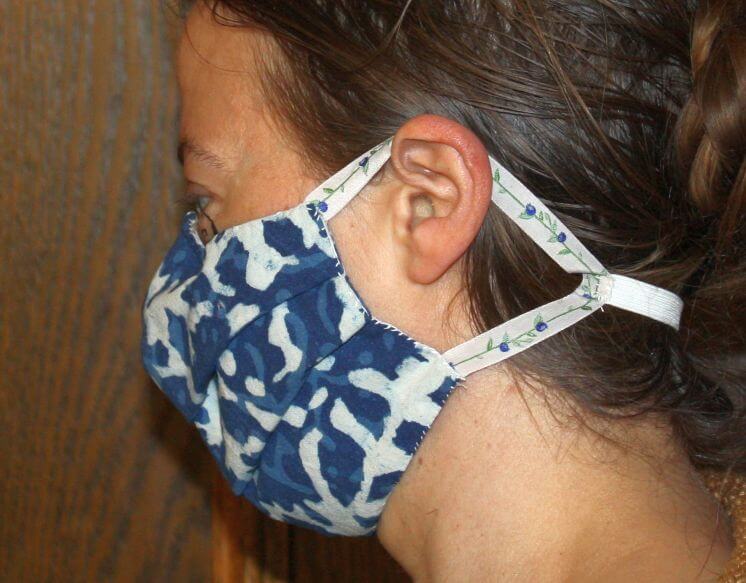
And here's the side view:


It fits well, it's rather comfy to wear, and the extra fabric integrated through the folds means a considerable plus of surface area. That gives us the impression of making breathing a bit easier, as there's more space to suck air through. It will definitely make the mask stay dry-ish for longer, too (more fabric means more capacity for taking up moisture before the mask is too wet for practical purposes, and also more surface area for evaporation).

We've tried them out on the bicycle, and while riding without a mask is still much nicer, it went surprisingly well. The good fit of the upper part means no or almost no steaming up of glasses even when waiting at traffic lights, and impact on breathing is mostly noticeable when going uphill. So definitely a use-able pattern for us.

 
0
APR.
29
0

Mask Making Adventures (part II)

So, as promised, more about my mask-making adventures!

In case the following things tempt you to try something similar yourself, this is probably a good time to warn you that I quite enjoy fiddly sewing once in a while. You might, too - then go ahead and do things. If you like your sewing nice, easy, and un-fiddly... try this at home at your own risk.

While we do own a (very simple, pedal-driven) sewing machine, we made our masks by hand-stitching. I just like that better, and I'm not very good with a sewing machine, and also I wanted to use medieval-type stitching to be able to join in Karina Grömer's #historicalmaskchallenge on Instagram.

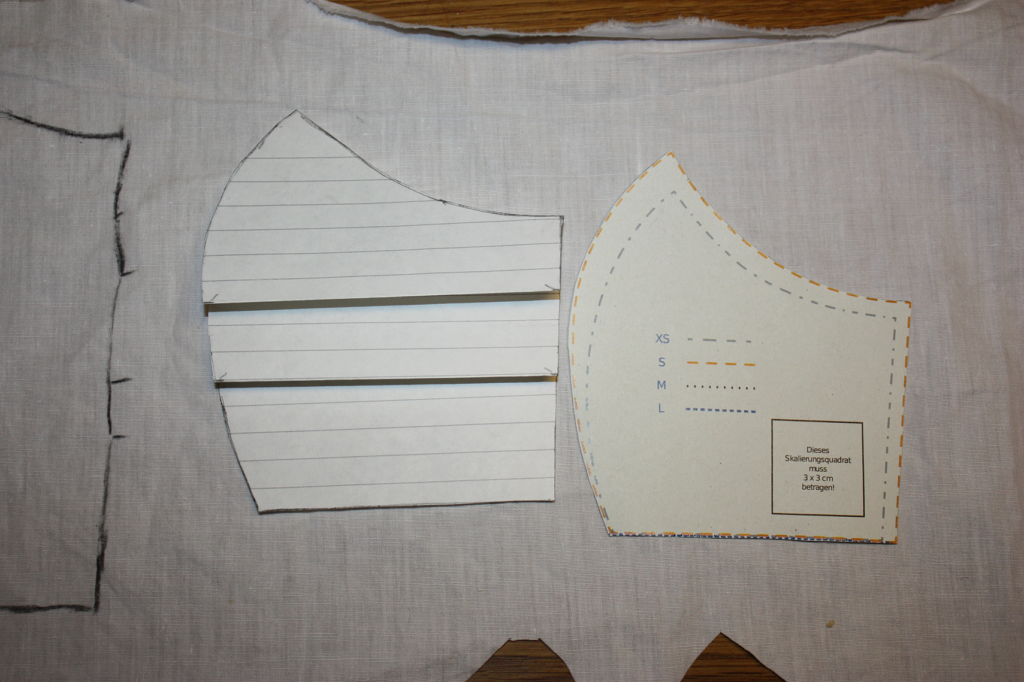
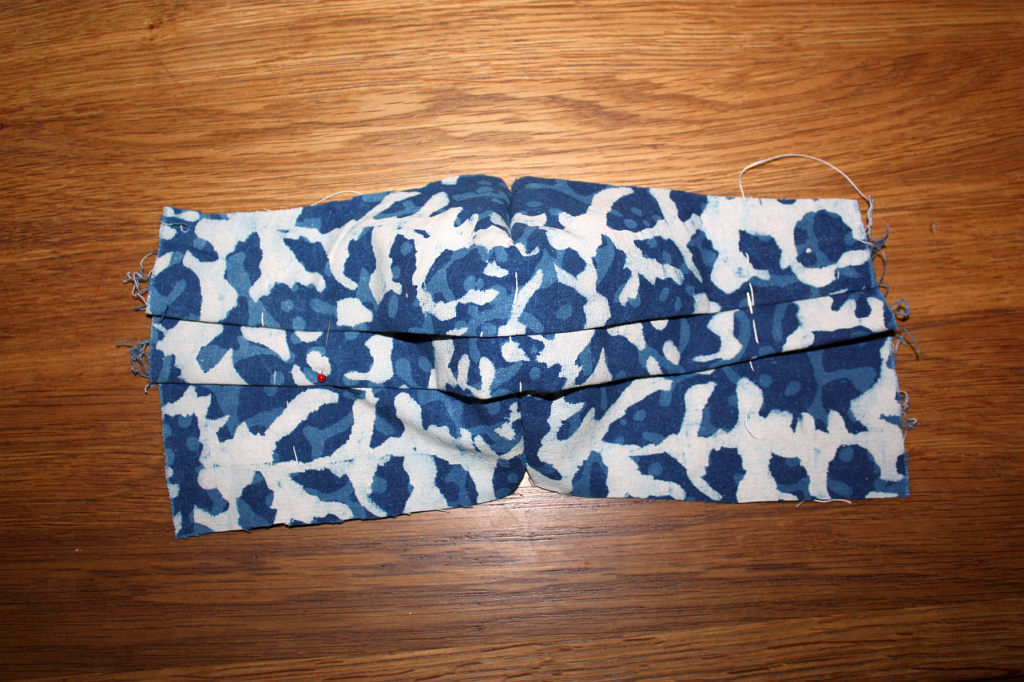
So. Mask-making, second try: This time I did test the breathability of my fabric combination first. I then adapted the pattern by making two folds, each about 2 cm deep, into a sheet of paper and transferring the shaped pattern outline to the folded-up paper. Un-fold, and there you have the adapted pattern. I made sure the folds do not overlap to avoid having a gazillion layers of cloth on the side of the mask.


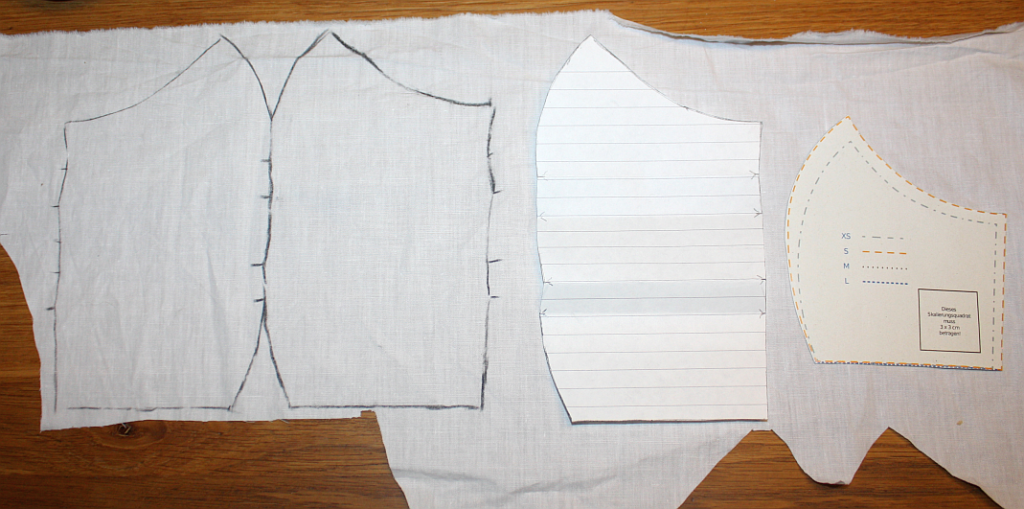
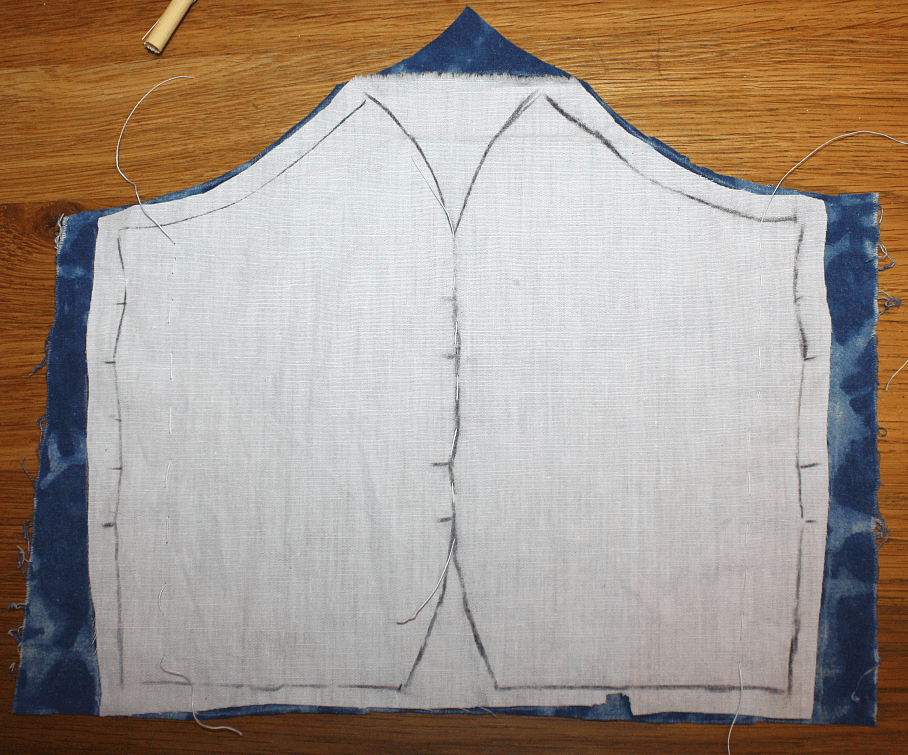
Next step was transferring this to the lining cloth. I did this by drawing around the paper pattern with charcoal (my preferred means of drawing on cloth), then flipping the paper over and drawing the second half right next to the first. The wiggly bits in the middle don't fit together, but hey, it's just guidelines anyways, right?


(Yes, there is very little seam allowance at one spot. I know how I sew, and what stitch I will use for that section, though, so I also know that  I can get away with that.)

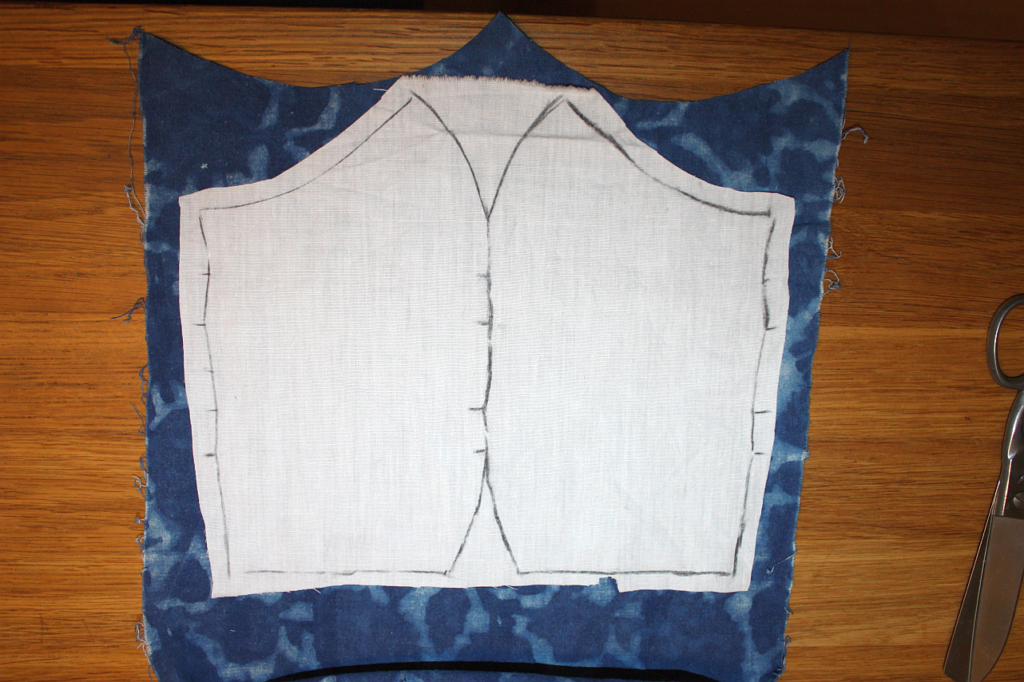
I then placed the cut-out lining on the fabric for the outside of the mask and cut that out accordingly. Consequently, there's only one piece of fabric with the mask lines drawn on it; if you want or need the lines on both, you'll have to trace around the paper pattern instead.


Next up was basting the two parts together to make the following things a little easier. I basted three lines, one each close to the outer edges (but far enough in so that I can fold the seam allowances to the inside) and one down the midline.

[caption id="attachment_5238" align="alignnone" width="908"] You can barely see the basting, but you can see the ends of the basting threads hanging out of the fabric on the top and at the bottom of the sides.


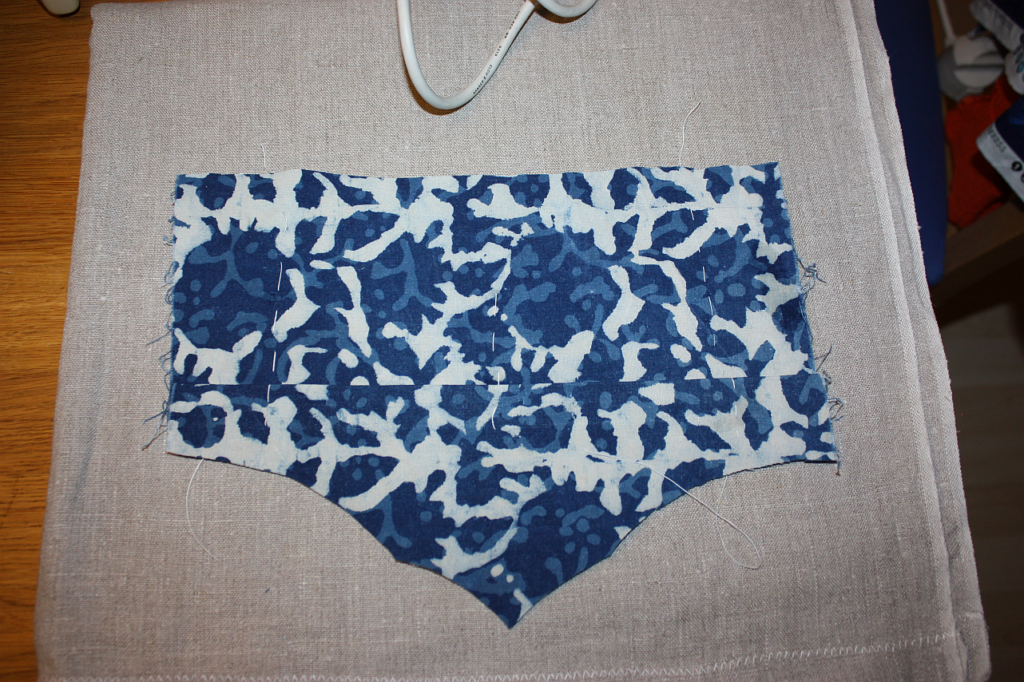
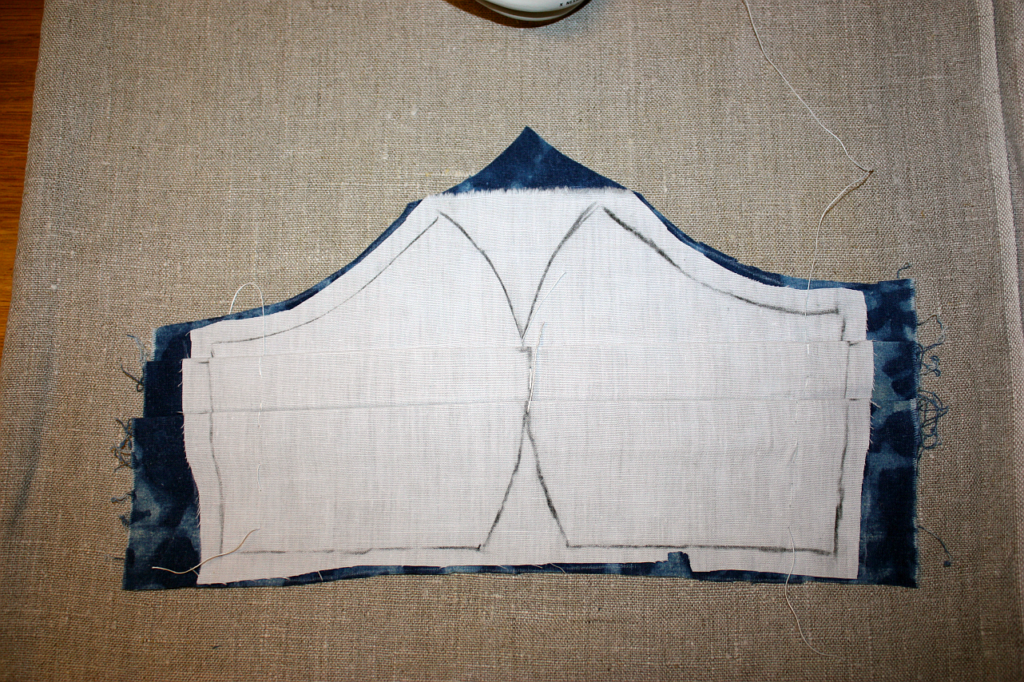
Once that was done, the next step was ironing in the folds. I did this after sewing on my first mask in this style, but realised it would be much easier to do it on a flat piece afterwards. There's two lines to iron in for each fold; moistening the fabric a little did help in making the creases nice and sharp, and the basting helps to keep the layers from moving against each other.

[caption id="attachment_5237" align="alignnone" width="493"] Ironing in the second crease of the first fold (and you can see the basting stitches better here)


[caption id="attachment_5236" align="alignnone" width="499"] ...and all folds are folded and ironed here.


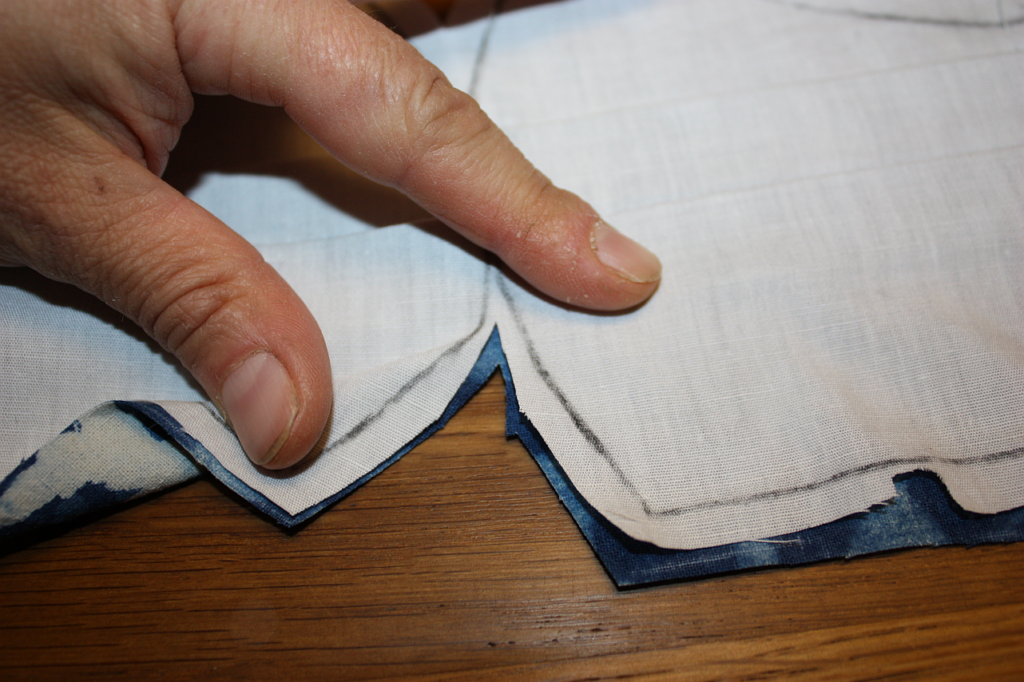
Next step: sewing the shaping bits in the nose and chin section. This is where it gets fiddly, and also where I get to use a stitch snatched from the 11th century linen shirt found in Viborg Søndersø. I cut the triangular bits, leaving a bit of a seam allowance, and lengthening the cut a bit more on the lining fabric than on the outer fabric:


Then the seam allowances are folded in, and the edges get whipstitch-varianted together. You go over the first of the four parts with the needle and through the other three, then repeat this from the other side.

[caption id="attachment_5232" align="alignnone" width="515"] I actually went over the first two layers in this stitch and through the second two. Oops.


The result of this technique is a very neat seam that can be pressed completely flat and does not feel bulky. It's also very pleasant to work, in my opinion, so I'm very fond of this kind of seam.

The nose part gets stitched up just like the chin part. It gets fiddlier the closer you get to the end of the cut - which is why I make one cut a little longer. Once I run out of cut in the outer fabric (having the inside towards me as I work), I stitch only through the inner fabric.


This closes up the last bit of the gap, and makes for a neat finish.

Now the mask has an actual shape - but there's a few more steps to go...


...which will follow tomorrow.

 
0
APR.
28
1

Mask Making Adventures (part I)

Here in Bavaria, it's now obligatory to keep mouth and nose covered in public transport and in shops.* This means either a disposable mask, a shawl or scarf or something similar, or a fabric mask - and I definitely prefer the latter, due to a) sustainability, b) best possible fit, and c) the possibility to make it nice, and fun, by using appropriate fabrics.

There's been a little bit of a false start to my masking adventures, though. General guidelines tell you that you're supposed to use a "densely woven fabric"... well. Apparently my definition of "densely woven" is a bit different from the intended one, because the first cloth combination I chose will stand in very well as equivalent to high-altitude training. Breathing muscle training, anyone?

So if you're in a similar situation - needing a cloth mask and being willing to make one yourself - here's my first bit of advice for you: Take the fabric combination you are planning to use and place it closely over your nose. Breathe in and out. It should feel normal, or almost normal, with no significantly increased resistance to the airflow. If you do feel significant resistance... it's probably not a good idea to use that combination.

For the mask-making itself, there's two different types, the rectangular one with folds (modeled after the simple disposable medicinal masks) and the form-fitted one. For both types, including a malleable metal thingummy in the nose section is a very good idea, as the mask won't fit properly otherwise.

We opted for the shaped masks for ours, and I found a download link to a pattern (on the website of the soccer club Hertha BSC, of all places!) that came in different sizes, as opposed to the many patterns in just one size. Important for me, because I have a rather small face; so small, in fact, that I wear children's glasses. So accordingly, I opted for size S.

Which does fit me. However... if you know me in person, you'll know that I like to talk. A lot. Almost all the time. Talking with the mask is, however, not so much fun... so I decided it would be a good idea to combine the fit of the shaped mask with the extra room for movement provided by the folds of the rectangular mask... and hence, some mask-making shenanigans ensued.

Which you will hear more about tomorrow!

 
*There is considerable discussion about whether this is a good or a bad idea, just like there is considerable discussion as to the function of these masks. They will definitely help at holding in your own outbreath aerosols, and stop or at least reduce your virus output if you are infected. This is especially the case if you sneeze or cough, though you are supposed to use your elbow in addition even if you're wearing a mask.
Though current state of research is that home-made cloth masks are usually not as effective as medicinal masks in keeping in your potentially dangerous output, they can reduce it significantly, depending on the kinds of material used. According to my status of information, jury's still out on whether they will also protect their wearer by reducing the chance of other people's virus-laden aerosols from getting directly into your mouth and nose. Common fabric is definitely not closely meshed enough to keep out viruses (especially not if you choose fabrics you can still breathe through, see above); you need special filtering material for this, and the mask then has to fit very well to be protective. Common advice still is to treat the thing as if it would be protective, which means both treating it as if it might be contaminated on the outside after use, and getting rid of the viruses caught on the mask by a hot wash or ironing.
0
APR.
27
0

Good Things.

The weekend is over, it's back to work as normal, though it's the "new normal", of course, with both of us sitting in the home office, often accompanied by the little cat (who is currently sleeping on her cat bed).

Bavaria is relaxing some of the lockdown rules as of today: smaller shops are now allowed to re-open. To keep infection rates down with this, everyone has to wear a cover over mouth and nose from today on, both in shops and in public transport. We'll see if that works, or if numbers will go up again - though obviously we'll only see it in about two weeks' time. This virus is doing its best at teaching us all patience!

Slowly but surely I also get the impression that it is showing us the flexibility of people, too. Some people have an easier time of finding new things to do, or finding new ways to socialise with friends; others don't really warm to videochatting easily. We're still trying to see the good things as much as possible, and we do find the time these days to do some of the things we usually never got around to.

I'm also really amazed at some of the things other do to keep themselves occupied and others entertained and morale-boosted. One brilliant example of this is the Ukulele Orchestra of Great Britain, who post a video each week. They are absolutely delightful, and we've watched all of them more than once, there's so much to discover and smile about in them. You find the videos, plus a good amount of other goodies, videos, and things on their Ukulele Lockdown page.

Others are also doing things in virtual teaming up now. Such as... stuntmen and stuntwomen. Enjoy! (But maybe keep some distance from your screen while watching... you never know...)

0
APR.
24
0

Knitting!

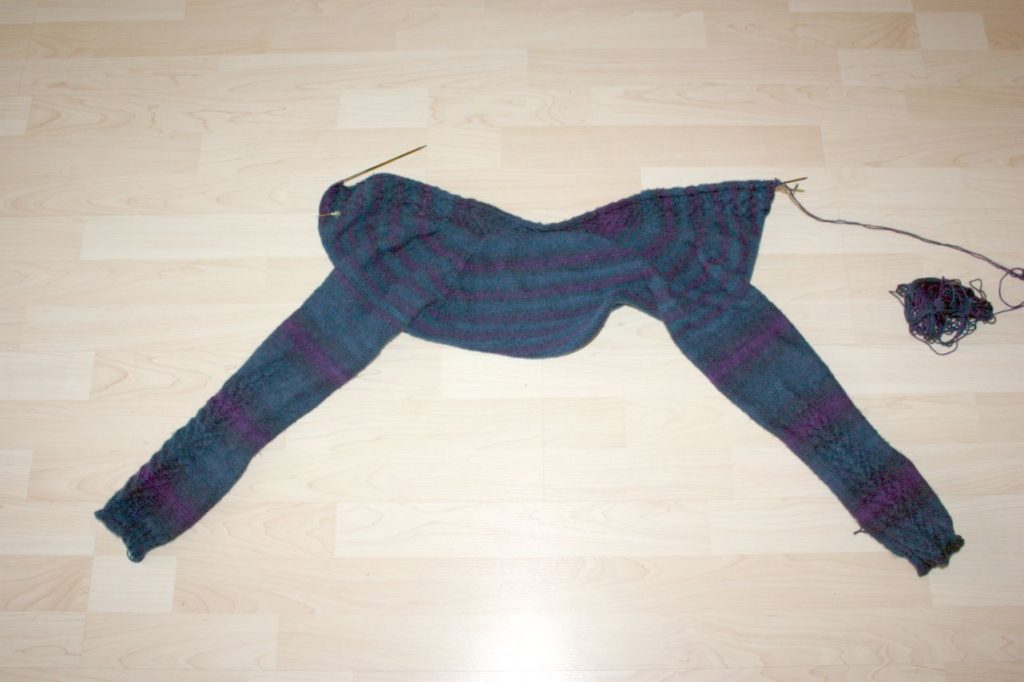
There's been surprisingly little knitting time happening here - too many other things have been done instead, predominantly gardening stuff. There's also been some mask sewing this week, as it will be compulsory to cover mouth and nose in shops and public transport from Monday on. I can report a bit of progress, though: The sleeves on my Ink cardi are finally finished, and I'm back to working on the body.


The yarn is very soft and very nice, and I also like the cable pattern, which is surprisingly hard to photograph. I still have a good long way to knit, though, before it will be finished...

Speaking of knitting, if you are looking for some inspiration, there's a nice and varied bundle of knitting patterns, called Spring Knits, available for 9.95 USD upwards from PatternChest. That's a new website, a spinoff from the Bundle of Holding, which sells bundles of roleplaying games.

You can pay the base price and get the basic bundle, or pay more than the threshold price (which gets adjusted on the basis of what people pay on average), and receive the basic bundle plus the bonus pack. Five percent of the price paid will get donated to a charity supporting healthcare workers, the rest of the payment is split up between the organisers and the designers.
0
APR.
23
3

Sashiko, Boro, and Medieval Mending.


In Tuesday's Ask me Anything post, I got this question from Michaela:
I'm getting started on mending and darning all the little things that are usually done by my mom (as she's currently obviously not visiting). Coincidentally I came across the japanese tradition of sashiko and boro (visible mending on garments sometimes used over several generations) and wonder if there ever was a similar tradition in Europe?

I had to look up both sashiko and boro first - and I hope that I've gained enough of an understanding of my quick look at the wikipedia articles to properly answer the question. For those of you also not familiar with these Japanese textile traditions, sashiko is using running stitches to make embroidery motifs; this can be used as a kind of quilting to reinforce worn textiles, or to firmly attach a patch to a worn or damaged textile. Boro is a technique where patches of fabrics were sewn together to provide more warmth in a very poor and very cold area of Japan - here is a Japanese museum site with explanations and images.


Both these techniques, as far as I can gather, were born out of necessity and poverty. Mending clothes was something done everywhere and in every time period when the cost of the textile, or the garment, was high enough to make mending feel worthwhile. In some cases, mending was done to be as inconspicuous as possible, while in other cases, the higher priority was to fix it in some way so that it would be okay to use again, with optics playing a secondary or no part. Which kind of mending was done probably depended on many different factors, including the personality of the mender and the owner of the garment.

Mending things usually is associated with poverty - if you are rich, you can afford to have new, unworn and undamaged things, and thus no mending. While having mended stuff would probably have been the norm for most people during most of human history, this association did its part to lead to our modern culture of throw-away clothing, bought very cheaply and in poor quality, worn a few times and then ending up in a landfill, or getting burned in some wast combustion plant.

Today, mending is becoming more fashionable again, in a turn against wasteful consumer culture. This also means that visible mending is turning into a kind of fashion statement - including the aforementioned techniques of sashiko and boro.

So did we have these, or similar techniques, in the Middle Ages in Europe? Whether that is answered with a "yes" or a "no" partly depends on how you see the different aspects.

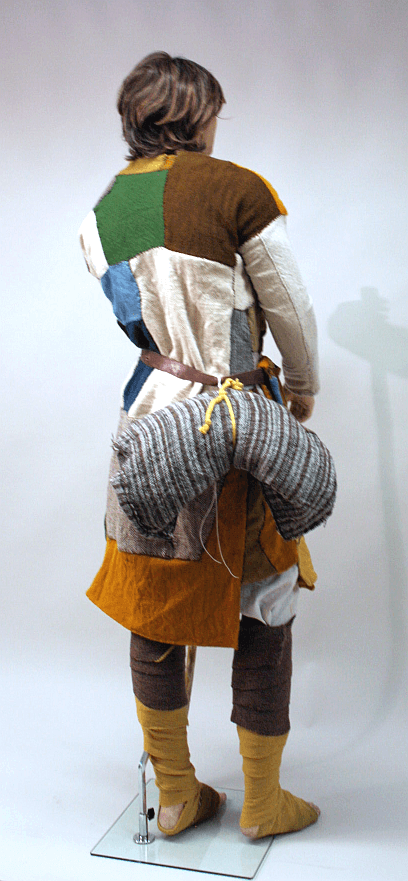
Firstly and most importantly, we did have a similar tradition in the widest sense - that garments and textiles were mended, re-used, and re-purposed; especially in poorer areas or by poorer people, who could not afford to buy shiny new things all the time. For the boro tradition, what comes to my mind first is the textile equipment of the Man from Bernuthsfeld, whose tunic was put together from many different patches of many different fabrics:

[caption id="attachment_3692" align="alignnone" width="273"] Reconstruction of the Bernuthsfeld tunic, made for the museum in Emden by Jens Klocke and myself.


However, this tunic is a special case - there's nothing else made in a similar fashion from the Middle Ages, as far as we know, and there is a lot of different speculations on why the man wore something like this.

There is a tradition in the European Middle Ages, though, that could be seen as a parallel to Japanese boro: Re-using the fabric of a garment to make something new out of it. This was done with garments that had a high value, either a tangible one (a very costly fabric) or an intangible one (something worn by a saint). Examples of these re-purposings are two Swedish altar frontals made from expensive garments that were donated to the church, or the Sixtus chasuble in Germany which was pieced together from another fabric, or St Birgitta's mantle in Sweden, which was made from what was a tunic or dress before.

There's also plenty of evidence for patches being sewn onto garments, sometimes in several layers, like in the underpants from Lengberg. Mending was not restricted to lower-class garments or less expensive fabrics either; for instance, the golden gown of Queen Margareta also has mends and patches. Off the top of my head, though, I don't know of patches reinforced with running stitches, or these stitchings being used as decoration.

So - I'd say that we had some aspects to mending traditions in Europe that could be considered similar to boro in Japan, but nothing that exactly or closely parallels the two Japanese techniques.


Read more about:

The Sixtus chasuble:
Worch, Maria Theresia. "Dokumentation zur Konservierung der Sixtuskasel." In Die Sixtuskasel in Vreden. Untersuchung und Restaurierung einer mittelalterlichen Gewandreliquie. Denkmalpflege und Forschung in Westfalen Bd. 35., edited by Elisabeth et al Jägers, S. 20-40. Bonn: Dr. Rudolf Habelt Verlag, 1997.

The altar frontals:
Nockert, Margareta. "Precious coats from the fifteenth century." In Opera Textilia Variorum Temporum. To honour Agnes Geijer on her ninetieth birthday 26th October 1988, edited by Margareta Nockert and Inger Estham, 111-20. Stockholm: Statens Historiska Museum, 1988.

The Bernuthsfeld man:
Farke, Heidemarie. "Der Männerkittel aus Bernuthsfeld. Beobachtungen während einer Restaurierung." In Textiles in European Archaeology. Report from the 6th NESAT Symposium, 7-11th May 1996 in Borås, edited by Lise Bender Jørgensen and Christina Rinaldo, 99-106. Göteborg, 1998.

St Birgitta's mantle:
Andersson, Aron, and Anne Marie Franzén. Birgittareliker inlånade till Historiska museets utställning "Birgitta och det Heliga landet" 30 november 1973-17 februari 1974. Vol. 59, Antikvariskt arkiv. Stockholm: Almqvist & Wiksell, 1975.

Margareta's Golden Gown:
Geijer, Agnes, Anne Marie Franzén, and Margareta Nockert. Drottning Margaretas gyllene kjortel i Uppsala domkyrka. Stockholm: Kungl. Vitterhets Historie och Antikvitets Akademien, 1994.
0

By accepting you will be accessing a service provided by a third-party external to https://www.pallia.net/

Kontakt